Showing posts with label onions. Show all posts

Sunday, March 11, 2012

Baingan ka Bartha - Smoky & Spicy Eggplant Mash

Dear Foodies,


Here is another recipe featuring the King of vegetables and with that it makes its second appearance on this blog (here is the first!). Over the last two years I've slowly but steadily tried to get past my dislike for this veggie by trying various recipes with it. The latest favorite is this spicy, smoky version that is almost mandatory on most Indian restaurant menus. It can be thought if as a spicier cousin of the Lebanese Baba Ghanouj and I definitely like this version better.


Eggplant/Brinjal is unique among other vegetables because it can handle a lot of spices and still hold its own.  Baingan Bartha translates to mashed eggplant and for this dish the larger eggplants are ideal since they have more flesh than seeds. Traditionally, the eggplant is grilled over charcoal which imparts the signature smoky flavor to this dish. An effective alternative is charring the eggplant over a gas flame or using the broil setting in your oven to re-create the intense heat of the coals. Once cooled,  peel the burnt skin to reveal the soft flesh inside which should be almost cooked. Coarsely mashed along with sauteed ginger (lots of it), garlic, onions, tomatoes and lots of cilantro in the end completes the dish. I love the fresh flavor of cilantro is this and so go a step further and add finely chopped stalks of cilantro while sauteing the onions & tomatoes.


A gas stove currently exists only in my dream kitchen & I'm stuck with an electric coil for now. I've never tried charring an eggplant direclty on the electric coil for fear of creating a mess. So I stick the eggplant into a 400°F oven, cut side down, for about 15-20 mins to allow the insides to cook and then place it under the broiler for 8-10 mins in the end while constantly hovering over it. Once the skin begins to shrivel and get all wrinkly pull it out and place the eggplant in a sealed dish. This allows steam to build up within that lifts the skin off, doing half the work for you. If you have a gas stove, then carefully hold the eggplant over medium flame for 3-4 mins on each side until the skin is uniformly charred all around. Picking an eggplant with a firm stem would be really helpful, if not, stick a skewer/chopstick through it.


Sweet, fresh peas are the perfect counterpoint to all the spices in the bartha. With spring making head way, the farmer's market stalls are brimming with vibrant green produce. All of last month I snacked on winter citrus fruit samples while strolling around the market but last week they were offering tender sugar snap peas to snack on! True to their name they were sweet as sugar. After a couple of samples I ended up buying a bag of them and along with it came the fresh pea pods as well.

Baingan ka Bartha
Prep time: 30mins
Cook time: 30mins
Servings: 3-4 (side dish)
Ingredients:-
  • 1 - Eggplant/Aubergine/Brinjal, medium size
  • 3/4 cup - Onion, finely diced
  • 1 - Tomato, finely diced
  • 1/2 cup - Sweet peas, fresh or frozen
  • 2 tsp - Ginger, minced  (reduce for mildly spicy version)
  • 1 tsp - Garlic, minced
  • 2 - Green Chillies, minced (reduce if you like it mildly spicy)
  • 1 Tbsp - Cilantro stalks, finely diced
  • 1 tsp - Cumin seeds (or use freshly ground powder)
  • 1 tsp - Coriander seeds  (or use freshly ground powder)
  • 1/8 tsp - Turmeric powder
  • 2 Tbsp - Oil
  • Salt to taste
  • Cilantro leaves & julienned ginger for garnish
Method:-
  1. If using an oven, place one rack close to the broiler with engouh room to slide the eggplants, and one in the middle of the oven. Pre-heat to 400°F. 
  2. Preparing the Eggplant: Wash and dry the eggplant, slice in half and coat the skin with a little bit of oil (or use an oil spray). Place cut side down on an greased foil sheet or non-stick mat and cook for 15-20 mins in the middle rack until it begins to soften. Now change to broiler setting and move the eggplants to the upper rack. Continue to cook for 8-10 more mins until the skin shrivels but constantly monitor them as each oven's temperature is different. Once they are done, move them to a deep bowl and cover tightly with plastic wrap for 10-15mins. When cool to handle peel and discard the outer skin, a few bits and pieces of it is still fine. Coarsely shop and reserve the flesh and any juices collected at the bottom of the bowl.
  3. While the eggplants are in the oven, chop and mince rest of ingredients. In a pestle and mortar lightly crush cumin and coriander seeds.
  4. Heat oil in the wide pan (I use a cast iron skillet) and add crushed cumin & coriander seeds. As they turn fragrant add ginger, garlic and chillies (Have your exhaust fan on at this stage as these ingredients could be very pungent) and cook for about 20-30 seconds before adding onions, a pinch of turmeric and salt.
  5. The onions don't have to gain color or soften completely, add tomatoes next and cook until they loose texture and become mushy. 
  6. Add eggplant, chopped cilantro stalks & salt next. Without breaking up the eggplant chunks to much mix all the ingredients and cook for a few more minutes allowing the flavors to meld. Taste and adjust for seasoning and add fresh peas towards the last 5 mins of cooking time.
  7. Serve warm, garnished with cilantro, fresh ginger julienne's and lemon wedges. It goes really well with Indian breads like naan/paratha/phulkas/rotis or with rice dishes.
Notes: Be very watchful when the eggplant is placed under the broiler as it can get out of hand very quickly. When chopping the eggplant keep them chunky as this isn't supposed to be a fine mash.
- I love the heat of ginger, chillies and fresh cilantro in this dish and so use more of them, but adjust quantities to suit your tastes. I use more ginger than garlic but you could surely swap quantities based on your preference.
- I like the flavor of crushed coriander seeds, but if you like a more subtle flavor use coriander powder instead, adding it along with the tomatoes.

The charred flavor of the eggplant, intense combination of ginger, garlic and chillies make it nothing but a show stopper. This is one eggplant dish that I now cannot resist. The flavors are most intense right off the stove but it mellows down a bit as it sits. Despite the use of all these strong elements they come together beautifully and each flavor hits your palate differently. Biting into the juicy, fresh peas brings respite from the spice and just keeps you going for more. If you only have only smaller eggplants (Indian/Thai eggplants) but want to make this, no worries, go ahead and cook them the same way. I've done it and the bartha was still amazing. You'll have as much seeds as eggplant flesh in the dish but the flavor will still be great.

Thursday, February 16, 2012

Bread Upma


Dear foodies,


Weekday mornings are a rush to get out of the house with breakfast being a speed bump in the process. Weekends on the other hand are days when I relax and cook a leisurely breakfast which more often that not ends up being brunch if we are lucky or a very late lunch. The food typically served for breakfast/tiffin in India are some of  my all time favorite foods. Indians detest sweet things first thing in the morning have come up with a myriad choice of delectable savory foods to kick start the day. A variety of dosa's, idli, upma, puri and all the condiments that go with each one of them are fabulous examples of Indian home cooking. Tiffin is the colloquial name given to these meals - a light meal that could be perfect for breakfast or a mid-day snack. 

Upma, for those unfamiliar with the dish, is a savory porridge made from Semolina/Rava/Sooji. The word upma/uppindi (Tamil/Telugu) comes from: uppu -salt, maavu/pindi - flour, combining to mean seasoned flour. But don't be fooled by its humble name, made well it could be an explosion of flavors & textures. This is also the famed dish that got Floyd Cardoz his final win on Top Chef Masters! Upma is traditionally a breakfast item and has as many variations are there are cooks. It can be made rich & divine by cooking it with ghee and toasted cashews (jeedipappu upma) or made healthy & colorful with seasonal vegetables. Wrapped inside a pesarattu (green lentil dosa) it's bound to make you take long nap :)


Upma begins with the rava/semolina lightly toasted in a pan and reserved. Ghee/oil is then seasoned with mild spices, veggies of choice and water are added and the whole thing is brought to a rolling boil. Rava is then slowly streamed into the seasoned water and allowed to steam for a few minutes. Served with a tiny dollop of ghee this is divine! This basic recipe evolved and transformed into many delectable variations that use ground whole wheat (dalia)vermicellinoodlespoha (flattenned rice), oats, tapioca pearls/sago, bread and even left over idli's. There might well be other variations that I'm not aware of.

At home, my mom is the go-to person for all things upma, well all things food! But bread upma, as far as I remember has been my Dad's domain (I know I'm going to hear about this). This is probably one of the few dishes I've seen him help out with consistently over the years. He came up with this neat technique to transform dry, stale bread into tender, flavorful chunks by sprinkling buttermilk over the bread cubes. It instantaneously gives it tang, very much like sourdough and makes the bread tender and moist again. And once you have buttermilk as the vehicle you can enhance the flavor with a dash of chilli powder, some turmeric for color, a few pinches of tandoori masala/garam masala or any other spice mix of choice. So if you have stale bread lying around this is the perfect way to use it up.

Bread Upma
Prep Time - 15mins
Cook time - 20mins
Servings - 3
  • 10-12 slices - day old bread slices (any kind would work)
  • 1/4 cup - Yogurt/Curd, homemade or store-bought 
  • 1/2 cup - Water
  • a pinch of Turmeric
  • 1/4 tsp - Red Chilli powder (optional)
  • 1/4 tsp - Garam Masala/Tandoori Masala/Sambar Powder/Coriander Powder (optional)
  • Salt to taste
  • 1" round of Ginger, thinly sliced or grated
  • 1/2 cup - Onions, sliced
  • 3/4 cup - Tomatoes, cubed
  • 1-2 - Green chiles, slit or 1/2 tsp - Red chilli powder
  • 1/4 tsp - Garam Masala/Tandoori Masala (optional)
  • 1/8 tsp - Turmeric
  • pinch of Asafoetida/Hing
  • 1/2 tsp - Mustard seeds
  • 1/2 tsp - Cumin seeds
  • 1/2 tsp - Urad/Channa dal
  • 6-8 - Curry leaves
  • 2 Tbsp - Oil
Method:
  1. Prepare your vegetables first, have everything sliced and ready to go. In a bowl whisk together yogurt, water and seasonings. Spread bread cubes on a wide platter and sprinkle the seasoned buttermilk as evenly as possible over all them. You don't want them to be entirely soaked in buttermilk but just barely moist, so use as much or little as needed.
  2. Heat oil in a wide, shallow pan and add mustard seeds, cumin and dals. Once the seeds begin to splutter, add turmeric powder, hing, onions, curry leaves, ginger and slit green chillies. Sprinkle some salt on the onions and cook until they are softened slightly.
  3. Add cubed tomatoes and cook until they begin to fall apart and become mushy. Add the spice powders next, if using.
  4. Carefully stir in bread cubes, coating them with the onion-tomato gravy without breaking them up. Increase heat to medium high and spread them out in a uniform layer so they can cook and char around the edges a bit. Cook undisturbed for 2-3 mins and then carefully stir so the other side chars as well. This is crucial step that adds needed texture to the otherwise mushy center of the bread cubes.
  5. Finally garnish with cilantro and serve hot with some tomato ketchup & lime/lemon wedges on the side.

This is a quick, filling breakfast to make and that will leave you with more time devour weekend newspapers and channel surf. Its a great way to use up stale bread lying around on the kitchen counter as well so you can stock up again for the week ahead. Fresh green peas are in season now and they would be great in this upma, and so would grated carrots or roasted peanuts.

Citrus fruit & Berrries are back in season again!

On another note, my camera gave up on me last week! :( An Err99 message showed up and after much anguish we found out that the shutter needs to be replaced. I am planning to upgrade to another camera instead of investing more on the old one (Rebel XSi). I am leaning towards a Canon T3i/600D but haven't decided yet, any inputs/tips/advice ?

Monday, January 09, 2012

Roasted Butternut Squash Soup with Thyme & Roasted Garlic

Dear foodies,


I hope all of you had a great start on 2012 after a fabulous holiday season. I think I'm ready to face the challenges and joy that the year ahead has in store. When a new year comes around it feels like we have a clean slate to begin with and mistakes of the past can be set right. There is a sense of rejuvenation and the want to do good and be good. Have you made any resolutions for the year ? I can never stick to a resolution long enough and so don't attempt to make one these days. I reckon, if the resolution is good enough I can take it up any day of the year and not have to wait for Jan 1st to come around...or may be I'm just to lazy! But I do hope I can begin to improve my fitness levels and enjoy more fruit.


With all the feasting over the last few weeks, eating healthy seems to come as a natural reaction whether you resolve to do so or not. Our mind and body craves for fresh, vibrant produce making up light & healthy meals. But with the cold weather making it through into the new year along with rest of us a warm soup much preferred over a cold salad. I cannot seem to get enough butternut squash this season and I'm going to start off this years posts with a stunning soup. Butternut squash is great in stews, simply roasted or sauteed but they really do shine through in soups. The squash is mildly sweet but it its robustness allows for use of strong herbs & spices too.


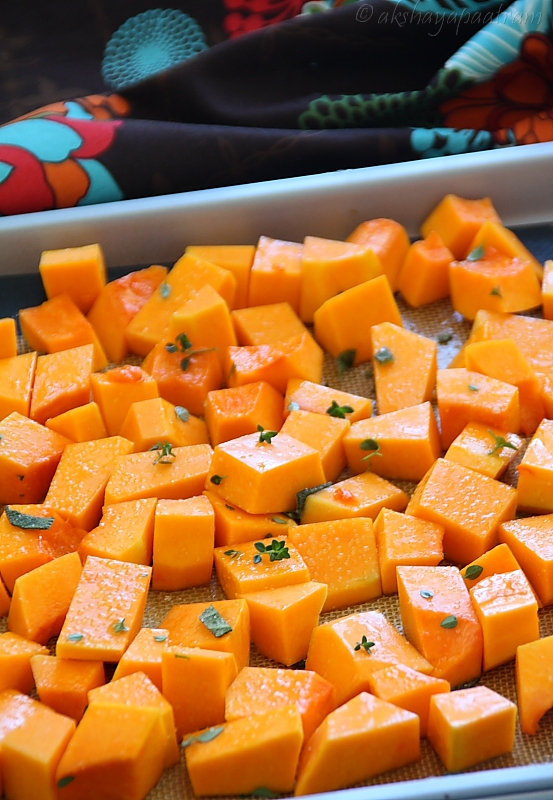
Roasting squash is the easiest option for me - toss it in a little olive oil, season with herbs & spices and in it goes for 35-40mins. Since you have the oven going you could choose to roast other veggies like carrots, peppers, onions, zucchini and even garlic to add to your meal. Just make sure you don't overcrowd the pan. My sister-in-law mentioned a recipe she came by for a roasted veggie dip which sounded really good -simply blend up the seasoned roasted veggies with cream cheese and its good to go.

When the squash is out, turn it into a salad on its own using this recipe, add it to greens with some feta cheese, its also good on cooked pasta/couscous/quinoa. This time around I blended the squash with some vegetable stock to get a silky, richly flavored soup devoid of any cream, milk & butter.

Roasted Butternut Squash, Garlic & Thyme Soup
Prep time-20mins
Cook time- 45-50mins
Servings- 4-5
Ingredients:
  • 4 cups - Butternut Squash, cubed
  • 6 - Garlic cloves, with skins on
  • 4-5 - Thyme sprigs
  • Salt & Pepper
  • 1 cup - Pumpkin puree (optional)
  • 3-4 cups - Vegetable stock (low sodium & organic)
  • 1/2 cup - Onions & Red pepper, finely diced
  • 1/2 tsp - Cumin
  • 1/4 tsp - Ginger powder
  • 1/8 tsp - Nutmeg, grated &
  • 1/2 tsp - Paprika & Cayenne (optional)
  • 3 Tbsp - Extra Virgin Olive Oil
Method:
  1. Preheat oven to 375F.
  2. Carefully peel, de-seed & cube butternut squash into fairly uniform pieces. Spread them on a lined baking sheet and coat evenly with 1-2 Tbsp olive oil, salt, pepper and a sprinkle of fresh thyme leaves.
  3. Coat 6 cloves of garlic with a few drops of oil and fully enclose in parchment or aluminum foil. (You could also use a whole garlic bulb, sliced in half here and use the extras for another recipe)
  4. Bake in the oven for 30-40mins until the squash is lightly browned around the edges.
  5. In the mean time, leisurely dice onions and red peppers. Heat around 1/2 Tbsp of olive oil in a pan and add cumin seeds. Once they begin to splutter add onions, peppers, salt and a pinch of red pepper flakes (optional). Cook for 4-5 mins until softened but still having a bit of crunch. Take off heat and reserve.
  6. When squash is out of the oven and cool enough to handle, transfer to a blender jar adding a cup of stock to the jar first. Squeeze garlic pulp directly into the blender along with pureed pumpkin. Cautiously blend the squash, adding more stock as you go to help out the blender and to get the consistency you like. I left the soup coarse, with a bit of texture and fairly thick.
  7. Transfer blended soup to a saucepan on medium heat and add spices - dry ginger powder, grated nutmeg, paprika. Taste test and add salt, pepper & cayenne accordingly. A tiny pinch of powdered cardamom/cloves/allspice would also work well here. Stir to combine and simmer for a few minutes allowing the spice to meld together.
  8. To serve, ladle warm soup into a bowl, top with a couple of spoons of reserved onion-pepper mixture, a few fresh thyme leaves and a light drizzle of extra virgin olive oil.
Note: You could experiment with using different herbs like rosemary & sage instead of thyme.
- Seeds from the squash make a great snack too. Clean and spread them out on a plate, cover with a paper towel and microwave for 40-50seconds until you hear them pop. Sprinkle with salt & pepper if desired.

This soup is absolutely fantastic, if I say so myself, and you cannot deny how gorgeous it looks in a bowl.  You could serve it with homemade croutons or toasted bread on the side to dunk into it. The strong spices go very well with the mild squash and make for a warm and hearty soup that could very well be a meal in itself. As you draw in a bit of onions & peppers into each spoonful they make for a nice textural difference that keeps thoughts of baby food far far away. Don't skip the cumin seeds in them either because you'll welcome the occasional crunch they lend to the soup. I also tried a tiny drizzle of pomegranate molasses and it was surprisingly good, so if you have some do give that combo a try as well. Leftovers keep well in the refrigerator tightly sealed for a few days.

Monday, August 29, 2011

Dum Paneer & Rumali Roti

Dear Foodies,

Paneer is a huge favorite of mine and in an odd way signifies a special occassion or a reason to celebrate in my mind. Whenever we eat out a paneer dish is a must on the order and being vegetarian almost an obvious choice. With its nuetral flavor and creamy texture there is hardly anyone who can say they hate it, just not possible. Made entirely from milk with no confusions about rennet or animal enjymes used in the process, its the most vegetarian friendly cheese available. Its the best use of milk thats close to its expiry date and sitting smugly in your refrigerator... but ofcourse that never happens in my place. (heh!)


Most regular north Indian restaurants here have a banal list of paneer dishes on their menu. I categorize them as Green/Orange/Red, and they progress just like the traffic signals, green you may take a chance, orange - give it a second thought, red - stay away! They taste of nothing familiar and are doused with ridiculous amounts of cream/grease and spices. The paneer also is often a chewy, rubbery mass and the whole purpose of eating out to enjoy a meal is lost right there. With such poor examples its hard explaining to the locals here that Indian food is nothing close to what these greasy/bland dishes represent. I was watching Gordan Ramsay's Great Escape on Netflix this past weekend, he sets out on a tour of India to learn about its curries and see what was done wrongly in UK kitchens. Though he does try some pretty dramatic variations of curries the show does focus on the true charm of India's cuisine. Each one has a rich culture and history associated with it based on where it comes from. Each curry has a pedigree of sorts attached to it and you can track down the various influences on the recipe. Its a shame that such rich heritage is then thrown out the window by these restaurants.


With my parents here as an excuse I got a telugu channel package installed at home and along with my mom we cover all the cooking shows on TV. Lots of new ideas with a good dose of weird combinations have filled up our recipes books, and by 'our' I mean my mom painstakingly writing them down and then re-typing them on the laptop for a soft copy! :D One of shows (Abhiruchi/Etv) now has a Iron Chef styled secret ingredient cook-off as one of its segments. The inspiration for this recipe came from one such episode that had paneer as the ingredient of choice. I have since modified the recipe a bit to suit our tastes but the basic idea came from the show. One ingredient that I think was missing in the original is Kasuri methi. It may sound insignificant but when used will surely trigger the 'aha! so this is what they use' moment when it comes to replicating restaurant favorites at home.

Kasuri Methi is regular methi leaves in their dried form. From wiki I learned that it gets its name from Kasur a city in the Punjab province of Pakistan, that grows methi in abundance. A small spoonful, crushed between your palms and sprinkled over the curry close to the very end of the cooking process will add an additional   layer of flavor to the dish. The leaves have a strong bitter/sour flavor and fragrance to them and when added to a gravy they compliment the strong spices really well.

Dum Paneer
Servings: 4
Prep Time: 30mins
Cooking Time: 30-40mins
Ingredients:
  • 1 - Onion,large ~ 3 cups, sliced
  • 3 - Tomatoes, medium sized
  • 2 - Green chillies
  • 12-15 - Cashews, whole
  • 2-3 Tbsp - Oil
  • 1/4 tsp - Turmeric
  • 1 tsp - Ginger-garlic paste(~ 1 big garlic clove & 1" round of ginger)
  • Whole Spices - 1 bay leaf, 2-3 1" shards of cinnamon stick, 2 Green Cardamom pods, 4-5 Cloves
  • Spice Powders - 1/2 tsp each of - Garam masala powder, Dhania powder, Cumin powder, Red Chilli powder (optional)
  • 2 Tbsp - Curd/Yogurt
  • 1-1.5 cups - Paneer cubes
  • 1 tsp - Kasuri Methi
  • few leaves of Mint/Pudina (optional, I skipped it) and Coriander
  • fresh/heavy cream for garnish (optional)
  • Salt to taste
Method:
  1. Make a shallow plus slit to pierce through the tomato skins and drop them in boiling water for about a minute to loosen the skin. When cool enough to handle, peel off the skin and grind them to a paste along with green chilies. Use some of the hot water to give the cashews a quick soak for a few minutes and grind to a fine paste.
  2. Heat a tbsp of oil in a pan and add the sliced onions. Cook them on medium heat until browned evenly. This takes about 8-10mins, a few charred bits is totally fine, you don't have to slow cook them as you would for caramelized onions. When cooled, blend it to a fine paste too.
  3. In a deep saucepan, heat 2 Tbsp of oil/butter and add in the whole spices and turmeric. Once they become fragrant carefully add ginger-garlic paste and cook for 15-20secs. Add brown onion paste and tomato-chilli paste next and cook on medium heat for 5-6 mins until the moisture is cooked out of it.
  4. Reduce the heat a bit and stir in the yogurt. Bring the heat back up to medium and continue to cook for a few more minutes until the mixture leaves the sides of the pan as one mass. This is where you would also see the oil separate if you used more but the 2 Tbsp isn't quite enough to do that for the amount of gravy.
  5. Add in the spice powders, salt, cashew paste and about ~11/2 cups of water to achieve  desired consistency. Make it a little looser than you would want the final gravy as it will continue to thicken a bit.
  6. Taste test for seasonings now, once the paneer is added you don't want to stir it much. Toss in the paneer cubes, kasuri methi, pudina(if using) and coriander leaves and cover with a heavy lid to ensure that moisture does not escape out of the pan. (This step is crucial step in the recipe, the Notes section has more details.) Heat on the lowest setting on your cooking range for about 15mins.
  7. Transfer to a serving bowl, garnish with fresh cream/coriander leaves and serve hot with roti or rice.
Notes: For the 'dum' part of the cooking process, I used a cast iron lid and it did a pretty good job of trapping steam. Another option is to cover the whole pot with aluminum foil and then press it down with the regular lid. If not try the traditional method by making chapathi dough, roll it out like a thick rope and seal the edges of the pan with the lid covered. - Make extras of the browned onion paste and freeze it for a quick gravy another night. - Instead of paneer you can try other veggies like potatoes, capsicum, cauliflower.

The flavors in this dish will take you by surprise. The browned onions that form the base of the gravy add a wonderful richness and depth. Cashew paste and curd mellow out the sharp flavors of the spices with the curd adding a tangy note at the end. Most recipes that use paneer call for it to be added at the very end. In this one though, paneer cubes blend into the whole dish instead of standing out like an after-thought. Cooking it in 'dum' forces all the flavors in the gravy to be absorbed by the paneer making them wonderfully moist and flavorful. If you are feeling awfully indulgent you can add cream and khoya to the gravy, both used in the original, but to me it was rich enough without them.

Feeling really adventurous I looked for a recipe for Rumali roti to pair with dum paneer. If I had to pick just one, then rumali roti will surely top the list of Indian breads for me. Being thin as a rumal/handkerchief it is the perfect vehicle for a rich gravy as it does not over power the flavors in anyway. It's rarely found in restaurants even in Hyderabad these days. I had requested our wedding caterer to make this for the reception dinner but he refused saying it would be tough to make them fresh for the crowd. No regrets though since I hardly got to enjoy a meal that day. It would have been distracting to think about the rumali rotis while sitting through the wedding ceremonies :D

Rumali/Roomali Roti
Serving: 12-14 rotis
Prep time: 10mins
Cooking time: 30mins
Ingredients
  • 1 cup All purpose flour/Maida
  • 1 cup Whole Wheat flour/Atta
  • salt to taste
  • 1 Tbsp oil
  • Milk and Water to make dough (~ 1.5 cups total).
  • Rice flour for dusting ~ 1/2 cup
Method:  Make a moist dough and knead it for 3-4 mins until soft and pliable. Cover the dough ball with a moist cloth and allow to rest for 1-2hrs. Roll two small dough balls the sixe of a key lime and stretch them to the size of a small poori. Spread oil on one side of each round and dredge/dust evenly with rice flour. Place one round over the other with floured sides facing each other and press around the edges to form a rough seal. Using a rolling pin stretch the dough to make a very thin roti, as thin as you can get without tears. Heat a wide, shallow pan on high heat and cook the roti for 20-30secs on each side until you see little brown spots on the surface. Any longer and you'll have papads! Transfer to a covered, serving dish and about a minute later when cool enough to handle, separate the two layers to get individual rumals!

Source: barely modified from here

The roti's are soft and melt in your mouth. You are gauranteed to lose count of how many you devour so make extras! I made this combination twice this month already and cannot wait to repeat it again. I served it alongside a salad of ripe tomatoes and onions sprinkled with salt, pepper and chaat masala because chaat masala makes everything better :)

Wednesday, February 02, 2011

Double Dip & Upcoming review

Dear Foodies,

Let me tell you about the review first, CSN stores gave me the opportunity to review one of their products and I'll be bringing you a kitchen essential soon. So stay tuned for that, and in the meanwhile you are sure to find a whole gamut of stuff from home decor, bed & bath, gardening tools and play sets like these fun wooden swing set.

Time seems to by flying by really quick. A month has already gone by in the new year, and February brings along with it the Super Bowl weekend. One of the biggest weekends for food consumption here. The amount of chips, pizza and beer consumed on game day surpass all highs. I have never been a huge spectator of sports, even when everyone around me were cheering the Indian cricket team when I was kid, I would be completely nonchalant about it. Well, unless it aligned with the exams at school :D A game of cricket was the only thing that gave us a time out from studies at home, not intentionally ofcourse. So I would sit along with my mom, dad and brother taking cues from them and cheering & booing along with them.

Monday, March 08, 2010

Sweet Potato and Chickpea Salad

Dear Foodies,

Spring is almost here at our doorstep and with the longer brighter days I almost forget grabbing my winter coat on the way out :D And with that, I've begun counting down to the D-day too, just a month away from today!! Its exciting but I'm also restless, since there's hardly anything I can get done from here :(

A few weeks back I decided I was going to have hearty soups to tide me through the snowy winter, so I brought out the huge soup books that I bought when I first moved to this winterland. I had fun trying out many different soup recipes and also added in a bunch of salads in between. This sweet potato salad was one of them, and its the best form of salad I have ever eaten.

I vaguely remember eating sweet potato when I was kid, the memory is too distant. In the last couple of years since I started cooking, I always saw the tubers in the bins at the store but never really ventured into cooking with them. Sweet and savory just did not seem comfortable. A month back when we were driving through Virginia, my colleagues and I stopped at a diner to grab some lunch. They were serving baked regular/sweet potato with the buffet and I ordered the sweet potato. It came accompanied with a huge dollop of butter and a mound of brown sugar. The first few bites were divine! The warm, tender potato mixed with the butter and crunchy brown sugar melts in your mouth. But after the initial excitement the cloying sweetness takes over. The good thing though was I was now ready to start experimenting with the sweet tubers again.

While going through Molly's blog Orangette I came across this recipe for a warm butternut squash & chickpea salad. It was the savory dressing that drew me to the recipe, it was like no other vinaigrette I had seen and I finally found another use for the huge tub of tahini that I have in the pantry. So when I brought home the sweet potatoes this was the first recipe that struck me, may be it was because the diced potato resembled the butternut squash in color ?! Or I was trying to mask the sweetness of the potato under the savory tahini dressing. No matter what the reason, you guys just have to give this one a shot. I added some warm spices like coriander, cumin and five spice to the mix, and the result was out of the world.
Sweet Potato and Chickpea salad with Tahini dressing
(Serves 3-4 as a side)

Ingredients:
  • 1nos - Sweet Potato, peeled and cubed into 1" pieces ~ 2 cups
  • 1 cup - Chickpeas, pre-soaked and boiled (or) canned, rinse and pat dry
  • 3/4 cup - Red onion, diced
  • 1/4 cup - Cilantro, roughly chopped
  • 4-5 nos - Mint leaves, roughly chopped
  • 2-3 nos - Sun-dried tomatoes, roughly chopped
  • 1Tbsp - Olive oil
  • 1/4 tsp - Chinese five spice powder (or your fav spice mix)
  • 1/4 tsp - Coriander powder
  • 1/4 tsp - Smoked Paprika (or) regular paprika/chilli powder to taste
  • Salt to taste
for the dressing:
  • 3 Tbsp - Tahini
  • 2-3 Tbsp - Lemon juice
  • 2 Tbsp - Olive oil
  • 1 nos - Garlic clove, finely minced
  • 1/4 tsp - Cumin powder
  • Salt to taste
Method:
  1. Pre-heat the oven to 400F
  2. Line a baking sheet with aluminum foil. In a bowl toss the sweet potatoes with salt and spice powders. Drizzle the olive oil and mix to coat the cubes well. Spread them on the baking sheet and let the roast for about 25-30 mins. They will shrink a little in size and get soft and tender, yummm!
  3. In the mean while, heat a wide skillet, add a tsp of olive oil and toast the chickpeas. You could also do this in the oven. Make sure that the chickpeas are dry when they hit the pan. Toast them for 5-6 mins till the skin starts to crisp a little.
  4. Start making the dressing in the same bowl you used to toss the sweet potato. Whisk together the tahini, lemon juice, olive oil, minced garlic and cumin powder. Adjust the amounts by tasting the dressing, some brands of tahini tend to be bitter (not good!) If the dressing is too thick, add a few spoons of warm water to loosen it.
  5. Once the sweet potatoes are ready, try not to snack on them! Instead, toss them into the dressing bowl along with the toasted chickpeas, diced onions, sun dried tomatoes, cilantro and mint. (I used the sun-dried tomatoes packed in oil, if using the dry kind, reconstitute them by soaking in warm water for a few minutes.) Mix well to blend all the flavors together and check for seasonings.
  6. The salad can be served warm, but I liked it even at room temperature the next afternoon.
As you may have noticed, I ran out of red onions and used white ones here. Don't let any excuse of this sort stop you from trying this recipe! The nutty tahini with the warm tones of the cumin and coriander reminded me of bagara baingan. All the flavors mingle so well together in this salad that it will have you craving for more n more. Every bite is delicious and filled with so many different notes that seem perfect together. I made this about a month ago, and just writing this post makes me want to have some right now. Lucky me, I have a sweet potato waiting in veggie basket :D Most of the other ingredients in this salad are regular/pantry ingredients. So don't waste any more time, make some for yourself asap! :) O, Happy Womens day to all you gorgeous ladies :)

Monday, June 29, 2009

Ragda Patties

Dear foodies,

Isn't chaat the best form of food ? They should make it one of the essential food groups. One bhel puri or ragda or one plate pani puri everyday :) That will be a diet plan I'll religiously stick too :D Specially in the summers, a spicy bhel or golgappa cooled down by a dahi poori or sugarcane juice is pure bliss. It's the best way to get your mind off the blistering sun of the Indian summer. Which brings up a very interesting question. Ever wondered why the hottest peppers come from the countries close to the equator. The cuisines of these countries (India, Thailand, Malaysia etc) also tend to be really spicy. You would think that people freezing in the cold would appreciate a hot pepper, but no, they are happy gulping down scotch/whiskey, and its the ones living in the tropics biting into hot chilli peppers.

Eating local and using what the land gives could be one reason. Most of the spices like chilli peppers, peppercorn, cloves etc prefer the hot humid climate and thrive is these regions. But that might still not answer why you would torture yourself by eating something that makes you feel hotter. Most chilli peppers have a chemical called Capsaicin which is an irritant and also gives them the spicy punch. It is known to act on the central nervous system and pump up the blood circulation, bringing more of the warm blood to the skin's surface causing us to sweat profusely. And since sweating is our body's natural way to cool us down, the spice aids this process. So though you might feel like your skin is burning up and you need a fire extinguisher asap, your body might actually be cooling itself! But this is good only as long as the level of Capsaicin is bareable, too high and you might really need a Doc. I also read in an article that your appetite tends to weaken as the mercury level rises. All you want is a light fruit salad or fruit juice or that cool, tall glass of buttermilk to cool you down. But that's surely not enough fodder for the body and so eating spicy food helps to bring back the appetite. (as long as you continue chomping down that spicy hot pav bhaji, you won't feel the heat :D)

Another theory draws on the unique properties that all of the spices possess- as an antiseptic (turmeric), anthelmintic (cloves), diuretic (coriander), carminative (coriander, pepper, ginger) to name a few. Apart from these they all have anti-bacterial properties in varying extents. So by using one or a combination of these spices, you are adding preservatives, preventing food poisoning from contamination by harmful microbial. This makes sense as modern day means of refrigeration are relatively new and the methods to store cooked food were limited. Now I also read a theory that since food tends to go bad very quickly in hot climates, the hot spices masked their rotten flavors! This, I am not willing to accept, nooooo, never....eoowww. But if you ate a really hot dish and want to put out the fire, instead of reaching for the glass of water or coke, eat a piece of bread. It does a better job at soaking up the capsaicin and gives relief. Milk and alcoholic beverages also help dilute the capsaicin molecules in the mouth.

Getting right back to our lovely chaats, I made some chatpata ragda patties when my friends came over last weekend. I now have chana, kala chana, pinto beans, yellow and green vatana in my pantry that I pre-soak and use when needed. I used yellow vatana to make the ragda and the patties are very easy to put together. I used store bought tamarind chutney and sev, the rest I made at home. Each component is extremely simple, quick and uncomplicated, which is the true essence of chaat - Fresh, flavorful, simple ingredients put together with the right balance of sweet/spice/sour/tangy to entice our tastebuds.
Ragda Patties
Ingredients:

for the patties or aloo tikki - makes upto 10-12 2" round tikkis
  • 4 nos - Potatoes, medium sized -cubed and boiled in salted water
  • 1/2 tsp - chopped ginger
  • 2-3 nos - Green chillies, minced
  • 1/2 tsp - Amchur (dry mango powder)
  • 2 Tbsp - Cilantro, chopped
  • 2 nos - Bread slices/ 2 Tbsp - Maida/AP flour or 2 Tbsp - bread crumbs
  • Oil for pan frying
  • Salt to taste
for green chutney
  • 1 cup - Mint leaves
  • 3/4 cup - Coriander leaves
  • 1/4 cup - Onion, roughly chopped
  • 2-3 - Green chillies (adjust to taste)
  • 1/2 tsp - Amchur
  • Salt to taste
for ragda
  • 2 cups - Yellow vatana/peas, pre-soaked for 8-10hrs
  • 1/2 cup - white Onions, diced
  • 1 tsp - minced ginger-garlic
  • 1/2 tsp - turmeric powder
  • 1 tsp - roasted Cumin/jeera powder
  • 3/4 tsp - roasted Coriander/dhania powder
  • 1/2 tsp - Red chilli powder (optional)
  • 1/2 tsp - Garam masala
  • pinch of sugar and amchur
  • 1 Tbsp - Oil
  • Salt to taste
Tamarind chutney, beaten curds/yogurt, coriander leaves, chopped onions and sev for garnish.

Method:
  1. For the ragda - Pressure cook the vatana with salt for just 1 whistle, (any longer turned them to mush in mine :( ), if not cook them on the stove top or microwave.
  2. In a pan, heat the oil on medium heat and add the minced ginger-garlic. Cook for 30secs and add the diced onions, turmeric. When the onions turn translucent add cooked vatane, a cup of water, and the spice powders. Bring to a boil and simmer for 8-10 mins. Add the sugar and amchur powder and, mash a few of the beans with the back of your spoon to slightly thicken the gravy. Taste and adjust the spices to balance the flavors, add more water as needed.
  3. The green chutney is the easiest, toss everything into a blender and give it a blitz adding spoonfuls of water as you go along.
  4. For the aloo patties, mash the potatoes (I did not peel them) and add the rest of the ingredients. If using bread slices, dip them in water for a few seconds. Give them a tight squeeze to remove excess water, crumble and add it to the potatoes. Mash everything together to form a light dough. Pinch off a key lime sized ball of the mixture, roll it into a round and press to form 1/2" thick discs. Heat a few drops of oil in a shallow pan and fry the patties until they turn golden brown with a crisp outer layer.
  5. While serving, place 2-3 patties on a plate, pour a ladleful of the piping hot ragda on top, drizzle green chutney, tamarind chutney and beaten curds on top. Sprinkle some onions, cilantro and a generous amount of sev. Serve immediately.
* Swap the aloo patties with crumbled Samosa/Kachori/Papdi to make - ragda samosa, ragda kachori or ragda papdi, as the case may be.
Boy O boy! this was a spectacular treat for the tastebuds. Having your mouth full with the hot peas and tikki, crunchy onions and sev, fresh cilantro, tangy chutnies and the coooool yogurt, all at the same time, is an experience you have to savor, atleast once. And after that its a perfect case of 'no one can eat just once' :D There is no rivaling the sheer genius of chaats, and your taste buds will love the rollercoaster ride. The yellow vatane have a very mild yet slightly spicy, chilli like flavor to them, unlike the ...err..bland (?) chickpeas, and so a mild gravy is enough to make a flavorful dish. All the flavors come together forming an elegant balance without any single element overpowering the rest. Since I like sev in my chaat I added that to the dish, but you can surely skip it. (can you ? will you ?)

Each one can also customize their plates with a lil more of the khatta-meeta chutney or green chutney or sev or all the above :D Its filling and its healthy. The green chutney can be made and stored in the fridge, extra peas can be frozen, a pack of sev should last you awhile. And so, once you have all the components on hand, putting the dish together is a snap.

This goes to the Sunday Snacks - Spill the beans event hosted by yours truly this month :) I took over from Pallavi this month. This being a bi-monthly event, you have time until the last Sunday of July to cook up some fabulous snacks.

Tuesday, June 09, 2009

Matar Paneer

Dear foodies,

I did it again! I killed the second basil plant I brought home :( I had really high hopes for the second one, and it looked like it was thriving too. But I was away for the 4-day long weekend and when I got back, no amount of coaxing it back to life helped. I have now officially given up on my patio garden for this year. I am going to stick to the more robust herbs and see how far they go. The mint, thyme and rosemary don't seem to miss me at all, they went about doing their business - sprouting new leaves and growing longer and bushier. Good for them! So the basil pesto and pizza ideas are now on an indefinite hold. Just like my cable subscription. The apartment community that I live in changed their rules, no more permanent mounting of dishes on the deck. They gave us a 3 week time period to find an alternative. I had 3 different technicians come to take a look at it and none had a solution. The dish is now lying on the deck facing nowhere in particular and the TV is reduced to a black box. I am used to having the TV playing in the background from the moment I step into the house in the evening. I need the noise pollution to keep me sane, the silence freaks me out completely :( Do any of you share the feeling ?

Okay, getting back to cooking. I've been buying fresh English peas and fava beans and ramps and garlic greens and asparagus whenever I can spot them in the grocery store aisle. Thanks to the blog hopping I do, I now look for these so-far unfamiliar goods, nestled between the usual suspects in the store. The berries haven't yet arrived in full splendor, but that does not stop me from buying the strawberries. I can slowly, yet steadily taste the sweetness and the burst of flavor increasing in each batch that I buy. When at home in India, my father would buy a lot of peas in the pod from the market when in season. Once we, er he shelled them, my mom would take over and add them to every dish she possibly could - vegetable curries, sambar, mixed rice, upma etc etc I liked them, but not enough to enjoy it in everything! But just like everything else, I've come like them too and now look forward to the fresh peas in the store. The fresh ones have a bite to them and hold up to short cooking times without turning into a mush. Apart from salads, I made this quintessential desi restaurant menu item - Matar Paneer (or mutter paneer).

Matar Paneer - Indian cottage cheese with Peas
Ingredients:
  • 2 cups - vine ripe Tomatoes, diced
  • 3/4 cup - Onions, minced ( I am currently in the 'I-love-vidalia-onions' phase :D)
  • 3/4 cup - Green peas, shelled
  • 3/4 cup - Paneer cubes, thinly sliced
  • 1 Tbsp - Oil
  • 1 tsp - Cumin seeds/Jeera
  • 2 nos - small Bay leaves ~ an inch long
  • 3 nos - Cloves/laung
  • 1/2 tsp - Ginger, minced
  • 1/2 tsp - Garlic, minced
  • 1/2 tsp - Green chilli, minced
  • 1/4 tsp - Turmeric powder
  • 1 tsp - Tomato paste
  • 1 tsp - Garam masala powder
  • 1 tsp - Red chilli powder (optional)
  • 2 tsp - Kasuri methi, crushed
  • 5-6 nos - whole cashews, soaked in warm water OR 1 Tbsp - sour cream
  • Salt to taste
  • For garnishing - Coriander leaves, sliced onions and lemon wedges
prepping the paneer : If using fresh paneer, dice it into cubes, and broil to get a golden crust OR cut long slabs and pan fry it in a non-stick pan. Drain and cut into cubes. OR if using frozen cubes, soak them in warm water for 5-10 mins and broil for 2-3mins if you desire.

Method:
  1. In a deep pan, heat the oil on medium heat. Add the cumin seeds, cloves and bay leaves. Once fragrant and toasted, add the minced onions and ginger, garlic and chillies. Sprinkle some salt and cook till the onions are softened and translucent.
  2. Add turmeric, tomato paste and cook for a minute. (The tomato paste adds a nice color and tartness) The minced tomatoes go in next along with the garam masala powder. Cook this on medium heat until the tomatoes fall apart and the oil starts to separate from the edges. Stir every few minutes so the gravy does not burn.
  3. At this point, you can fish out the bay leaves, transfer the whole gravy to a blender with the soaked cashews and blend to a smooth paste. ( let it cool before blending or leave room for the hot steam to vent while grinding) Transfer it back to the pan, add the bay leaves and bring it back to medium heat with the crushed kasuri methi and peas added. Check for salt.
  4. If you are not in a mood to use the blender, start with finely minced onions & tomatoes and use a masher at this stage to turn it to pulp. Stir in a spoon of sour cream, proceed with the kasuri methi and peas, and simmer for a few minutes on low heat.
  5. Add the paneer cubes, heat it through, and add a little water if needed. Take off the heat, garnish with coriander leaves and lemon wedges on the side. Serve with pulao/jeera rice or Indian breads like naan and rotis.
*Boiled (in salted water) and cubed potatoes could be used instead of paneer to make this Aloo matar. Add it to the cooked gravy in step 4 before adding the peas, simmer for 6-7mins allowing the potatoes to soak up the flavors.
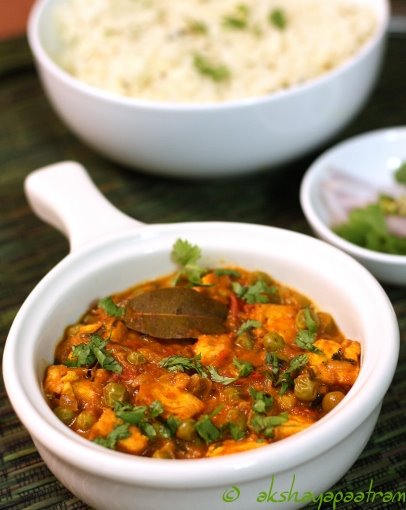
I made a quick, microwave jeera rice to go along with the curry. The bowl that you see is the one I cooked the rice in, just a cup of it. I melted a thin slice of butter in the microwave, 30secs. Add a tsp of cumin seeds and heated it for another 30secs until it sizzles. I then added the washed rice and required amount of water and microwaved it for 8 mins, and then two more minutes with the bowl covered. Let it cool, fluff it up with a spoon and jeera rice is done :)

The gravy tasted fabulous, if I say so myself. I made it twice in the last 3 weeks, the first time was the lazy me, not touching the blender and using low-fat sour cream for the creaminess. The fresh home grown tomatoes I found at the store were bursting with juices and added a nice tang. The peas held their shape and tasted really good in the gravy. I could not take the photos as soon as the curry was done, and so the peas seem to have lost the bright green they had. I consciously stayed away from using heavy spices in this curry because I wanted to taste the peas and keep it simple/mild. The kasuri methi in the end enhances the flavor of the gravy and gives it a very nice flavor. The second time I made it was this weekend, when I had friends visiting. This time I brought out the blender and used cashews to add richness to the gravy. It tasted great both ways and I don't think I can pick one over the other, it comes down to your convenience.

Monday, February 23, 2009

Bottle gourd & tomato curry

Dear foodies,

I simply can't wait for Spring to come and brighten up everything around here! It feels like it's been snowing forever now. I guess it takes a depressing winter to appreciate the sun peeping out of the white clouds and a perfectly blue sky. The snow does make the whole city look beautiful in pristine white, but its what it does to the roads that I hate. I am still just as terrified of driving in snow as I was two seasons ago. How do you get used to it? I really wish I knew. For now, I take the easy way out but staying in :D Brilliant idea ? Definitely not!

One of the things I cut in my travel list over the last few months was the trip to the Indian grocery store that is 30miles North of where I live. Its a nightmare to drive up there since its in the snow belt and it gets really bad when it snows. The local stores have had a good selection of winter veggies during these months, and since its a warm hearty soup that I crave most often, it has worked out, it had to ;) Early this month I visited my brother (or was it the Sun :P) in Houston, and sneaked in a little grocery shopping, yes a pack of urad dal and cumin seeds came all the way from Houston :))

Last weekend was a little better here and I spent nearly an hour at the Indian store going through all the aisles and looking for new products on the shelves. I bought some fresh vegetables like bottle gourd, bitter gourd and dondakaya/tindora. I also spotted a 5 lb bag of Sona masoori and just had to pick it up. Most of last year the stores here did not stock sona masoori, they only had basmati, which I prefer only for biryani's or pulaos and not for everyday cooking. I bought the US grown white/brown rice from the organic store here instead. So this weekend I decided on having a comforting meal to invite the dear grain back into the kitchen...I love its flavor and could actually eat it on its own :D

Bottle gourd & tomato curry
Ingredients:
  • 11/2 cup - Bottle gourd/sorakaya/dudhi, peeled, de-seeded and cubed
  • 1 cup - Ripe tomatoes, diced
  • Optional: 1/2 tsp - tamarind extract if tomatoes aren't tangy enough
  • 1/2 cup - Onions, diced
  • 11/2 Tbsp - Channa dal
  • 2-3 nos - Green chillies, slit lengthwise
  • 6-7 nos - Curry leaves, roughly chopped/torn
  • 1/2 tsp - Mustard seeds
  • 1/2 tsp - Cumin seeds
  • 1/4 tsp - Turmeric powder
  • 3/4 Tbsp - Oil
  • Salt to taste
  • 2 tsp - Sesame seeds/til/nuvvulu, toasted (I microwaved them for 11/2 mins in 30sec intervals)
  • 1 Tbsp - Peanuts, dry roasted
  • couple of sprigs of Cilantro
Method:
  1. Heat a saucepan with oil, splutter the mustard and cumin seeds. Add the channa dal next, as it starts changing color add the green chillies, curry leaves and turmeric. Saute for 30sec until the chillies soften and the dal has a deep orange hue.
  2. Add the onions and saute until they turn translucent. The tomatoes go in next along with some salt, cook for 5-7mins until they soften and turn to a mush.
  3. Add the cubed bottle gourd to this along with a cup of water, cover and cook on medium heat until they soften and yield to a gentle press ~ 10-12mins. You could also microwave them separately for a few minutes before adding them to the onion-tomato mix.
  4. Finally, coarsely powder the toasted sesame seeds and peanuts in a mortar and pestle and add it to the curry. Cook for 5-6 mins, allowing the flavors to blend and thicken the curry a little. Taste for seasonings & add more salt if needed.
  5. Garnish with cilantro/coriander leaves and serve along with hot rice/chapathis and the quintessential Andhra avakaya and crispies on the side :)
I am feeling hungry just looking at the plate again! I had the curry for lunch and dinner over the weekend and was going for seconds each time, it was a very satisfying meal. I usually use the sorakaya in a sambar or kootu or steamed, but this time I did not want the dal to take over. I still needed the protein part though, and so increased the qty of channa dal in the tadka and let it soften along with the bottle gourd. The curry has a really nice tangy edge to it from the tomatoes. If the tomatoes you have aren't doing their job, add a little tamarind extract to help them along. The powdered peanuts and sesame and a subtle nutty flavor and texture to the curry, and also thicken it up a bit. On the whole it was delicious and I'm surely going to use this recipe again.

Monday, February 09, 2009

Rustic bread salad - Panzanella

Dear foodies,

I would call this a bhel puri made with bread instead, its that good. Now I love my bhel puri and would not give such a comment lightly :D Every time I make bread at home, the enthusiasm with which I consume it keeps decreasing with each vanishing slice, and the last few are the toughest. So I always have a problem using them up in ways other than a sandwich or toast. Sometimes I might make a upma or use the crumbs as a topping for another dish, but I'm stumped most times. I discovered that you can store bread in the refrigerator/freezer early last year, but even then its the same problem, just that it gets pushed by a few days (or weeks!). I watched a show on food network a few months back where, I don't remember who, was making a bread salad called Panzanella. Panzanella is a Tuscan dish whipped up by yet another enterprising cook, who like me might have had loads of
stale
day old bread lying around. (stale just doesn't sound appetizing)

Traditionally, Panzanella is a salad made with day old bread, juicy ripe tomatoes & generous amounts of basil - a classic Italian combination. But soon each cook added his/her own flair to it and so you will now find Panzanella having onions, capers, garlic, anchovy, olives, cucumber, colored bell peppers & cheese in addition to the basic ingredients. My additions were avocado, and some juicy oranges, it brightens up the flavors and is a treat to bite into. This salad either is a smart way to use up day old bread, or an even smarter trick to get fresh vegetables on the dinner table :) And its just as delicious as this hearty Tuscan bean soup, another innovative dish to use up day old bread.

Tuscan recipes are known for their simplicity and choice of flavorful, fresh ingredients. No matter which combination of vegetables you choose, use the freshest produce you can find, preferably in season, local and organic. The bread can be any Italian style bread, sour dough, rye/ whole wheat bread. I had a loaf of Bee & Jai's Sundried tomato & Peppercorn bread. It definitely is one of the most flavorful breads I've made to date, second would be the potato focaccia. I was wimp while adding pepper though and might bump up the quantity next time. And just as they said, it works really well in sandwiches but is great to simply snack on too. Thanks for the recipe guys.
Panzanella - Bread salad
(serves 2-3)
Ingredients:
  • 2-3 thick slices of bread, cut into 1" cubes
  • I used JB's Sundried tomato & peppercorn bread
  • 1/2 cup - Red onions, diced
  • 3/4 cup - Cherry Tomatoes, halved
  • 1/2 cup - Cucumber, diced
  • I used English cucumbers and retained their skin
  • 1  - ripe Avocado, diced
  • 1  - Jalapeno, finely chopped (optional)
  • 1  - Orange
  • 1/4 cup - Cilantro
  • 2 tsp - Lemon juice, freshly squeezed
  • 2 tsp - Olive oil
  • Salt and freshly ground pepper to taste
Method:
  1. Set the oven on Broil (low). Toss the bread cubes on a baking sheet and season with salt, pepper and a drizzle of olive oil. Broil for about 3-4 mins till they start browning and turn crunchy. Alternatively, you can toast them on a pan or use a toaster.
  2. In a large bowl, toss the rest of the ingredients together, making sure to coat the avocado chunks with the lemon juice, so they don't discolor. Section an orange like shown here. The fiber will still have some pulp holding on to it, squeeze it between your hands to extract all the juice. Taste and adjust the salad for seasonings.
  3. Toss the bread cubes with the salad just a few minutes before serving. If its allowed to sit for too long, the bread will soak up all the juices and turn soggy! You can store the salad separately in the fridge for a day in a covered bowl/plastic container.

I absolutely loved this salad and the bread had a major contribution in it, being slightly chewy & slightly crunchy. The stale bread can directly be used too but I love the crunch and enhanced flavor that broiling it with olive oil gives. The bread immediately soaks up the delicious juices from the vegetables but still retains a little crunch. I enjoyed eating it and picked a different assortment of veggies with each forkful...yummm.

The salad is great on its own too and you could easily add some puffed rice and turn it into the ever so popular bhel. Once you have this salad you will start storing fresh bread to use in it :) Coming to that, fresh bread can also be used in this recipe if that is all you have at home and can't wait to try it out :) Broiling dries it up (might take a little longer though) and so it is just as good at soaking up the flavors.

This salad is off to Vaishali's 'Its a Vegan World - Italian' event, visit her blog for more information about the event. You have until the end of this month to send her your vegan Italian creations.

How do you use up bread ? Any go-to sandwich fillers/combos and how do you pack it up for lunch ?

Blogging tips