Showing posts with label channa dal. Show all posts

Monday, February 23, 2009

Bottle gourd & tomato curry

Dear foodies,

I simply can't wait for Spring to come and brighten up everything around here! It feels like it's been snowing forever now. I guess it takes a depressing winter to appreciate the sun peeping out of the white clouds and a perfectly blue sky. The snow does make the whole city look beautiful in pristine white, but its what it does to the roads that I hate. I am still just as terrified of driving in snow as I was two seasons ago. How do you get used to it? I really wish I knew. For now, I take the easy way out but staying in :D Brilliant idea ? Definitely not!

One of the things I cut in my travel list over the last few months was the trip to the Indian grocery store that is 30miles North of where I live. Its a nightmare to drive up there since its in the snow belt and it gets really bad when it snows. The local stores have had a good selection of winter veggies during these months, and since its a warm hearty soup that I crave most often, it has worked out, it had to ;) Early this month I visited my brother (or was it the Sun :P) in Houston, and sneaked in a little grocery shopping, yes a pack of urad dal and cumin seeds came all the way from Houston :))

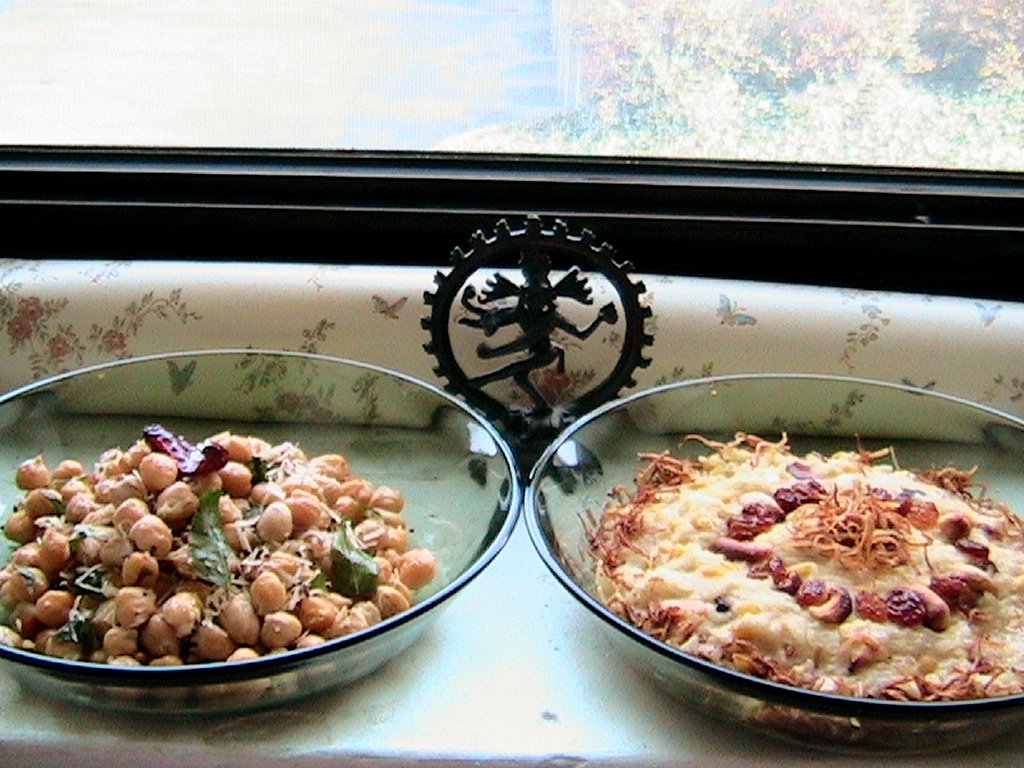
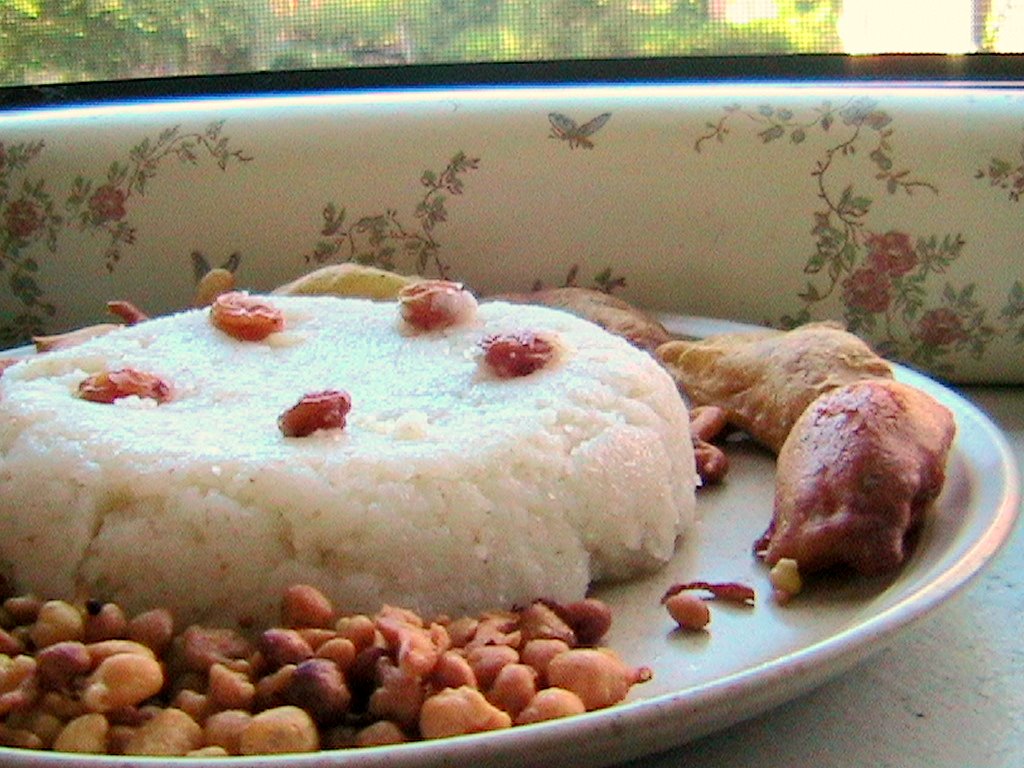
Last weekend was a little better here and I spent nearly an hour at the Indian store going through all the aisles and looking for new products on the shelves. I bought some fresh vegetables like bottle gourd, bitter gourd and dondakaya/tindora. I also spotted a 5 lb bag of Sona masoori and just had to pick it up. Most of last year the stores here did not stock sona masoori, they only had basmati, which I prefer only for biryani's or pulaos and not for everyday cooking. I bought the US grown white/brown rice from the organic store here instead. So this weekend I decided on having a comforting meal to invite the dear grain back into the kitchen...I love its flavor and could actually eat it on its own :D

Bottle gourd & tomato curry
Ingredients:
  • 11/2 cup - Bottle gourd/sorakaya/dudhi, peeled, de-seeded and cubed
  • 1 cup - Ripe tomatoes, diced
  • Optional: 1/2 tsp - tamarind extract if tomatoes aren't tangy enough
  • 1/2 cup - Onions, diced
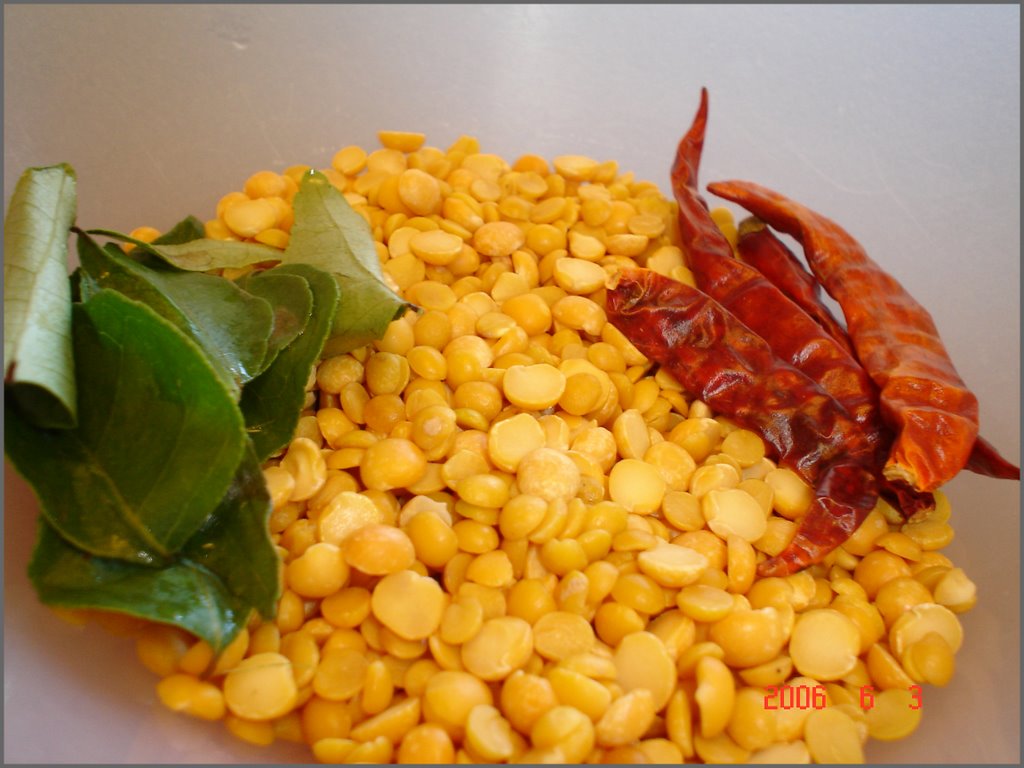
  • 11/2 Tbsp - Channa dal
  • 2-3 nos - Green chillies, slit lengthwise
  • 6-7 nos - Curry leaves, roughly chopped/torn
  • 1/2 tsp - Mustard seeds
  • 1/2 tsp - Cumin seeds
  • 1/4 tsp - Turmeric powder
  • 3/4 Tbsp - Oil
  • Salt to taste
  • 2 tsp - Sesame seeds/til/nuvvulu, toasted (I microwaved them for 11/2 mins in 30sec intervals)
  • 1 Tbsp - Peanuts, dry roasted
  • couple of sprigs of Cilantro
Method:
  1. Heat a saucepan with oil, splutter the mustard and cumin seeds. Add the channa dal next, as it starts changing color add the green chillies, curry leaves and turmeric. Saute for 30sec until the chillies soften and the dal has a deep orange hue.
  2. Add the onions and saute until they turn translucent. The tomatoes go in next along with some salt, cook for 5-7mins until they soften and turn to a mush.
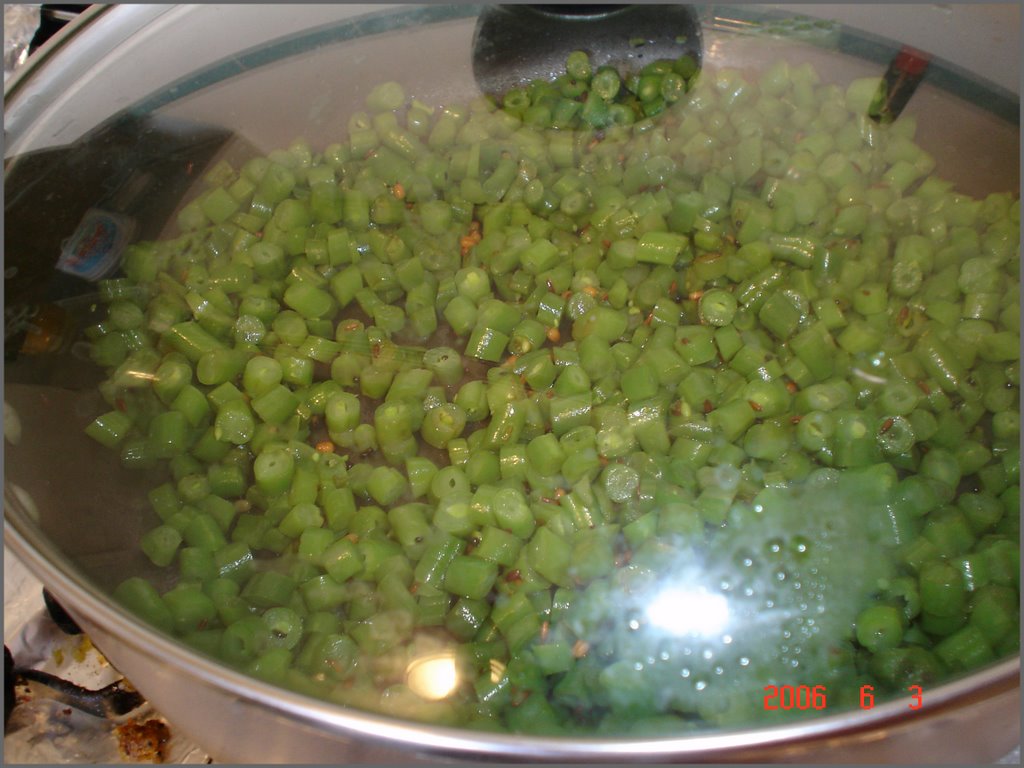
  3. Add the cubed bottle gourd to this along with a cup of water, cover and cook on medium heat until they soften and yield to a gentle press ~ 10-12mins. You could also microwave them separately for a few minutes before adding them to the onion-tomato mix.
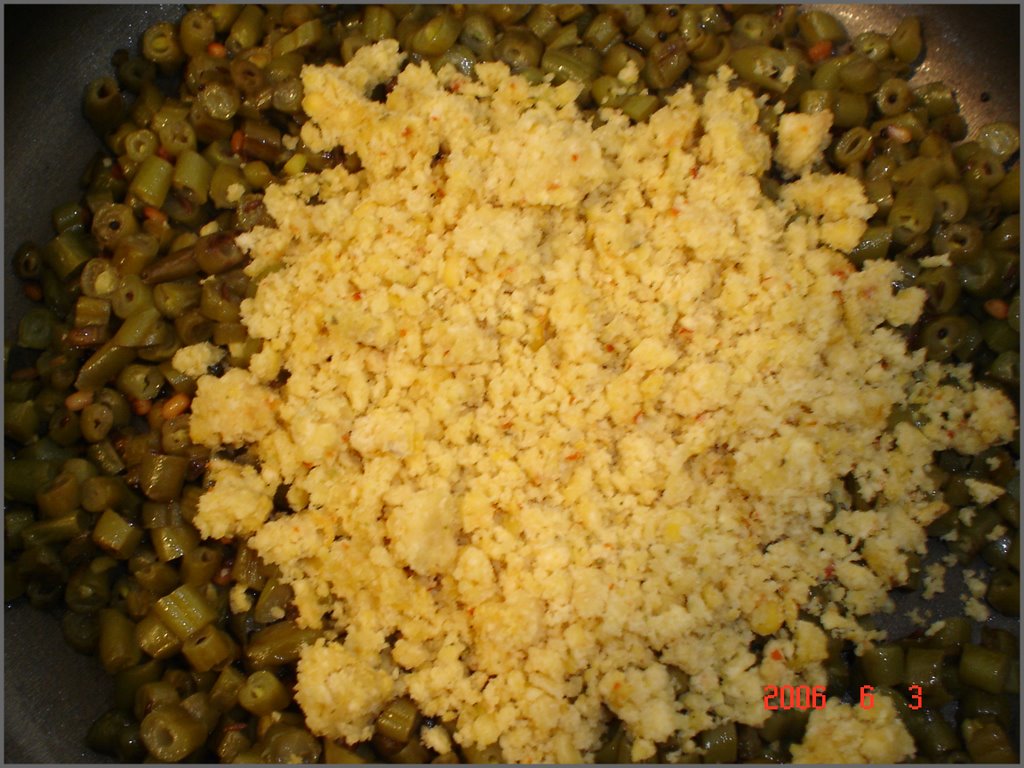
  4. Finally, coarsely powder the toasted sesame seeds and peanuts in a mortar and pestle and add it to the curry. Cook for 5-6 mins, allowing the flavors to blend and thicken the curry a little. Taste for seasonings & add more salt if needed.
  5. Garnish with cilantro/coriander leaves and serve along with hot rice/chapathis and the quintessential Andhra avakaya and crispies on the side :)
I am feeling hungry just looking at the plate again! I had the curry for lunch and dinner over the weekend and was going for seconds each time, it was a very satisfying meal. I usually use the sorakaya in a sambar or kootu or steamed, but this time I did not want the dal to take over. I still needed the protein part though, and so increased the qty of channa dal in the tadka and let it soften along with the bottle gourd. The curry has a really nice tangy edge to it from the tomatoes. If the tomatoes you have aren't doing their job, add a little tamarind extract to help them along. The powdered peanuts and sesame and a subtle nutty flavor and texture to the curry, and also thicken it up a bit. On the whole it was delicious and I'm surely going to use this recipe again.

Tuesday, September 16, 2008

Undrallu/Steamed Rice cakes


Dear foodies,
Steamed rice cakes
This year on Vinakaya chavithi all of you got together and schemed against me by talking about the festivites and your delicious offerings to the elephant Lord. I had not planned on making anything special, a quick sugar candy/dry fruits neivedyam in the morning and I was out of the house. I changed my status message on the messenger, wished everyone I could find online, put a nice blog post wishing all of you, and then started going around ...that was the mistake. Each one of you had a solid plan chalked out on how you were making the day special, hmph! 
And all the foodie photos got me hungry for some authentic festive food too :( I am not a sweet lover, I think I've mentioned that enough in this space, no mood for frying things up either. As I was composing that post I tried looking for a post of undrallu on my blog, I had made them the last two years for Ganesh chathurthi and was so sure I had blogged about them, atleast I thought so. Not finding the post though confirmed by dinner plans :) Undrallu it was, with the condiment made specially for it, a yet another awesome traditional combo, puli-inji/allam-chinthapandu pachadi. Here's my version...
Ingredients:
  • 3/4 cup - Rice
  •  * Use 1 1/2 cup idli rava if you want to save time
  • 1/4 cup - Moong/chana/toor dal 
  •  * I used a combo of the later two, while the first is the traditional choice
  • 3/4 tsp - whole Peppercorns  
  • 1/2 tsp + 1/4 tsp - Cumin seeds/jeera
  • 1/2 Tbsp - Ghee/oil
  • 5-6 - Curry leaves
  • 1 - dried Red chilli
  • Salt to taste
  • 1 Tbsp - grated/bite sized coconut for added flavor (thanks anon!)
Method:
    The upma stage
  1. Soak the rice in water for about 30-40 mins. Drain and spread them on kitchen towels to dry. Once most of the moisture is lost, blend them to a coarse powder along with the dal,  pepper and 1/2 tsp jeera. I got approximately 2 cups of the coarse powder/rava from this.
  2. Microwave 1 1/2 cups of water. Heat ghee in a sauce pan, add the 1/4tsp of the jeera, next add the curry leaves and broken red chilli. Once they splutter, carefully add all the water to the pan with salt. 
  3. Stirring continuously, add the rice-dal rava (and coconut) , try to avoid any lumps. Cover and place on medium-low heat for a 5-8mins. Since the rice was soaked and then ground, it does not take long to cook. Turn off heat when done, but keep covered for a few more minutes. Drizzle a little more ghee if you want now.
  4. The idli stage
  5. In the meantime, place a pressure cooker with a few inches of water to heat. lightly grease a pan that fits inside the cooker. When the rice-dal upma is cool enough to handle, form into into oval shape balls, moisten your hands if needed, so the mixture does not stick to them. Arrange them on the greased pan, close with the lid and steam them for 8-10mins, or until you get a steady stream of steam coming out of the cooker for about 5 mins. Serve hot with some puli-inji or kara podi/idli podi or sambar
Undrallu/Steamed rice cakes
I got about 8 of these, I steamed 4 in the cooker and 4 in the microwave. The batch in the microwave was slightly yellowish and not steamed through as well as the cooker batch. But I am sure you can use the microwave in a pinch. 
I'll add the recipe to the puli-inji and karapodi in the next few posts :) Until then, if you are looking to add sweet potatoes to your meal but are bored of the baked potato like I am, but still want to enjoy them,  try these two wonderful recipes: Baked fries and Thai stew.

Thursday, August 14, 2008

Bobatlu/Poli

Dear foodies,

IMG_4231-1 copy

The festive season has started in India, atleast at my home it has! Tomorrow, Friday, my mother will be performing the Varalakshmi vratam. Its a major puja at my home and my mother puts in a lot effort every year decorating the altar and getting all the neivedyam ready. You can see the photos from the year before last in this post. The alankaram for the Goddess is done with great detail including the pattu pavadai or saree, a handmade flower piece for the hair, jewelery and the flowers. My mother and I would usually sit the previous night and get all the decoration done, will I was only a sidekick, so is my father :) I miss home the most on these occassions, they have been part of my life for as long as I can remember. Every festival has its own pattern to follow and a set of customs unique to it. Its not so much about the religious aspect but more about the joy of celebrating as a family and sharing it with everyone around you. Festivals just perk up our moods and when everyone around you is that way, there is no room for conflict. I also feel that they set such deeply embedded memories in you that you will cherish for life, its tough to remember the years past otherwise :P I will post pictures from this year's puja once my father sends them over.

So since my mother is going to have a huge spread laid out for tomorrow, here is a tiny token for you and me to share. She made poli (or bobatlu or puran poli) one of my favorite sweets when she was here. I tried to take as many photos as I could while successfully irritating her in the process :D

3-in-1

Ingredients:

Filling:
  • 1 cup - Channa dal
  • 1 1/2 cup - Jaggery
  • 1/2 cup - grated Coconut
  • 2-3 nos - Elaichi/cardamom, powdered
  • 1/4 tsp - dry Ginger powder
Method:
  • Filling: Pressure cook the chana dal for one whistle (or in a saucepan). It should still hold its shape but yield under pressure when gently squeezed between your fingers. Drain and allow to cool for a while. Grind the dal with jaggery along with the elaichi and ginger powder(to fight all the channa dal, you don't want to be reading this later :D ) to a smooth paste.
  • If you find that the filling is too watery, heat it on low flame and cook, stirring frequently until it dries up.
Dough:
  • 1 cup - Maida/All purpose flour
  • 1/2 cup - Wheat atta/flour
  • 2 Tbsp+ - Oil
  • a pinch of salt and turmeric
  • Water
Method:
  • Dough: Make a soft and pliable dough by mixing the flours, salt and turmeric with the oil and required amount of water. For a soft poli, use more oil than water to make the dough. The oil combined with the maida will result in the elastic dough which will hold more of the filling without tearing apart while rolling. Once kneaded, smear oil over the dough and cover loosely with a damp cloth to avoid drying.
  • Assembly: Oil your palms, rolling pin and rolling surface well. (use as little flour as possible for lasting softness of the poli). Take a lime sized ball of the dough, flatten it into a ~5"dia circle and form it into a cup shape by placing it on your palm, place a slightly lesser sized ball of poornam into in and seal the opening with the dough. (ref. Photo above)
  • {To form the cup shape by hand, flatten the dough between your palms, hold it with both your hands, 4 fingers of each hand covering the base of the dough and the thumb placed inside. The dough is then rhythmically passed between the fingers with the thumb forming the cup. Very hard to explain with words and I don't have any good pics :( There is one on this post, step 4).
  • Once you have the stuffed balls formed, take a wide plastic sheet, we used a ziploc bag cut open, smear it with a little oil and place a ball in the center, cover with another sheet on top and roll the dough it into a circle. Using the plastic sheet totally reduces the need for flour and makes the rolling a lot easier. (ref. Photo above)
  • Heat a tawa/cast iron pan on medium heat, place a rolled poli and let it cook completely on one side before flipping it. (use the appearance of tiny brown spots as an indication to flip) Since there is enough oil in the dough you will not need any in this step.
  • When cooked on both sides, smear them with a little ghee before taking it off the heat.
IMG_4254-1 copy

Poli is a decadent sweet treat and can be savored hot or at room temperature. I like to eat it with sugar sprinkled on top and some warm milk poured over it. My dad likes to have it with sugar dusted on top and a drizzle of honey all over, and my brother, well he'll have it anyway you give it to him :) This is a sweet that you might indulge in very rarely, so don't skimp on the oil or the ghee when you do or all the effort you put in will not be rewarded with the same amount of satisfaction.

Kozhakattai/Modak is a sweet made specifically on Varalakshmi vratam, for other Indian sweet recipes on my blog click here. Have a lovely puja at home if you follow this custom and drop me a comment sharing your experience.

Friday, April 11, 2008

Ready for Adai ?

Dear Foodies,


The recipes are back again on this blog, Yayyyy !! So before my blog gets branded as another no-recipe food blog ;), lets get cooking, shall we ?

I really love dosa's and idli's, they are so easy to make and you can either go ahead with the whole side dishes charade or make do with some pickles and podi's in your pantry. Either way, they are a great breakfast, lunch or dinner. And our love for this is more than evident with the number of recipe variations that we get to see on the blogs.

Since I started cooking here, I've never tried making my own dosa batter from scratch. One main reason being I am scared to even try fermenting it, and another equally strong reason is I don't have a good blender :D So whenever I want to get the satisfaction of making dosa's from scratch I jump over to Vaishali's instant recipe, otherwise its the pesarattu and rava dosa that are my go-to dishes.

The other favorite of mine is the Adai....

Ingredients:
  • 1 cup - Rice
  • 1 cup - mixed dals -- more of chana dal & toor dal and a little moong/urad dal
  • 3 nos - dried Red chillies or to taste
  • A pinch of hing/asafoetida
  • A sprig of curry leaves
  • Salt to taste
  • Oil for cooking the dosa - approx 2 Tbsp
Optional additions: 1" inch - ginger piece, a cup of drumstick leaves, Cilantro

Method:
  1. Soak the rice, dals and red chillies in water for about 3 - 4 hrs. If I want it quicker I just microwave them for a few minutes to warm the water and reduce the soaking time to 1 -2 hrs.
  2. Grind the soaking ingredients with the curry leaves and any or all of the optional ingredients to a coarse paste. The coarseness is what gives the adai the crisp texture.
  3. Add salt to taste and the asafoetida and mix well. Heat a shallow, wide pan for making the dosa's and spread a little oil on the pan and get started with the adai's. (check here for pics )
  4. The adai should be a little thicker than the normal dosa. To make it cook uniformly and also to make them extra crispy, make 1 or 2 holes at the center of the adai and add a drop of oil, this gives it the signature adai look.
  5. Serve hot with red chilli pickle, kara podi (gunpowder ;) ), jaggery and yogurt to make a perfect meal. For some extra touch, my mom would also add a small dollop of home made butter on the warm adai, the white colored one...yummmm
In our house we were totally spoilt. There were always more than 2 accompaniments to any of these tiffin items. I would have this queue system to optimize the dosa/idli between all the side dishes :)) So if you ask me, all those items mentioned are compulsory not optional :D

You could also add some chopped onions while making the adai and sprinkle some kara podi and grated jaggery...(yup, you cannot have just one thing)


and roll them up for the to-go person :)

I also tried my hand at my mom's Sponge dosa recipe. Since my blender did not give me a very smooth paste, I had trouble getting it to ferment well, and ya its the ~hand~ too :( So I added a tiny pinch of baking soda create the sponge effect :))


And most of you would have figured it out, this one is for Srivalli's dosa mela.

Sunday, December 17, 2006

Majjiga Pulusu/Mor Kuzhambu

Dear Foodies,


After a very long time I am posting a recipe from my mom. She sent me a few recipes with pictures quiet a few months back, but I never got around to putting it up. She had made Aratipoola pappu podi ( also known as patoli or usili) and majjiga pulusu for lunch at home. I was going to put in both of them in this post but realized there was a lot more I wanted to write about the plantain flowers, so thats again going to be a post some time hopefully in the near future !! For today I'll be serving some cool and extremely comforting pulusu made with buttermilk.

This one is called 'majjiga(buttermilk) pulusu' in Telugu and 'Mor Kozhambu' in Tamil. It is similar to the North Indian 'Kadi'. You can add veggies like okra, brinjal, white pumpkin or bottle gourd or some spinach or collard greens to it, or when your fridge is empty you can add lil fried besan bajji's or steamed chana dal-toor dal dumplings. I generally end up making this when we have loads of buttermilk nearing its expiry date !! hehe

Ingredients:
  • 3 cups - Buttermilk
  • 1/2 cup - Coconut (freshly grated/dessicated)
  • 2 tsp - Chana dal
  • 1 tsp - Toor dal
  • 2 tsp - Rice
  • 2-3 nos - Green chillies/dry red ones if thats all you have !
  • 1 tsp - Cumin seeds
  • Pinch of turmeric (optional)
  • Salt to taste.
  • 1 tsp -Coconut oil
  • 1 tsp - Mustard seeds
  • A sprig of curry leaves and coriander leaves for garnish.
Procedure:
  1. Soak the chana dal, toor dal and rice in some warm water for 15-20 mins. I generally toss in the dessicated coconut, cumin seeds and the chillies in the water too, just to make it easier to grind in my very delicate blender.
  2. Heat some oil in a pan and saute the veggies and reserve or blanch some spinach or collard greens.
  3. Grind the soaked ingredients to a coarse paste by adding sufficient water.
  4. Add this to the buttermilk along with some salt and the veggies or greens or the steamed dal dumplings/besan bajjis and heat the whole thing on medium heat.
  5. Don't let it boil, but just until it raises up and then turn off the heat.
  6. Season it by spluttering some mustard seeds, and curry leaves in coconut oil.
Sit back and enjoy every morsel of rice had along with this extremely delightful and soothing dish !! Pair it with this for a absolutely wonderful combo and you can use the same steamed dal as dumplings for the pulusu :-)

Steamed, coarsely pulsed chana dal, toor dal and red chilli dumplings. recipe??


Sunday, October 01, 2006

Happy Dasara

Dear Foodies,

~~ A VERY HAPPY DASARA TO ALL OF YOU !! ~~


I made Pongal and Sundal as
naivedyam on Friday and here are the pictures. I will be posting the recipes a little later as I plan to make more goodies for Vijayadasami too. :-)


Dasara in our house is a big event. We have the custom of keeping '
kolu/golu', which is an exhibit of dolls(made of clay or wood), majorly consisting of Gods. We usually have a 5 or7 step arrangement. A few dolls that we have in our collection in India are:a Ashtalakshmi set, Dasavataram, a doll set depicting a market place, a collection of animals which we arrange in some wet soil to depict a zoo, a temple with a band of muscians. The most reacent major entrant is a cricket set which is soo much fun to set-up :-). I miss being at home for this festival. It was always soo interesting to help my mom arrange the dolls.


I was of the opinion that Dasara and Dussera were just two different ways of spelling the festival name in English, but wikipedia says otherwise....read about the interesting twist:
Dasara and Dussera

I made some Rava Kesari and Bajji(potato fritters) on Sunday for the Saraswati puja naivedyam. A little about the puja from wiki
The goddess Saraswati is worshipped during Navaratri. In South India, Saraswati Puja is a very important festival. The last three days of Navarathri starting from Mahalaya Amavasya (the New Moon day) are dedicated to the goddess. On the ninth day of Navaratri (Mahanavami), books and all musical instruments are ceremoniously kept near the gods early at dawn and worshipped with special prayers. No studies or any performance of arts is carried out, as it is considered that the Goddess herself is blessing the books and the instruments.


I had some batter left even after I used up all the sliced potatoes. It was then in a sudden flash that I realised my mother uses a slotted spoon to make boondi and I was using one such spoon to drain the oil from the fritters. And soo... I happyily made use of the extra batter in making boondi's instead of peeling another potato for the fritters :-) They were nice n crisp and it was wonderful eating them after a looong time :-) I think I am going to make boondi's more often as they are soo simple to make and yet soo tasty.

Monday, June 12, 2006

Green Beans Patoli/Usli


Sorry for the long delay in getting this post out. I wanted to have my blog template set before I could start posting.
The first recipe is going to be ‘Green Beans Usli’. The beans I have used are fresh ones. I got them from my recent visit to Jungle Jims, an International Market. It is a huge store, and will eat away half of your shopping day, but you can be sure to find all that you need. The first dish that popped out of my friends’ mind when he saw the beans was ‘Usli’. Usli I thnk is one of the few dishes part of any cuisine in India. All my friends found the dish familiar the first time I made it. The only difference was the name by which they called it. The recipe might sound too complicated but trust me its very easy and worth the extra effort
Vegetables:
  • Green Beans


For the Usli:
  • 1 cup - Channa dal or Toor dal ( I used equal portions of both)
  • 3 or 4 nos - Red Chillis
  • 1 sprig - Curry Leaves
  • Salt to taste

For popu/tadka
  • 1 Tsp - Mustard seeds
  • 1 Tsp - Cumin seeds
  • 1 Tsp - Urad Dal
  • 4 Tsp - Oil
Procedure
  1. Soak the Channa dal/Toor dal along with the red chillies & Curry leaves for about 30-40 mins.
  2. Wash and de-string the beans if necessary. Chop them into tiny half cm pieces. If using frozen beans, thaw and keep them aside. ( and ofcourse you can skip the cutting part, or the purpose of buying frozen beans is defeated ;-) )
  3. In a wide pan, heat the oil and add mustard seeds. Once u hear them popping add the cumin seeds and Urad dal.
  4. Once the dals start to turn red add the beans( Take care not to burn the tadka ). Mix well and cover the pan with a lid and let the beans cook on a low flame till they turn soft. You might not have to add water separately as the beans have enough moisture stored in them, but do check. If you feel they are burning, sprinkle a little water.
  5. Now grind the soaked Usli ingredients with enough salt and add water to form a coarse paste. Do not add too much water as the next step is to steam cook them.
  6. You can make idli-like patties of the dal paste and use a idli stand to steam them or you can just layer the paste on a shallow vessel that fits in you cooker. Steam cook for abt 10-15 mins. ( To check if the dal mixture is cooked, dig a knife into it. If it comes clean without any of the grains sticking onto it, the mixture is cooked else steam cook it for some more time )
  7. Once the steamed dal idlies cool down crumble them. Heat some oil in a pan and add this crumble, saute till all the moisture is lost. This might take 4-5 tablespoons of oil. An alternative method is to use the oven. Take the mixture in a baking dish and cook it in a oven at 300 deg C for about 8-10 mins or till you feel all the moisture has left. This step adds crunch to the Usli.
  8. By now your beans should be ready, dont forget to check on them at regular intervals. Once the beans are soft add the Usli mixture and mix well. Check to see if there is enough salt.
  9. Garnish with coriander leaves.

Note:
  • You can add some baking soda to the green beans while cooking them if you wish the retain the green color.
  • Using the oven for removing the moisture from the Usli can avoid the use of oil making the recipe low cal.
  • You can increase the Usli ingredient measure and store the Usli in air-tight containers in your freezer. It stay good for a couple of weeks. The mixture can be used with veggies like Cabbage, banana flower, raw banana (boiled & grated)
  • This dish is dry and so goes best with liquid-based dishes like Sambar, Tamarind based Pulusu/Kozhambu, Majiga pulusu/Mor Kozhambu.
Jihva for ingredients
Blogging tips