Showing posts with label vegetarian/vegan friendly. Show all posts

Wednesday, August 06, 2014

Farmstand Summer Salad

Dear Foodies,


The recipe for this salad was nothing more than putting together ingredients in my market tote. Everything was perfectly fresh, picked right that morning at their peak flavor. There was not much I needed to do to enjoy a good lunch. My neighborhood market is a short 10 min walk from my apartment. It opened the week I moved to the area 3 years ago and though it has changed locations a few times, its still within a 5mi radius. A couple of farms have become market regulars and bring in their fresh produce, likely picked that morning. Even if I don't need groceries for the week I stop by to see whats in season.

Buying veggies and fruit at the market is not necessarily cheaper than at the stores but freshness cannot be beat. More importantly it makes you relearn seasonality charts which are easy to forget when you can buy out of season produce shipped in from around the world at grocery stores. And a bonus if you still need one is finding lesser known varieties of fruits, vegetables and greens that never make it to large scale grocery stores. The lemon basil I used in this salad is a perfect example of that. I'd never heard of it before but the minute I walked up to the table the fragrance from the herb was hard to ignore. It's less peppery than regular basil with a big punch of lemony, floral notes and is perfect in raw preparations.


One other bonus I'm embarrassed to admit is getting my evening snack fix from samples laid out - candy-like tomatoes, crunchy pea pods and sugar snap peas, variety of citrus segments, berries even some fresh pita chips and dip! The difference in taste between produce at the market and grocery store is unbelievable. With a strong CSA subscription and a regular flow of people stopping by to pick up weekly groceries, farmers can confidently harvest produce without any pressures of having to transport them many miles away. Its a perfect win-win for both parties while also establishing a sense of community. I'm usually scrambling to get there by closing time but when I do have a few minutes to chat I get tips on how to cook unfamiliar ingredients, gardening tips to salvage my brown thumb or an extra handful of beans or a sprig of herbs thrown in.

I had some cooked chickpeas on hand and decided to include it to make the salad substantial. I lightly roasted them in a cast iron pan along with a little oil to get them crisp around the edges. I roasted shucked corn as well to add in the salad. If you had an outdoor grill/grill pan you could grill them first instead. I happen to love charred corn flavor but you could skip this entire step and use them raw...choose your favorite method.

I made a simple lemon+olive oil dressing perked up with red pepper flakes and tangy chaat masala for an Indian twist. Any combination of fresh herbs you like should work here. I used cilantro that I always have in my fridge and potent lemon basil from the market. This salad tastes better when made ahead and set aside for at least 30 mins up to a couple of hours. I stored leftovers in the fridge and had it for lunch next day and it tasted really good.

 I used a couple of crunchy Kirby cucumbers in this salad and made a quick pickle out of the rest using this recipe. Some cukes tend to have a bitter edge to them and I use my Dad's trick when prepping to get around it. I begin by slicing off both tips, take one end bit and rub it against the opposite end in a circular motion about 4-5 rounds. Repeat using second end bit on the other end. You'll see a slight foam form around the edges and its supposed to be the bitterness getting drawn out. Wash it under running water and slice as needed. I never cared to research if science backs this up but also don't recollect ending up with a bitter cuke after using this method.
Farmstand Summer Salad
Prep Time - 15 mins
Cook Time - 20 mins
Servings - 2-3 (main) 4-5 (side)
Ingredients:

  • 12-15 - Heirloom cherry/grape tomatoes or 2-3 regular sized
  • 1 ear of Corn, shucked
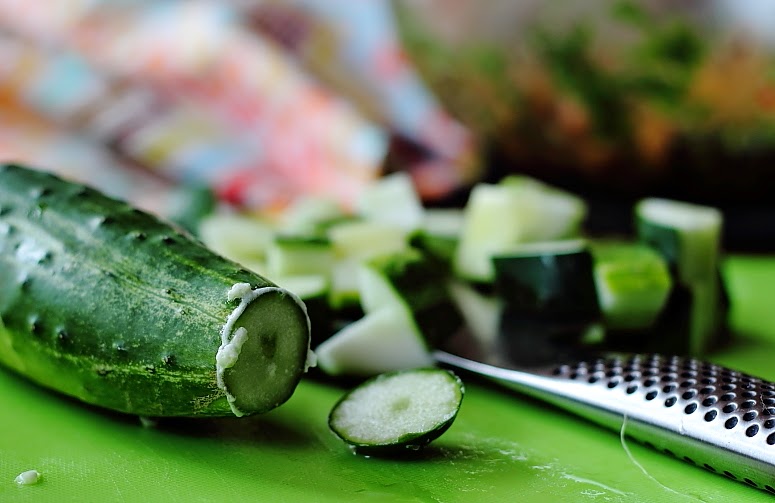
  • 2 - Kirby cucumber (~approx 1 cup diced)
  • 1 cup - Chickpeas, cooked
  • 6-8 - mini Mozzarella balls, halved
  • 1/3 cup - chopped herbs. I used Cilantro and Lemon Basil
  • 1 Tbsp - Oil
  • 1/4 tsp - Turmeric (optional)
  • Dressing - 2 Tbsp Lemon juice, 2 Tbsp - extra virgin Olive oil, 1/2 tsp Salt, 1/4 tsp Black pepper, 1/4 tsp Red pepper flakes (optional), 1/2 tsp Chaat masala
Method:
  1. Heat a cast iron pan to medium heat with a tablespoon of oil. Add cooked, drained chickpeas, 1/8 tsp turmeric and roast for 8-10 minutes tossing every few minutes till lightly browned on all sides. 
  2. Whisk together all dressing ingredients in a bowl big enough to hold finished salad. Once chickpeas are done add to bowl and toss gently. 
  3. Add shucked corn to the pan with remaining 1/8 tsp turmeric. Saute for 6-8 mins until lightly charred and add to dressing bowl. 
  4. Allow to cool slightly before adding diced tomatoes, cucumber, herbs and cheese. Toss all ingredients together and adjust seasonings to taste. Cover and set aside for at least 30 mins at room temperature or in the fridge if serving cold. 
  5. Serve with freshly shucked corn as a garnish and toasted bread on the side.
Note: I used turmeric for color and it can be left out if you don't have it. Add chunks of lightly toasted cubed bread for a take on panzanella. Diced avocado, jicama and red onion would also work well here. This salad travels well and can be made ahead for a picnic or potluck.

This salad hits different notes on the flavor and texture palate and only gets better as it marinates in the dressing and fresh tomato juices. Though chaat masala may seem out of place in a salad it pairs perfectly with tomatoes and corn and of course its best friend cilantro and lemon. I made this three times in 10 days and will continue to make it as long as I can get my hand on these fresh ingredients. Its become my favorite lunch to pack and I'm going to miss it once summer is out!

Monday, February 10, 2014

Quinoa & Lentil Pilaf

Dear Foodies,

 
I've been bringing home big bunches of menthikura (fenugreek leaves) from my trip for Indian groceries. During the off season I get a miserly 20-25 sprigs for 2$ and now its thrice that quantity for the same price. So now I'm trying to find new recipes since the usual suspects -  andhra style pappu, aloo methi fry, methi malai paneer have been covered. For lunch last week I was looking to use quinoa instead of rice and decided to make this puloa/pilaf.

To cook quinoa by first toasting the seeds in a dry pan. This adds a nice nuttiness and also keeps them from turning into a mush if cooked a few extra minutes. As they toast the seeds begin to pop which is my cue to take them off the heat and rinse them under cold water. Based on the batch/brand that you buy you may have to rinse the seeds multiple times to get rid of the bitter outer coating. Once water runs clear I add water in the ratio of 1:1.5 and bring it to a boil. Add salt and whole spices or spice powders at this stage for extra flavor. Then set to lowest heat setting, cover and cook for 15-20 mins until all the of water is absorbed.

I had a huge bunch of methi leaves, freshly shucked peas and carrots on hand. Quinoa is a good vegetarian source of protein but I bumped it up with whole green lentils. Cook them in twice the amount of water, bring to a boil, add salt/spices and simmer for 10-15 mins until al dente i.e., they still retain a bite. Technically you could cook the lentils along with quinoa but they tend to discolor the cooking liquid and I did not want that. I was cooking a bigger batch of lentils to use later anyway so it worked out well.
Quinoa - Lentil Pilaf
Prep time - 10 mins
Cook time - 15-20 mins
Serves - 2
Ingredients:
  • 1 cup - Quinoa, cooked; (see note above for cooking method)
  • 1/2 cup - Brown/Green lentils, cooked
  • 1 cup - Fenugreek/methi/menthikura leaves, packed
  • 1/2 cup - Carrots, grated
  • 1/4 cup - Green peas
  • 1/2 tsp - Coriander powder
  • 1/4 tsp - Mustard seeds, Cumin seeds
  • 4-5 - Curry leaves
  • 2 - Green chilies, slit lengthwise
  • 1/2 tsp - Urad dal (Ivory lentils)
  • 1/8 tsp - Turmeric powder
  • 1 Tbsp - Peanuts and Cashews
  • 2 Tbsp - Olive Oil
  • salt to taste
Method:
  1. Cook quinoa and lentils separately. (See my notes above for cooking method)
  2. Heat oil in a wide saute pan on medium heat, add mustard and cumin seeds. Once the seeds begin to splutter add urad dal, peanuts and cashews and toast until reddish brown. Add turmeric, curry leaves, green chillies, methi leaves and saute for a few minutes. Grated carrots and peas go in next along with coriander powder and salt. Cover and cook the vegetables for 6-7 mins on medium-to-low heat.
  3. Add quinoa and lentils, mix thoroughly and cover again for 8-10 mins on the lowest heat setting to allow flavors to meld.

I enjoy the crunchy texture of quinoa and its perfect here with the mild bitterness from the fenugreek leaves, sweet peas, earthy lentils and occasional cashews and peanuts. I used a mandoline and not a grater to shred carrots which helps them retain their shape and stay separate when cooked. I served this with a dollop of labneh with pomegranate seeds. Yogurt would have been my go-to choice if I hadn't run out of it. Pomegranate seeds added a bit of tartness which is nice here, or a wedge of lime would do the trick too. And if you think I've focused more on the fabric than the dish itself in these photos then your not totally wrong :D I fell in love with the print and had to buy it though I have no clue what I'll use it for!

Tuesday, August 27, 2013

Simple meals | Soba Noodle Salad

Dear Foodies,


The last few weeks our grocery shopping has been an exercise in self control, well, when is it not actually. On each trip, my dad and I come back with a couple of bags of fruit.  To get all our groceries we invariably end up going to a couple of stores in the area. And its extremely tough not getting tempted by the variety of fruits found in each. We seem to be at a perfect point in the season where summer berries are sharing the space with wonderful fall stone fruit. Mangoes and lychee's from the Asian market, plump raspberries, blueberries, strawberries, blackberries and melon at the neighborhood Sprouts and ripe peaches, nectarines, plums, plouts, plumcots(!) from Tarder Joe's. It's come to point where my mother has had to intervene and place a ban on fruit buying (huh!).  But we still sneak some in cos there's just too much fruit to pass up and not enough time to enjoy all of it. psst...mango is still the winner :)

We are also eating our way through the amazing produce from our trip to Suzie's farm a few weekends back. The ripe tomatoes went into a traditional South Indian pachadi/pickle (recipe soon), enchilada sauce (this too!), green tomato chutney, rasam, sandwiches, salads and many more. In fact, no matter what we cooked in the last few weeks, tomatoes and peppers found a way in. A few beets, eggplants and peppers are still hanging around and I want to give this gorgeous looking pickled slaw a try soon. But in the mean time, here is a super simple summer noodle salad. It does not need much cooking and is great at room temperature or cold. I start with soba noodles that are made from buckwheat and have a nutty flavor and a slight chewiness when cooked. Did I mention it barely takes 4 mins to cook them ? In the time it takes for the water to come to boil and cook the noodles, the veggies and dressing can be prepared. Quick, simple and flavorful.

Soba Noodle Bowl
Prep time: 20 mins
Cook time: 10 mins
Ingredients:-
  • 2 bundles (3.1oz each) - Soba noodles
  • 1/2 cup - Onions, sliced
  • 1/2 - Red pepper, sliced lengthwise
  • 10-15 - Snow peas, vein removed and sliced in half
  • 1 Tbsp - Toasted sesame oil
Dressing:-
  • 2 tsp - Toasted Sesame oil
  • 11/2 Tbsp - Tamari sauce or Soy sauce
  • 2 Tbsp - Tahini or Peanut butter or Almond butter
  • 1 Tbsp - Lime juice or Rice Vinegar
  • 1-inch knob of fresh Ginger, finely grated
  • 1 tsp - Sriracha hot sauce or 1/2 tsp - Red chilli flakes (adjust to taste)
  • 1 tsp - Honey
  • 1/3 -1/2 cup - Noodle cooking liquid 
Garnishes:-
  • 2 stalks - Scallions, green and white parts sliced
  • 1/2 cup - Cilantro, coarsely chopped 
  • 2 tsp - Sesame seeds
Method:-
  1. Bring water to boil in a pot deep enough to hold the noodles.
  2. In a large mixing bowl, add all dressing ingredients and whisk to combine. If the tahini or nut butters are clumpy and the choice of pots allows it - carefully place the bowl on the pot of water to gently heat and loosen the dressing. Otherwise, microwave for 15-20 seconds. Taste test and adjust quantities to suit your taste. I tend to add more lime juice and ginger.
  3. Blanch snow peas in the near boiling water for just a minute or two. Fish them out and add to the dressing bowl. Next add the noodles and cook to package instructions.
  4. Heat sesame oil in a shallow, wide pan on medium-high heat. Add onions and peppers to it and stir fry until slightly tender yet crunchy. Transfer to the dressing bowl. Toast sesame seeds in the same pan until lightly browned. They'll start jumping out of the pan at this point anyway :) Reserve for the final garnish.
  5. Once the noodles are ready, reserve 1/2 cup of water and drain the rest. Rinse noodles under cold running water and add to the dressing + veggies bowl. Toss gently to coat the noodles with the dressing, adding noodle cooking water as needed.
  6. Garnish with chopped scallions, cilantro and toasted sesame seeds.
Note: Swap in other veggies but make sure pick a few that are crunchy. You can also add crushed, roasted peanuts for garnish. I've made this recipe with all three choices - tahini, peanut and almond butter and they all tasted good.

This has become one the recipes I go to when a quick, flavor packed meal is needed. Its fresh, colorful and has lots of textures and flavors that will keep you going back for more. I've become a huge fan of the ginger-soy combo after I made this for the first time and have used it in this salad recipe too. The ingredients in the dressing are things that I have begun to stock in my pantry and I always have a few packets of soba & udon noodles from the Asian market. With the addition of a few veggies its a quick lunch or dinner in the making. Since its good at room temperature or cold, and sans garlic, its a great lunch box dish as well.

Monday, August 19, 2013

Tostadas with Guacamole, Red Cabbage slaw & fresh Corn

Dear Foodies,


Have you been to a horse race ? We were there a few weekends back and surprisingly had a good time. I don't think I would go back there every weekend, but it was a good one time thing to do. I don't gamble much, I could just as well through some cash out the window and it'd be the same. But that said, we wagered a couple of dollars on a few races that day. My dad found a few websites that offered free tips for each race. Some could not have been more off the mark, the one they picked to come 1st came 6th in a 8 horse race...ughh. We ended up with happy coincidences on some picks though - I whopping $3.60 on a $2 wager...hehe. They have 8 races each evening, one every 30 mins, that gives a rookie just enough time to figure out which horse to pick and place your wager. We had a nice time and enjoyed the first 4-5 races of the day. It took us awhile to figure out what was going on but we soon caught on and knew what win, show, place stood for and even the special quinella, trifecta and exacta meant. We tried a few combinations on each race until we were tired of losing and got out. By the 7th race we were done and left before the final race for the day.  Every summer my evening drive home is disrupted by this event - the amount of traffic is crazy, taking me twice as long to get home. Now I know whats its all about but still don't get where the money comes from! Even in the midst of a recession, $458 million was wagered at the race track last year, that is nearly $13 million a day!


Instead of corn tortillas I picked up these tostadas at the store. I had never tasted them before and was intrigued by the idea of having a crunchy chip as the vessel for toppings. Part of the reason I like corn tortillas is probably the smaller size. The fillings tend to be what I like the most about taco's. I'd rather have less tortilla and more filling and these tostadas are even better because of the crunch they bring. They are light and still surprisingly sturdy enough, allowing you to pile on the toppings.

A tostada is a fried tortilla that can be loaded with goodies. Its like an open faced taco with a crunchy shell giving you more room for filings which are essentially the best part. When you need a light lunch or snack to get you through a busy summer day a tostada is your answer. With the bounty of avocado in the markets here I make guacamole very often and with a few other ingredients I can have a fun meal ready in 15 - 20 mins. If you don't find pre-made tostada's in your local stores you can lightly fry store bought corn tortilla's as shown here. But finding ready made ones would be ideal in making this a quick meal to put together.


This dish has a few of my current favorites - guacamole and red cabbage slaw. Its perfect for picnics or do ahead scenarios as you can make and store all the components ahead of time. And more importantly, it looks stunning on the plate ;-) It could also be a great addition to a 'taco party' menu. I keep the guacamole simple with lots of cilantro and lime juice. A hint of cumin and diced jalapeno round up the spices for me.

Summer Veggie Tostadas
Prep time: 20 mins
Ingredients
  • Tostadas
  • 1 cup - Guacamole (recipe below)
  • 1 cup - Mexican cabbage and Jicama slaw
  • 2 - Corn on the cob, roasted (oven/grill) or microwaved whole in the husk
  • 3 - Spring onions - greens only
  • Feta cheese
  • Hot sauce (optional)
Guacamole
  • 2 - Avocados
  • 1-2 - Limes
  • 1/4 cup - Cilantro, roughly chopped
  • 1/2 tsp - Jalapeno/Serrano, minced (adjust to taste)
  • 2 Tbsp - Onions, finely diced (optional)
  • 1/4 tsp - roasted, Cumin powder
  • Salt to taste
Method:
  1. Roast or char grill corn or microwave in the husk for 3-4 mins as I did for this recipe. Once cool to handle, slice off the kernels with a sharp knife. 
  2. For the guacamole, combine onions (if using), minced chilies, cumin powder, salt and half the lime juice in a bowl. Using the back of your spoon apply gentle pressure to crush them together. This helps to draw out the juices. Add peeled and roughly diced or scooped out avocado to the mix and toss together. I sometimes go for a smooth texture and use a fork to mash everything together or when I want a more chunky guac, I add diced avocado and fold it into the other ingredients. Add more lime juice to taste, I prefer more of it.
  3. To assemble, apply a generous smear of guacamole on the tostada, top it with a few spoons of the cabbage slaw. Add as much of the corn and cheese and complete it with a sprinkle of spring onion greens and a few drops of hot sauce(optional)

This was a super nice spin on ingredients used in these tacos. The tostada's are surprisingly sturdy and did not fall apart in my hand and neither did they turn into a soggy mess. The sharp hint of lime in the guacamole and the slaw brighten up the dish and the fresh summer corn is a burst of sweetness. I had some mild feta on hand and it turned out to be a nice addition to the tostada. This is more of a technique or idea and could be used as a perfect vehicle for all the fresh produce in summer and fall.

What's your current summer favorite go-to meal ?

Friday, June 14, 2013

Corn Tacos with Mexican Slaw & Poblano Dressing

Dear Foodies,


I've been waiting all year long to share this recipe here. I discovered fresh corn tortilla's and tacos last summer and they were my staple food for a good month or two. But it was way past fresh corn season by the time I got around to putting the recipe together. This year I hope its right not time so you guys can enjoy it as much as I do. Summer in SD is not until July or August, we are going through what is called June 'gloom' right now. Overcast days with 60-65F temperature hardly feels like summer. One look at the farmers market stalls though and you'll know otherwise. Just like summer and mangoes will go hand in hand for me, its fresh summer corn that I look forward to here. The kernels are so tender and juicy that they hardly need any cooking. When separating the kernels form the corn, a good portion of it ends up being a snack. I nuke them in the microwave for 2-3 minutes while still in their husks sometimes. Once cool to handle, remove the husks, slide half a lime through the kernels, sprinkle salt, chili powder and call it dinner.


This taco recipe is filled with some of my favorite components. A stunning slaw has just three main ingredients - purple/red cabbage, carrots and jicama. I started using jicama only last year after watching a Mexican food show on TV. I had always seen them next to cauliflowers at the local store here but never really paid them notice. Eaten raw, jicama is super crunchy and has a mild sweet flavor. It's rich in fiber and adds a wonderful texture to salads. I dress the salad with a sharp lime dressing with lots of cilantro and a hint of cumin and chile powder to add zing. This simple slaw is clearly greater than the sum of its parts. Its perfect for picnics or do ahead scenarios as the veggies are sturdy enough to hold up against the acidic dressing for a few hours. And more importantly, it looks stunning on the plate!


If you make nothing else from this recipe, you should at least try the poblano dressing immediately. I use poblano's instead of green bell peppers in quesadilla's or stuff them with the sauteed corn and red peppers, a little cheese and bake them for a quick dinner. Once the poblano's are grilled/broiled it takes 5 mins to make the sauce. I use thick homemade yogurt, scallions, a lot of cilantro, some lime juice and roasted cumin powder. A few recipes call for garlic but I don't like its pungent flavor in raw form and avoid it here. Throw everything in a blender jar, give it a few pulses until the sauce to smooth and creamy. And its ready to be used as a salad dressing or a condiment for burgers and sandwiches.

For these taco's, I separated the kernels from the cob and charred them in a dry pan. Seasoned them lightly with salt and pepper. The star of the dish though are the vibrant slaw and poblano chile dressing that packs a punch. I make both every few weeks and store in the fridge for a few days. I made the slaw for a event at work a few weeks back it was enjoyed by all.

Corn Tacos with Mexican Cabbage slaw and Poblano dressing
Prep time: 45mins
Cook time: 15mins
Servings: 3-4
  • Corn Tortillas
  • Roasted/Charred corn (on an open flame or kernels sauteed in a dry pan)
  • Radish sprouts or any other kind of your choice
Mexican Cabbage-Carrot-Jicama Slaw
  • 1/2  - small head of Red cabbage, thinly sliced, approx. 3 cups
  • 1/2 - Jicama, julienned, approx. 1.5 cup
  • 3 - Carrots, julienned or shredded, approx 1.5 cup
  • 1/2 cup - Cilantro, roughly chopped
  • 1/2 tsp - Jalapeno/Serrano. minced or mexican red chile powder (adjust to taste)
  • 1 tsp - roasted, Cumin powder
  • 2-3 - Limes, juiced
  • 2 Tbsp - Olive oil
  • Salt to taste
  1. For the salad dressing, combine lime juice, olive oil, salt, chile and roasted cumin powder. Adjust seasonings to taste. I tend to use more lime juice in mine. Toss together all the veggies, cilantro and half the dressing adding more as needed. Set aside for 30 mins at room temperature or refrigerated to develop flavors.
Poblano Chile Dressing
  • 3 - Poblano chiles
  • 1 - Scallion
  • 1/2 cup - Cilantro leaves and tender stalks
  • 1.5 cups - thick plain Yogurt or (3/4 cup buttermilk + 2 Tbsp sour cream)
  • 1/2 tsp - freshly roasted Cumin powder
  • 1-2 Tbsp - Lime juice
  • 1/4 tsp - Garlic, grated (optional)
  • Salt to taste 
  1. Roast poblano chiles over a gas flame or under the broiler until charred all around. Transfer while hot to a bowl and cover with plastic wrap for 10mins. Once cool to handle the peel should come off easily, discard the seeds and membrane as well.
  2. Transfer coarsely chopped poblano, scallions, cilantro and yogurt to the blender jar and process until smooth. Add salt, lime juice and cumin powder to taste. Use immediately or store refrigerated in an air tight container for up to a 1 day.
Warm the corn tortillas lightly to make them pliable again. This can be done on a skillet or cover a stack of them in aluminum foil and place in a warm over for 10 mins. Spread out all your fixings on a table for a taco bar or assemble them as you go. Place a spoonful of slaw on the taco, top with charred corn, radish sprouts and finally drizzle a spoonful of poblano chile dressing over all of it, right before serving.

Notes: Swap charred corn with roasted onions & peppers or marinated and cooked tofu/mushrooms or crisp sauteed potatoes or well, the choices are endless. You can also add a zippy guacamole tomato salsa or tomatillo salsa as topping additions.

This is a perfect summer dish loaded with crunchy veggies and vibrant flavors that keep these tacos light and refreshing. Since its all about the fillings I like to use smaller tortilla's and prefer the flavor of corn tortilla's over flour. There are no strict rules with this though so make it your own and use flavors and ingredients you enjoy. Each component is good on its own too and can be used in many other forms. If I have left over salsa's and roasted corn or peppers I make a burrito bowl with the addition of black beans and rice. Add some steamed edamame, cranberries and toasted slivered almonds to the slaw for a light mid-week lunch.

Wednesday, December 12, 2012

Simple meals | Orecchiette in Arrabbiata sauce

Dear Foodies,


I try to cook almost everyday since time in the kitchen helps me unwind and relax. Keeping track of what ingredient goes next, what needs to be washed, chopped, grated, pureed...enough salt ? spice ? With all that happening there's no choice but to throw out all of the days worries. At the end of it all there is a nice meal to enjoy as well, so its a win-win. That does not apply to the clean up that follows, but lets not go there. On days when I want a meal done asap all inspiration is lost on me though. I get into a mechanical mode reaching out for a few selective dishes. There is no energy expended in planning for them. Traditional Indian meals that my mom made fall under that category for the most part - Pappu or chaaru or sambar and plain annam (rice), a quick stir-fry of cabbage or beanskichadi + kadhi are some of them.

Over the last few years I have added a few more dishes into this category. I make a mixed veg quinoa quite often throwing in any veggies I have on hand and the first masala I find in the spice cabinet. And then there is pasta...


it could be the new rice...the new guilty pleasure :) And I say that as I don't always be good and use whole wheat pasta. But whichever one you choose its always quick to make as most dry pastas cook in less than 10-12 mins. And more often and not that's how long I take to prepare a sauce to go with it. So with that I start this 'Simple meals' category which will make use of pantry ingredients and not take too much hands on time.

There is this tiny cafe next to the grocery store I shop at and they make the best gnocchi I've had. Its served in an arrabbiata sauce that has the right amount of heat and the gnocchi ...oooh the gnocchi. It just melts in your mouth and it has a snow like grating of cheese on top that seals the deal. This weekend when the weather was gloomy and cold all I wanted was a warm plate of pasta in a zesty sauce. I did not have gnocchi and so I used orecchiette but feel free to use any pasta you have on hand. Its the sauce that is the magic component here.
Orecchiette in Arrabbiata sauce
Cooking time - 20mins
Servings - 2 
Ingredients:
  • 2 cups - Orecchiette (or any dry pasta) 
  • 4 - Plum tomatoes
  • 2 - Garlic, cloves, finely chopped
  • 1/2 tsp - Red chilli flakes
  • 1/4 tsp - Dried Oregano
  • 2 Tbsp - Olive oil
  • Salt to taste
  • Pinch of sugar
  • Toasted pine nuts
  • 5-6 - Basil leaves, chopped
  • Freshly grated Parmesan/Asiago cheese
Method:
  1. Bring water to a rolling boil in a deep pot, add about a Tbsp of salt, dry pasta and give it a stir. Cook per package instructions.
  2. In the mean time, add oil to a pan along with garlic and red chilli flakes. As they begin to sizzle add chopped tomatoes and a small pinch of sugar. Continue to cook until the tomatoes soften and break down. Crush oregano in your palm and add to the sauce and season with salt to taste.
  3. Save about 1/2 cup pasta water and drain the pasta a minute or two before its done. Add it to the tomato sauce along with 1/4 cup reserved pasta water and continue to cook until pasta is al dente. Add more water as needed to achieve desired consistency.
  4. Transfer to a serving dish and garnish with chopped basil, toasted pine nuts and fresh grated cheese.

This is an uncomplicated, hearty meal for a cold, gloomy day. Arrabbiata is nothing but a spicy marinara and this sauce can be used as a dipping sauce or on pizza's as well. There are very few ingredients in this recipe and so each of them counts. Use plump, ripe tomatoes is available, canned tomatoes will also work. Fresh basil and toasted pine nuts complete the dish. I love pine nuts and usually add a few extra to my bowl. The basil, shockingly came from my ever-brown garden. I had given up on the basil and had even stopped watering the plants and surprisingly I saw it spring back to life. The cheese is optional but a light sprinkle on warm pasta is tempting. What are your go-to simple meals ?

Friday, July 20, 2012

Sprouted Quinoa & Oats Granola

Dear foodies,


My blog seems to be a on health kick and I don't want to break its stride. We've covered a few salads but lets focus on the first meal of the day - breakfast. I've tried numerous cereals and still haven't found the one. Winters are easy, all I need is a warm bowl of oatmeal with some dry fruits on top and I'm happy. But the rest of the year is a mash up of many different breakfast finds. When in grad school nothing could beat Honey bunches oats with Almonds, well except Raisin bran crunch. We (roomies) would have it every single day and somehow did not tire of it. Never once did we complain while going through box after box of them. And then once I moved out I couldn't have another morsel of that cereal again! I had probably hit the quota limit for one kind of cereal and ever since the search for the next continues.

The first time I made granola at home I was pleasantly surprised by how good it was and more importantly how easy it is to make. Since then I've made numerous batches each different from the other. I pick up a cup of so of dry fruits from bulk bins and store them in refrigerator.

After experimenting with multiple batches I've narrowed my list down to using two type of nuts and dry fruits in each batch. Having this equation cuts down my confusion and makes it easier to get a batch done. The only constant in the last few batches has been crystallized ginger. I dice the chunks into tiny bits that disappear in the granola and the spice hits you by surprise when you bite into it. Switching out the combination of nuts, fruits and even the sweetener keeps it interesting. I've used honey, maple syrup, brown sugar, apple sauce and for this recipe Pomegranate molasses as a sweetener. I keep a jar of granola on the kitchen counter and a box at work. When the snack craving hits I don't have to look too far for something healthy to munch on.


I've always used rolled oats as the bulk of the granola but with plenty of quinoa on hand I decided to experiment. Cooking quinoa was out of the question for a granola so I decided to sprout the seeds instead. Sprouting, in general helps our body absorb nutrients a lot easier by breaking down some of the enzymes. And quinoa seeds are the easiest to sprout as they need a relatively short time. A 15-20min soak in water after a good rinse helps hydrate the seeds, overnight works too. Spread them out on a piece of clean cloth, cover to block any light and keep away from sun light for 4-8hours. If the conditions are right you could see tiny sprouts in just 4-5 hours. Its recommended that the sprout not be longer than the seed for consumption. Given the teeny tiny size of the seeds themselves tiny sprouts are just what we want. Sprouted quinoa can be used in various recipes like this granola or salads and stir-fries. Store unused sprouts in the refrigerator and use within 2-3 days. I've been adding about 2Tbsp to my breakfast smoothie for extra protein and it tastes just as good.

Oats are a great source of thiamine, iron, and dietary fiber making them perfect for breakfast foods.

Before                                                                                                      all decked out after baking
Sprouted Quinoa & Oats Granola
Prep time: 1 day ahead
Cook time: 40 mins 
Servings - makes ~6 cups
Ingredients:
  • 3 cups - Old Fashioned, Rolled Oats
  • 1 cup - Quinoa
  • 1/2 cup -each of Almonds, Pecans coarsely chopped
  • 1/3 cup each Cranberries, Raisins, coarsely chopped 
  • 2 Tbsp - Crystallized ginger, finely diced
  • 2 Tbsp - Flax seeds
  • 1 Tbsp - Orange Zest
  • 3 Tbsp - Butter
  • 2 Tbsp - Oil, Honey, Pomegranate molasses
  • 1 tsp - Vanilla extract
  • A pinch of salt if using unsalted butter
Method:
  1. Approx 8-10 hours ahead - Thoroughly rinse quinoa and set to soak for 20-30mins (can be left overnight). Drain water and spread the seeds on a clean kitchen towel. Cover and keep away from direct sun light for upto 8 hrs. When you see tiny sprouts they are ready to use, you can begin checking after 4-5 hrs. If you don't see any sprouts after 8 hrs then rinse, drain and repeat the process of spreading them out for another 8 hours.
  2. When ready to make granola, Pre-heat oven to 325F
  3. In a huge microwave safe bowl, combine butter & oil, microwave for 45-60secs. Add honey, pomegranate molasses, vanilla extract to melted butter and whisk together. Add the dry ingredients (excluding dry fruits and orange zest) and mix together coating them with some of the wet mixture. 
  4. Spread the mix evenly on a baking sheet lined with parchment and place in the center rack of the oven. Bake for 30-40 mins, flipping it every 10mins. Once you begin smelling the toasted nuts and oats check to see if they've turned a light brownish hue. 
  5. Remove pan from oven and sprinkle chopped dried fruits, finely grated orange zest and combine. The oats may not be crunchy right out of the oven, let them cool a bit to dry out and get deliciously crunchy.
  6. Store in an clean and dry air tight container on the counter for upto 2 weeks or move to the refrigerator for longer shelf life.
Note: This recipe makes a mildly sweet granola leaning on dried fruit for sweetness. Pomegranate molasses also adds sweetness and a mellow tartness to the granola which I enjoyed. On its own pom molasses is extremely tart, making you pucker and the taste reminds of rola cola/purple poppins I had as a kid.
If I want chunks of granola I pulse about 1/2 cup oats or add almond meal and pack the granola mix in the baking sheet before it goes in the oven. Being extremely gentle when flipping ensures that the chunks hold up.
Millet can also be sprouted and used here but it takes longer to sprout compared to quinoa so plan ahead.
Tart, sweet, crunchy, colorful and healthy...can't ask for more from one recipe. Enjoy it on its own or use in other recipes, either way its a winner. Layered with fresh summer berries and homemade yogurt you have a perfect summer parfait to cool you down. Citrus zest and pomegranate molasses add bright bursts of flavor and pair really well with other fruits. You would want to stop and relish this for breakfast instead of rushing out the door. So customize this recipe to your liking and let me know what your favorite combination for granola is ?

Friday, July 06, 2012

Friday Frames | Summer Colors


Dear Foodies,

Don't you love that yellow ? It's a piece of sunshine you can hold in your palm

Jewel colored radishes, almost too pretty to eat, almost...

With nature doing all the work for us, I only did the assembling. No cooking needed. I got a huge bunch of basil and made pesto with a punch of lemon zest. This platter is my very poor interpretation of a veggie sampler plate I had at Burlap.

ending the meal with some sweet cherries.

Saturday, March 17, 2012

Vegetable & Quinoa Cakes | Guest post for Anu @ Truth Personified


Dear Foodies,


The last few weeks have been overcast and the temperatures have been lower than usual. Cloudy skies and rain conjure up the need to wrap your hands around a warm cup of tea and crispy, crunchy snack to go with it.  I've been on a quinoa cooking spree lately and trying to use it in as many recipes as possible. This recipe is a result of one such attempt that turned out to be most delightful of them all.


Quinoa (keen-wah) though often grouped into the 'whole-grain' club, is really a seed of plant closely related to beets and spinach. The ancient Incan's considered it scared and gave it the name Quinoa which meant 'mother grain'. I guess the confusion of seed vs grain started early :) In recent times, this South American crop has gained popularity due to its nutritional value. Its a rich source of protein, essential amino acids and contains more fiber, calcium, phosphorous, iron and magnesium compared to wheat, corn or barley. Being naturally gluten-free makes it easy to digest and in general a better choice compared to other cereal grains.

Having been around for such a long time proves that these seeds have learnt to survive. They have a bitter outer coating which keeps birds away from them in the fields but when it comes to cooking with it, that coating needs to come off. Most quinoa that we get in the stores now is processed to take away this bitterness but it still needs a good wash under multiple changes of water (as you would with rice).

 The cooking process is very similar to rice as well, but I like to toast the seeds first to enhance their nutty flavor. So before rinsing, toast them in a dry pan for a few minutes until you hear them 'pop', and then wash under multiple changes of water. While cooking them I use less water that I would with rice, I've had success with 1:1.25 of quinoa to water and that keeps the seeds separate & fluffy.


Quinoa is pretty versatile but it takes some getting used too in terms of flavor, specially if you are a rice lover like me. It has a nutty, slightly bitter and mildly crunchy texture, which now is what I like about it. I try to treat it like rice and substitute it in recipes for tomato rice, mixed veg pulao, chinese/thai fried rice, sambar rice and even pulihora/tamarind rice rice. I was cooking some quinoa for lunch one cloudy, rainy day and decided to make mini cakes with them instead. Chopped fresh fennel bulbs, onions, ginger, garlic and carrots went into it along with some spices. To prevent the mixture from getting too moist I used lemon zest instead of juice. For a binding agent, I did not have bread or breadcrumbs at home and remembered that I loved the nutty toasted besan/chickpeas flour in these corn cakes. Finally, along with some freshly grated parmesan cheese and roasted peanuts the cutlet came together beautifully!

Around this point is when I would jump to the recipe, but this post is special since its headed to Anu for her blog. Many of you might already know Anu from her enthusiastic comments and stories that she shares. She's the author of the blog Truth Personified and there could not have been a more perfectly suited name. Her genuineness and curiosity is what makes her blog a pleasure to read.  I'm sure once you read the stories & recipes she shares, you will be persuaded to stay on. I knew Anu way before either of us blogged, we went to the same high school and later the same undergrad college as well. But we were in different batches and never really got to spend time together. It was again through her comments on my blog that we got in touch again. I was thrilled when she asked me to guest post but the excitement soon turned into major procrastination and I'm glad that she still held on to her invite :D So as a first step, I'm sending over a recipe to her space and hope that eventually we'll get to meet in person too!

Please head over to Truth Personified for the recipe - Vegetable & Quinoa Cakes

Blogging tips