

The Jack sitting on a dollop of ...hmm..what was the flavor ??

Mini tarts filled with the Jack
Bee and Jai came up with this wonderful plan of getting all us foodies to get back and savor the fruit that has so easily and silently slipped away from our memories. And did they succeed. Every day I have been seeing a minimum of one post of the fruit. A few have been really serious about it and managed to hunt for the real fresh fruit and the rest of us have made our peace with the canned ones.When I opened my can of jack fruit I could think of no better way of eating but just as is !! But well that would not get me an entry into the event, nope ! I had seen a show on Food Network where Paula Deen topped key lime cookies with a cream cheese mix and baked them. It was a new thing to know that cream cheese could be baked. I had some ricotta cheese in my fridge that I knew would spoil if I did not use it up soon. And I had to use my hand blender you see. So I blended some ricotta cheese and cream cheese with a few flavorings to come up with this recipe. I added some oven roasted peaches and jack fruit ( I had to do something with it ! :D) and the result was yummy just like a mini cheese cake. I think the addition of eggs would have made this a perfect cheese cake.
Ingredients:
For the filling
- 4 Tbsp - Cream cheese
- 6 Tbsp - Ricotta cheese
- 1 tsp - Vanilla essence
- 2 tsps - Lemon zest
- Sugar as per taste
- 4 Tbsp - Cream cheese
- 6 Graham crackers
- 1 Tbsp - Butter
- 3 nos - Jack fruit & Peaches (washed)
- A couple of Strawberries
- Pre-heat the oven to about 375deg C. Line a baking pan with aluminum foil. Place the cream cheese and ricotta cheese out of the refrigerator to bring them to room temperature.
- Half the peaches and remove the pits. Line the jack fruit and peach halves on the pan and place them in the oven for about 20 mins or till you can see the juices in the peach bubbling.
- Also wrap the graham crackers in the aluminum foil and place them in the oven for a few minutes. This makes the butter in them to melt and makes them soft and easy to crumble. This way I could skip pulling the blender out of the cabinet ! Well you could also just wrap them in tissues and pound them to your hearts content with a rolling pin :D Which ever suits you fine, just have them coarsely powdered.
- Line a muffin pan with muffin cups and spray with some cooking oil spray. If you are patient enough use melted butter.
- Fill the muffin cups with the crumbled crackers and press down with the bottom of a cup. Place them in the freezer for a few minutes to set.
- Take a deep dish and place the cream cheese in it and blend using a hand blender until smooth. Next add the ricotta cheese and blend for a few more minutes until smooth and creamy.
- Add the lemon zest, vanilla essence, sugar and mix well. This will be a thick mixture which looks like whipped cream brought to soft peak consistency, but a lot more dense.
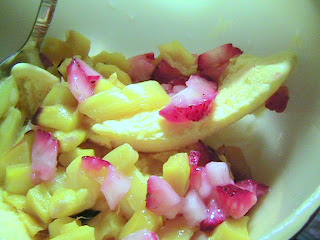
- Once the fruits are roasted and cooled, dice them up, even the fresh strawberries.
- Slice a tiny piece of butter on each of the muffin cups and then spoon the cream cheese mix. Add a spoon of the diced fruits next and then top it off with more of the cream cheese mix.
- You can go ahead and fill up all the cups to the brim as they will raise a little initially but will eventually fall in at the center forming a crater.
- Place this in an oven pre-heated to 350deg C and bake for about 20 mins or until you notice the craters and a slight browning. I placed the them on broil for the last min to get an even brown on the top.
- You can either serve them warm or chilled for an hour. I filled the crater with some mango ice-cream before serving :), you could also use some whipped cream or honey or maple syrup or....Ssshhhh


 These were really good and paired with the mango ice cream, it was fantastic. My friends and I just loved them. They really matched a cheese cake in flavor and the fruits inside were a neat little surprise. I filled each cup with a different combo of the three fruits. The roasted jack fruit was really yummy. It gave a nice bite to the otherwise smooth tart. The lemon zest was the main flavoring in the cheese mix and it brought a lot of freshness to the tarts. I loved the robust flavor they gave the filling and will surely be using them more. The graham cracker base was a perfect complement to the vary textures in the filling. Do try it out with your own choice of flavorings and fruit fillings. But make sure you have enough fun :)
I am going to send one of these out to Bee n Jai for hosting JFI this month. I can't thank them enough for getting me to buy Jack fruit here. Thank you :P and hey a final Thank you to Indira for coming up with this event in the first place :)

 This was a dish that fell into place as I was going on. I had no idea what I was making until it was done and sitting on my plate. I started out with the intention of making a curry with Soy granules. It was a long time since I had eaten it and I suddenly had the cravings for them. I checked my kitchen closet, and dug out near 3/4th pack of it. Happy, I was :), So I went about getting the veggies ready. I diced some fresh carrots, capsicum, onions, all to match the size of the soy granules, and that meant tiny cubes(Why! Oh why !! It took me such a looooong time.) Once that was ready, I thought I was all set to get the curry started. I opened the pack of soy granules so I could soak them in water as the veggies got cooked. Surprise !! It had those teeny tiny insects in it .....eeks...it was way past its shelf life ! I threw out the whole pack and then cleaned the rest of the shelf. But after all that I was still hungry and had neatly diced, cute veggies with me. I had to come up with something using all of them and decided to make it into a curry that I could add rice to,hence making it complete meal on its own. The result of that experiment was this extremely delicious rice dish. It was so wonderful that I fell in love with it right from the first spoonful. This is a must try guys.
 I had only recently discovered that coconut and garlic can be paired together and the act did not have to be termed
  The photos definitely don't do justice to this dish. I had made it for dinner and there was no sunlight, just the boring yellow light from the bulbs, I tried my best though ! I simply loved this rice dish. More so since I had no clue how it would all taste together. But I am really happy that I dint have soy granules, cos I would have missed out on this one. I would surely recommend it to all of you. Its a dish to wipe out all the odd leftover veggies in your fridge and though the list of ingredients seems long, its just throwing together stuff. So try it out and let me know how you liked it :)

 Being a true Indian, whose heart starts to ache for Mangoes just as soon as the Sun peeps out in the summer, the flavor of the ice cream was decided ! I cannot find


 This has become my favorite dal recipe, and to think it is so simple to make ! After this recipe I have become a fan of the magical transformation a spoon of yogurt can lend to a dish, be it dal or a North Indian gravy dish. If you don't already do this, try it out today and turn your dish into a rich, creamy one without the need for any fattening heavy cream. Yogurt also tends to bring all the spices in the dish together giving you a smooth overall effect instead of a sharp individual feel. And not to forget, that it can also take care of that accidental, unintentional extra spoon of red chilli powder or garam masala in the dish ;-)