Wednesday, January 31, 2007

...and I gingerly step in !

Dear Foodies,


Help yourself to some of my ginger tea and biscuits while I enjoy it myself as I write this post :-)

Hugs..Hugs and more Hugs to all of you who missed me :P and inquired about me the past few weeks. Each one of your comments made my day !!

THANK YOU SOOOOOOO MUCH :-)

P.S: Will be back soon with the post ;-)

Chai and biscuits (recipe coming soon)

This post was meant to be my last desperate attempt to participate in the JFI - Ginger event hosted this time by Rosie . But the blog and this post have been neglected for a looong time now and I haven't been able to meet the deadline. A few weeks back I hurt my finger trying to be adventurous in the kitchen and got banned from going any where close to it. Though I missed cooking, I got used to be royally babysitted by my darling roommates, friends and of course Big B (thats my brother ;-)).

Off-late I seem to have lost my affection towards the daily dose of Starbucks and crave more for a nice cup of chai. I simply love the soothing taste of hot tea brewed till the milk in infused by the magic of the tea leaves. I have also been experimenting on the right blend of spices that I want in it. I have always preferred a mix of Cardamom and Ginger in my tea. Cardamom lends a calmness and a lovely festive touch to the tea while Ginger lends its sharpness to it. I have also been adding a tiny piece of cinnamon and have fallen in love with the spicy-sweet flavor it gives. Added in the right proportions, this hot cup of spiced chai will give you all the warmth you need for your body and mind.

Apart from all these wonderful aromatic spices the other main ingredient is the Tea powder itself. I am totally in favor of the Tajmahal tea from Brooke Bond. I personally feel this is the best blend.

It has also been snowing here for the last two weeks with temperatures dipping to a unforgiving -18C !! And so the simple thought of sipping a hot cup of chai cuddled in my palm is all that I crave :-)

Chai/Tea is generally made by boiling a mix of water and milk and then adding in the tea leaves and bringing the whole thing to a boil. I read somewhere that the tea leaves should not be left to boil for a long time as they loose their smell and other nutritive value on boiling. It is always suggested to first bring the water+milk mixture to a boil first and then adding the tea. If using whole milk, I use a near 50-50 ratio of milk and water. Since we buy 2% milk at our apt, I use it directly, its already thin, and it definitely needs no more water in it !!

For one cup of tea:
  • 1 1/4 cup - milk + water (if using, whole milk, else plain 2% milk)
  • 1-2 tsp - Tea leaves or 1-2 tea bags as per your taste.
  • a tiny piece of ginger crushed with your knife
  • 1-2 pods - Cardamom, slightly crushed too.
  • 1 tiny piece of Cinnamon
  • Sugar to taste
* I used the amount in the photo

How I do it:
  1. Set the milk + water mixture to a boil and toss in the crushed ginger, opened cardamom pods along with the skin and the piece of cinnamon.
  2. Let this mixture boil for a few minutes until a thin layer of fat forms on the surface and the milk starts to raise. By this time your kitchen will smell of the wonderful spiced milk !! :-)
  3. Reduce the flame a little and add the tea leaves or tea bags let it all simmer for a few more minutes.
  4. Slowly the milk will turn into a beautiful orange color. The longer you simmer it, the stronger it gets.
  5. Turn off the heat and filter the tea into your favorite cup and add sugar to taste. ENJOY !! :D
Hot Ginger-spice tea with munchies(vadiyum)

This tea has a predominant ginger taste complimented by the cardamom and cinnamon, just the way I like it :-) Let me know how you like your cuppa, and if you try out mine, let me know !!

Friday, December 22, 2006

Merry Christmas !!

Dear Foodies,

I finally managed to make a full fledged Eggless Fruit Cake !!! yaaaaayyyyyyyyyyyy now I am going to enjoy the cake for Christmas !! You take care and have loads of fun and come back to blogging with all your wonderful stories after the weekend :-)

Sunday, December 17, 2006

Majjiga Pulusu/Mor Kuzhambu

Dear Foodies,


After a very long time I am posting a recipe from my mom. She sent me a few recipes with pictures quiet a few months back, but I never got around to putting it up. She had made Aratipoola pappu podi ( also known as patoli or usili) and majjiga pulusu for lunch at home. I was going to put in both of them in this post but realized there was a lot more I wanted to write about the plantain flowers, so thats again going to be a post some time hopefully in the near future !! For today I'll be serving some cool and extremely comforting pulusu made with buttermilk.

This one is called 'majjiga(buttermilk) pulusu' in Telugu and 'Mor Kozhambu' in Tamil. It is similar to the North Indian 'Kadi'. You can add veggies like okra, brinjal, white pumpkin or bottle gourd or some spinach or collard greens to it, or when your fridge is empty you can add lil fried besan bajji's or steamed chana dal-toor dal dumplings. I generally end up making this when we have loads of buttermilk nearing its expiry date !! hehe

Ingredients:
  • 3 cups - Buttermilk
  • 1/2 cup - Coconut (freshly grated/dessicated)
  • 2 tsp - Chana dal
  • 1 tsp - Toor dal
  • 2 tsp - Rice
  • 2-3 nos - Green chillies/dry red ones if thats all you have !
  • 1 tsp - Cumin seeds
  • Pinch of turmeric (optional)
  • Salt to taste.
  • 1 tsp -Coconut oil
  • 1 tsp - Mustard seeds
  • A sprig of curry leaves and coriander leaves for garnish.
Procedure:
  1. Soak the chana dal, toor dal and rice in some warm water for 15-20 mins. I generally toss in the dessicated coconut, cumin seeds and the chillies in the water too, just to make it easier to grind in my very delicate blender.
  2. Heat some oil in a pan and saute the veggies and reserve or blanch some spinach or collard greens.
  3. Grind the soaked ingredients to a coarse paste by adding sufficient water.
  4. Add this to the buttermilk along with some salt and the veggies or greens or the steamed dal dumplings/besan bajjis and heat the whole thing on medium heat.
  5. Don't let it boil, but just until it raises up and then turn off the heat.
  6. Season it by spluttering some mustard seeds, and curry leaves in coconut oil.
Sit back and enjoy every morsel of rice had along with this extremely delightful and soothing dish !! Pair it with this for a absolutely wonderful combo and you can use the same steamed dal as dumplings for the pulusu :-)

Steamed, coarsely pulsed chana dal, toor dal and red chilli dumplings. recipe??


Wednesday, December 13, 2006

Wanna Puff ???

Dear Foodies,


Any body interested in a Veggie Puff ???

--------------------------------

I have always liked vegetable puffs more than samosas, though it was the samosa that was considered the Badshah of snacks !! And more the people around me raved about them, so much more my love for puffs increased ! I have no reasoning for it, probably a kiddish emotion, but it has stuck to me until now. I miss eating them here....you can somehow manage to get samosa's in restaurants or the frozen sections of Indian grocery stores...but the puffs somehow chose to stay away from it all, they were happy sitting on the local bakery shelves hot out of the rustic ovens :-(

A few months back the craving for these beauties sky-rocketed, I guess due to their appearances in the blogs and also because it was so damn simple to make them if you had the pastry sheets !! But finding those sheets turned out to be the most difficult part for me. I looked and looked and looked ... for them in the grocery stores near my apartment and surprisingly none of them stocked those sheets, either they never had it on their list, or just stopped ordering them :-(( Finally last weekend, on my trip to Meijer's I found something similar, I was actually looking for Pepperidge puff pastry sheets, as that was what all the bloggers had mentioned, but Meijer's chose to stock only the shells !! Luckily they had this other brand which was for phyllo sheets and I blindly grabbed two boxes of those. I had no idea what they were meant for and chose to experiment with them.

The phyllo sheets are really really thin white sheets of flour dough, about 2 rolls of 8-10 stacked sheets in each box. They reminded me of the famous Andhra sweet, putharekhulu or paper sweet as I call it. Since they were that thin, I cut the long sheets into 3" rectangles and used 6 of those for each puff.

For the stuffing, I drew a blank. It felt like ages since I had a veggie puff and I totally forgot what the stuffing was. I knew it had to have potatoes and onions. After a lil consultation with my mom, I added in some green peas and carrots. It wasn't the perfect stuffing, but was surely good enough.

I made another stuffing too :-) I have been wanting to make Saffron's Paneer Burji for a looooonggg time now and since I had a near half gallon of milk close to its expiry date in the refridgerator, it was just puurrrrfect :-) hahaha

So well, here goes the recipes

Click on image to enlarge
Potato filling:

Ingredients:

microwave till cooked:
2 nos - Potatoes; 1/2 cup - Green Peas; 1/2 cup - Carrots, grated; the last two were from the from frozen packs.

2 Tbsp - Oil; 1 tsp - mustard seeds; 1 tsp - Cumin seeds; 1 tsp - Saunf(optional); 1 inch - ginger piece, julienned; 2 nos - Green chillies, finely chopped; 1 nos - Onion, finely chopped; 1 tsp - Turmeric powder; 1 tsp - Coriander powder;

Procedure:
  1. Heat the oil in a pan and toss in the mustard seeds, once they start popping add the cumin seeds, saunf, ginger and green chillies, fry for a min and add the chopped onions, turmeric powder and coriander powder.
  2. Once the onions turn translucent add the boiled and peeled potatoes. Mash the potatoes with the back of the spoon or a potato masher. Add some salt and water(if needed) and cook for a few minutes.
  3. Next add the carrots and peas and cook till the spices blend in.
  4. Garnish with coriander leaves and some lemon juice.
* You can add tomatoes too after step 1 and cook for awhile before adding the potatoes :-)

Paneer stuffing:

For the Paneer Burji I followed Saffron's recipe, with the addition of tomatoes and some coriander powder instead of pepper.

Getting the Puffs ready:
  1. Thaw the pastry sheets by moving them from the freezer to the refrigerators main section.
  2. Things to have ready at hand before getting the pastry sheets out:
    • Have your stuffings ready (and photographed ;-)
    • Pre-heat the oven to about 250C
    • Clean your counter top and dust it with some flour to get rid of moisture.
    • Melt some butter and have a brush by the side if you have one
    • Have two moist tissues or a cloth ready to cover the sheets that you won't be working on immediately and a plastic wrap, cut to the length of your pastry sheets.
    • Finally, dry your hands, as any water will spoil the sheets :-)
  3. Doing all the above is really important and I learnt after loosing 1-2 sheets. On exposure to air these sheets get really brittle and cannot be shaped or used !!
  4. The pastry roll has about 8 sheets in it, un-roll and take out 4 sheets first and roll up the rest and send them into the refrigerator again.
  5. Spread out the 4 sheets and cut into 3 equal portions along the length.
  6. Place the plastic wrap over 2 of these portions and cover with a moist cloth/tissue. Placing the cloth directly will make the sheets too sticky and dough like and render them unusable !!
  7. Now carefully separate the 4 sheets of the 1st portion and brush a little butter on each and stack them up again. This is to ensure that you get your layers. You have to be really fast in all this, notice the sheets getting brittle and cracking in the pic below !!
  8. Spoon a little filling into the center or the sheets and then fold the corners onto it so as to completely cover the filling.
  9. Seal the edges by pressing them together and applying some more butter or a lil water.
  10. Brush a little butter on the top of the puff and place it on a greased and flour dusted baking tray. Immediately send the tray into the oven and bake for about 15-20 mins or till you see a uniform golden crust.
  11. As and when you have your puffs stuffed send them into the oven, keeping them out for even for a minute will make the outer sheets brittle !!
  12. Once done try to hold yourself till the puffs cool down a bit as the stuffing will be extremely hot. I had some Maggie Hot n Sweet sauce which is my favorite and it was just the perfect sauce for the puffs.
Click on image to enlarge
I initially made separate puffs for each filling, but slowly added a layer of both into each puff. You can see that in the picture above showing the stuffing on the sheets. They taste really really gooood and the ketchup was just amazing !! I finally got to eat puffs here in the US and I am sure that I will be making them more often.

You can also use sliced hard boiled eggs to make some egg puffs or use a meat filling too.

If you get the Pepperidge puff pastry sheets I would suggest you use them to make puffs. I think they are sheets of thickly stacked layers and all you will have to do is flatten them a bit, stuff them, brush a little butter on the outside and bake them. You will not have to take the trouble of buttering each sheet and seeing that they don't dry etc etc

Once you have these little wonders ready with some yummy ketchup, set yourself on the couch with some hot chai as Chandrika & Anupama have suggested in the comments and enjoy the gloomy weather outside :-)

And now, the these two veggie puffs are off to Pooja's Potato week :-), have your cup of tea ready Pooja !


Monday, December 11, 2006

Oven Roasted Potatoes

Dear Foodies,

Click on image to enlarge
Since the time I discovered that we had ovens in our kitchens, I have been trying to use it when ever I can. Well, I think I'll have to explain a bit, though its common knowledge to many of you that almost all US kitchens come with a oven by default, me n my roomies never realized that for many months. Through the first year of a our stay, we used it as a rack for storing vessels !!! And I guess it wasn't in working conditions either, and well we weren't in the mood to explore the kitchen while there was a whole new world outside to explore !! :-) Only after we moved to a bigger apt, implying a one bedroom apt with an an extra dining room added to the kitchen-living-bedroom apt we had before, and should I mention 3 gals share it !! :-), did we start using the oven for purposes other than storage !! And need I also mention we were barely cooking the first few months, and trying hard to cook the basic dals and curries that go with rice, so you can imagine that we never found the need to look for a oven in the first place, we were blissfully happy to find a neat storage place though :-D !!

Well, so lately, I have used it for making guiltless chips out of green plantains, bitter gourd and potatoes. When I saw Nabeela's roast potatoes that she made along with her chicken, I wanted to try making it separately too. She also has a separate recipe for it here.

Click on image to enlarge
I used a different mix of spices, I basically added those that I had with me. I cubed 2 potatoes, tossed them in some oil, a mix of olive oil and vegetable oil, roughly 1 tsp of each. Added some salt, red chilli powder, corinder powder and turmeric. I baked them in the oven, pre-heated to 350F, for about 20 mins, then increased the temp to about 400F-450F for another 10-15mins till they turned golden crisp. Instead of being part of our meal, we finished it off as a snack :-P ..hehe

The best part of using the oven for making this dish or the chips is, I found them to stay crisp for a longer time when compared to frying them in oil on a stove-top. This way of cooking also reduces the amount of oil drastically and there are no hassles of bubbling hot oil in the kitchen, just leave them in the oven and peacefully forget about them for awhile !!

I am going to send this platter to Pooja, for her 'Vegetable of the Week' event !!

Thursday, December 07, 2006

One Pot Meals - Capsicum Rice

Dear Foodies,

I saw a whole lot of recipes for Capsicum rice in Indian food blogs but never attempted making it myself, as I am a little moody when it comes to eating them. They do'nt spontaneously get into my 'most-liked' veggies. I pick and choose what dishes I can eat them in. My roommate makes a wonderful dish with capsicums cooked in a peanut based gravy, I like it a lot, but then I will only eat the gravy and not the peppers !! And sometimes I cut and chop them myself and use them in sambar as I like the flavor they add to it !! :-D

So, on one such 'I-like-capsicums' day I started out making a pulao using capsicums. I used a my own simple style and set out chopping the capsicum, and then I heard my roomie asking me to add potatoes, so I washed a few potatoes too. When I opened the refrigerator to get some coriander leaves I saw a can of chickpeas staring at me and the next moment I was washing a bowl of them. To accompany then I added some roasted peanuts too :-) And slowly my capsicum rice transformed into something totally different but still pleasing to the taste buds.

Ingredients:
  • 2 nos - Green Capsicum/bell pepper, cubed
  • 1 nos - a big Potato, cubed
  • 1 nos - Onion, cubed
  • 1 cup - Chickpeas
  • 1/2 cup - Peanuts
  • 2 nos - Green Chillies
  • 1 inch piece of ginger, julienned
  • 2 nos - Garlic cloves, julienned
  • few sprigs of Coriander leaves
Spices:
  • 1 tsp - Shahjeera
  • 3 nos - Green Cardamom/Elaichi
  • 5-6 nos - Cloves/Laung
  • 2 nos - Cinnamon, 1 inch sticks
  • 1 tsp - Mint leaves, dried ( optional)
  • 1 tsp - Coriander/Dhania powder (optional)
  • 1-2 Tbsp - Oil / ghee
  • 3 cups - Rice, I use Sona Masoori
Procedure:
  1. Wash and soak the rice till the veggies get done.
  2. Heat oil in a wide pan, once hot add the shahjeera, you can also use normal Cumin seeds/jeera. As they start to brown, add the rest of the ingredients in the spice list through to the mint leaves and toast them for a few seconds.
  3. Next add the peanuts and roast them well.
  4. Now add the ginger and garlic and saute for a minute before you add the onions. After the onions turn translucent add the capsicum. I don't like to cook them until tender at this stage and allow them to retain some crunch. Next add the chickpeas and saute till they start getting a crisp at the outer skin.
  5. Toss in the cubed potatoes now, peeling them is left to your choice. Also add some salt sufficient for the veggies and some dhania powder. Cover and cook for a few minutes till the potatoes get a little tender. Add half the coriander leaves too.
  6. Now drain and add the rice and mix well. I saute it till the little water left in the drained rice evaporates and the grains get coated with the oil and look glossy, this will take just 2-3 minutes if the rice is drained well.
  7. Transfer it all to the electric cooker, add the required amount of water and salt and cook to perfection !!
  8. Garnish with coriander leaves and serve hot with raita or any gravy of your choice. Will post my recipe for 'bagara baingan with a twist' in my next post which goes perfectly with this dish :-)
Notes:
  • You can choose your own mix of vegetables for this dish.
  • A ground paste of mint, coriander leaves and green chillies could be added for a variation.
  • Instead of using all water for cooking the rice, you can add a cup of coconut milk and reduce the amount of water accordingly.

Sunday, December 03, 2006

Munakkaya Pulusu - Drumstick cooked with Tamarind

Dear Foodies,


I only recently realized that our Indian store stocks frozen drumsticks, and from then on I get a pack of these every time we go grocery shopping. We use it in Sambar and Pulusu, this one above is Munakkaya Pulusu. The difference between Sambar and Pulusu, is that the latter either has no dal in it or very little dal unlike Sambar.

Will be back with the recipe in awhile :-)

I wanted to write about the different tamarind based dishes that we make in our house, but I haven't been able to manage time for that. So I am going to directly jump to the recipe and reserve that thought for another post. This pulusu is extremely easy to make, you will know once you see the ingredients list itself !! I myself was a bit stunned while writing it down and tried hard to see if I missed something ..hehe. All it needs is some tamarind extract, a veggie and some sambar powder. Just leave it to boil to all its glory and its ready to serve :-)

Ingredients:
  • 5-6 nos - Drumstick pieces, 3" in size
  • Golf ball sized Tamarind, pulp extracted or 2 Tbsp - Tamarind Extract
  • 1 1/2 Tbsp - Sambar Powder
  • 1 tsp - Turmeric powder
  • Salt to taste
  • 2-4 cups - Water
  • 1 tsp - Oil
  • 1 tsp Mustard seeds
  • 1-2 nos - Dried red chillies
  • 2 tsp - Rice flour
Procedure:
  1. Microwave the tamarind in a cup of water and extract the pulp.
  2. In a vessel, take 2 cups of water and add the tamarind extract and allow it to boil. Also add salt, sambar powder and turmeric powder. If using fresh drumsticks add them to the water and cook. Since I used frozen ones which turn soft when thawed, I added them after the tamarind water came to a boil.
  3. Once the tamarind has lost its raw smell check to see if the tangyness of the pulusu is to your taste and add water accordingly.
  4. To make the pulusu thick, mix a spoon of rice flour in 2 Tbsp of water and add to the tamarind water and allow to boil.
  5. Do the popu/tadka by heating the oil, add the mustard seeds, once they pop add the red chillies and turn off the heat.
  6. Add this to the Pulusu and serve hot with rice or chapatis !!
Notes:
  • You can use okra, pearl onions, bottlegourd and make a similar pulusu. The okra and onions will have to be sauted in oil before adding the tamarind water.


Thursday, November 30, 2006

Radish Stir Fry

Dear Foodies,


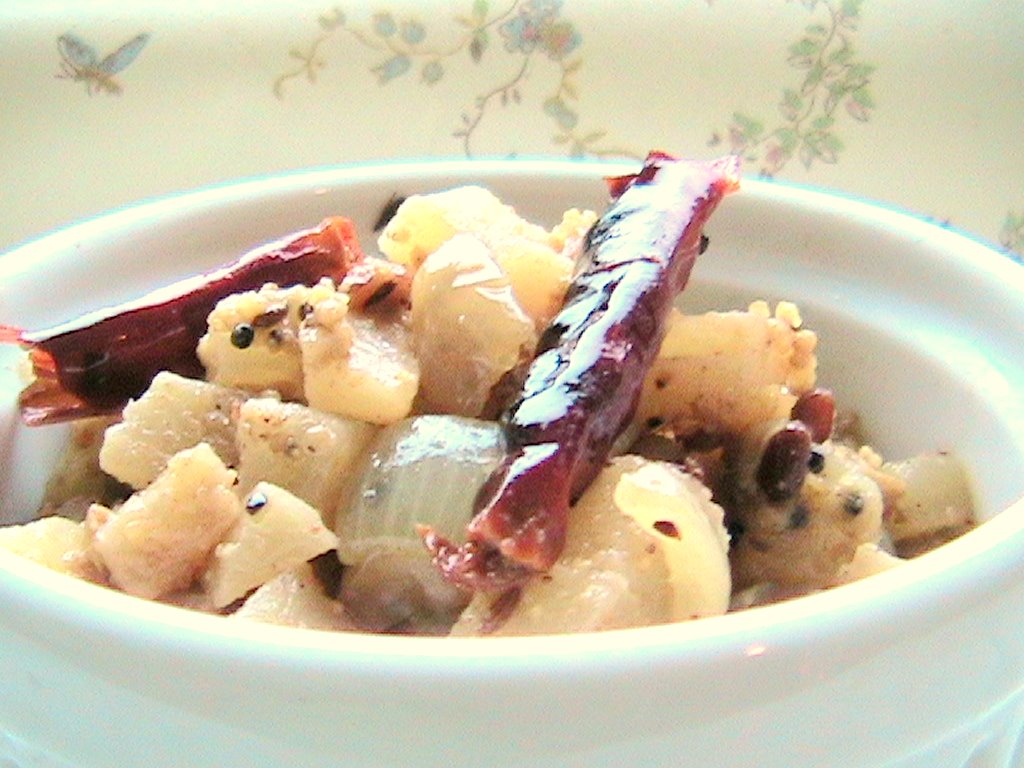
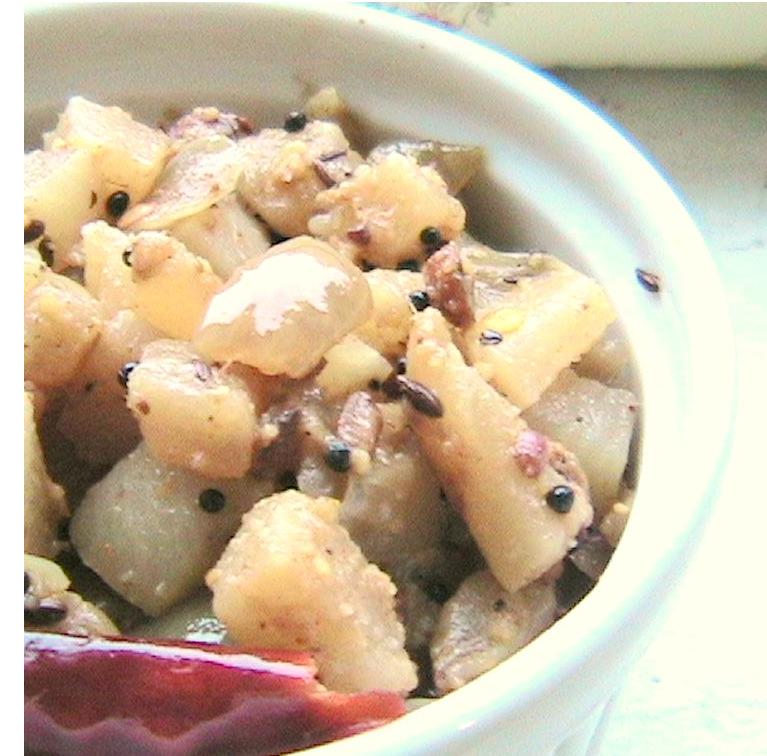
I made Mysore rasam a few days back and paired it with this simple radish stir fry. The rasam has a comforting feel attributed to the freshly ground spices that it is made from. My mother very thoughtfully made some kind of a simple veggie stir fry along with it, something that would gel with the rasam and not take snatch away its glory.

I used Red Radishes to make this dish. I dont remember eating the red colored ones in India, radish is called mullangi in Telugu and the one I am used to seeing is white and my mother made Sambar with it (similar to Indira's recipe). When I saw these tiny lil beauties at the grocery store for the first time I was tempted to buy them though I dint know what to do with them. The first few times I made use of them in sambar, but then I was using up just 3-4 at a time and the pack never got over !! So I tried making a stir fry with these and it tasted really good. If you have tasted them, you will see that they are not as strong in taste as the white ones, those were really sharp in taste and even brought tears in your eyes !! But these cute reddies do no such thing. They take well to the spice powders and have a comforting feel to them.

This dish can me made in a jiffy and does not need much of your attention either. Cooking them this way also retains most of their nutrients as they are mainly steam cooked with very little oil used. Here goes my recipe.

Ingredients:
  • 10-15 nos - Radishes, the small ones neatly washed.
  • 1 nos - Onion, chopped
  • 2 nos - Red chilli, dried
  • 1 tsp - Mustard seeds
  • 1 tsp - Cumin seeds
  • 1 tsp - Urad dal
  • 1 tsp - Channa dal
  • 1 Tbsp - Oil, for sauteing
  • Salt to taste
  • 1 - 2 Tbsp - *Curry Powder(kura podi)/Dalia Powder or 1 tsp - Coriander powder
  • 2 tsp - Coconut flakes (optional)
Procedure:
  1. Neatly wash & clean the radishes and chop them. Peeling them is left to your choice. Cutting them is the only tedious part for this dish !! Peel and chop the onion, size same as that of the radishes.
  2. In a wide pan heat the oil, once hot add the mustard seeds. When they begin to splutter add the cumin seeds and the dals. Toast them till the dals turn a slight red and add the red chilles and then the onions.
  3. Saute till the onions become transparent. Now toss in the chopped radishes. Sprinkle salt and cooked covered. The salt will bring out the water in the radish that will be enough to cook them. Sprinkle some water if needed. Stir in between to avoid charring.
  4. Once the radish pieces turn soft add the choice of spice powder you use and stir fry for a few minutes, uncovered. Add the coconut flakes now if using.
  5. Serve with hot rice and sambar/rasam. They also pair well with chapatis.

Notes:
  • Other veggies like beans, potatoes, beetroot, carrot, bottle gourd, chow-chow can be cooked in a similar method.
  • The Kura Podi I used is the pack my roomies mom made in India and sent it along for us :-) I will try and get the recipe from her and post it soon :-)

Monday, November 27, 2006

Baking Adventures - Shortscones ??

Dear Foodies,


This is what I conjured up for Nandita's WBB # 7 - Baking for Breakfast event. Will be back with the recipe in sometime :-)

Off-late I have been trying to bake a lil whenever I can manage some free time. I dont like using eggs and so keep browsing for recipes that dont need it. Substituting eggs in a recipe is tricky, as you more often then not have to compromise on the texture or the taste. I am still on the look out for egg-less cake recipes, so any of you who have some do share them with me :-).

But in the meantime I was also looking at recipes for cookies and scones too. That was when I chanced upon this amazing blog, Baking Sheetby Nic. She has a huge collection of recipes which are soo well written and neatly explained. The first scone I had was a cinnamon scone at Panera bread and it was love at first bite :-) , so the moment I saw the scone recipes on Nic's site I was really excited to make some at home. I was going through the list of cookies and scone recipe she has and found a lot of them that did not need eggs. Browsing through her recipes frequently gave me a picture of the basic method and I experimented with the flavors depending on what I had in hand. I have made chocolate chip scones, coffee scones and berry scones, all of which were absolutely delicious. I only made about 4-5 medium sized scones each time and so they vanished before I and my friends were done tasting them. I have been planning ever since to make a bigger batch that would last a few breakfasts alteast, but never found the time or the motivation to do so.


When Nandita unveiled the theme for WBB event to be Baking, I rushed to my apt that very evening to bake some scones. Well it was actually night by then, I went home at 11:00pm and started out :-) I planned on making scones, but once the dough was ready I was in no mood of shaping them like those triangles and so shaped them randomly like cookies or bit sized scones. I then realised that shortbreads are, vaguely put, the cookie shaped version of scones. So now I dint know what I had made.....and so I named them ShortScones ..hehe..

I am going to give you a rough estimate of the ingredients I used. As I am still learning how to bake the perfect scones, I would suggest that you go over the Nic's blog for her detailed recipes.

Ingredients:

Dry Ingredients:
  • 1 1/2 cup - All purpose flour
  • 1/3 cup - Sugar, I used the fine powdered sugar
  • 1 tsp - baking powder
  • 1/2 cup - Butter, chilled and cubed ( I used half a stick of butter)
  • a pinch of salt
Any of these: 1/3rd to 1/4th cup
  • your choice of chopped berries (strawberries,raspberries,blueberries,cranberries)
  • dry fruits and nuts (apricots, raisins, walnuts,peacans)
My choice:
  1. 1/3 cup- Chocolate chips + 2 Tbsp - Cocoa powder
  2. 2 Tbsp mango pulp + 1 tsp - Elaichi powder
Wet Ingredients: 1-2 Tbsp of
  • Water or Orange juice/Lemon juice + a few drops of the zest or Buttermilk or Soymilk
Procedure: ( Preheat oven to 300deg F)
  1. In a bowl sieve in the flour, salt and baking powder. Add the sugar and mix well, toss in the cubed butter. And rub it into the flour mix with your hands by applying slight pressure on the cubes forming a coarse flour mix.
  2. Now add in your choice of berries/dry fruits/choco chips and mix well
  3. Next add the wet ingredients a tsp at a time and get the flour mix together, so you can shape it. When using berries you will need very little of the liquid to do the job.
  4. The mixture does not have to be kneaded, and should be loosely packed, shape the into a lil thick disc and make cuts with a blunt knife like you would to a pizza and place it on a parchment paper lined baking dish.
  5. Bake for about 15-20 mins, until a tap on the surface gives a hollow sound and it has a wonderful golden brown color. You can also test it withthe knife coming out clean when done trick.
  6. Break the individual scones along the cuts you made and enjoy one right out of the oven and try to store the rest if you can stop yourself from eating more ;-)
While baking these treats the way I have done them, keep in mind that they continue to cook for a little while after being taken out of the oven. The Cardamom- Mango rounds and nankatai were a lil soft when I removed them from the oven but turned crisp on cooling. So time them accordingly.


Chocolate Hearts :-)
I made a heart-shaped batch of chocolate chip + cocoa powder combo. These were my favorites, well ofcourse I shud add I am a huge chocolate fan !! Anything that has to do with chocolate or coffee or soft toys will grab me 100% :-) The chocolate chips that were at the center did not totally melt, but were warm when rite out of the oven and gave a nice gooey, chocolatey taste that was very very delicious. I dusted these with some icing sugar just for the heck of it :D I am going to try refining this recipe to get a near brownie taste soon.

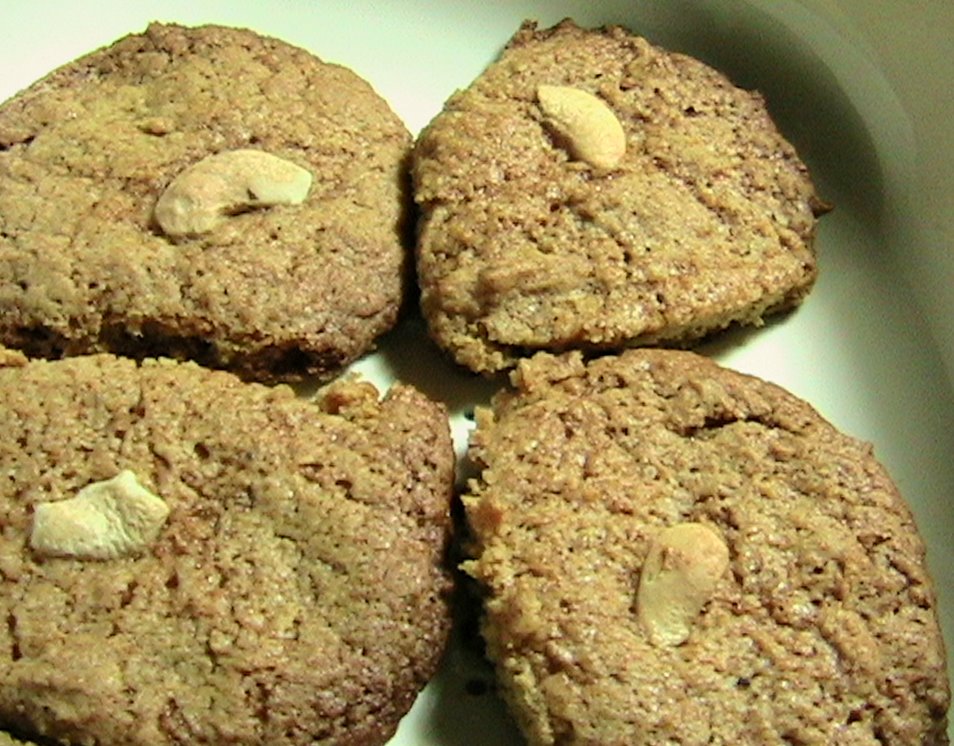
Cardamom-Mango rounds
The second batch was with the cardamom powder and mango pulp, shaped as round cookies with a cashew topped on each. I arranged these cookes too close to each other in the tray and so they came out as one big cookie that I had to break. The mango pulp did not contribute much to the taste as the quantity was far too less to dominate. The cardamom powder was the ruler. This cookie very dearly resembled an Indian sweet, but niether me nor my friends could pin-point at the name though. Let me know if you try these out :-)

Savoury Nankatai's
I also tried out savoury Nankhatias taking hints from Jyotsna's recipe. Instead of 1/2 cup of sugar and cashews I added just 1/4th cup sugar and 2 tsp of salt. I also added some hand-crushed cumin seeds. I did add some vanilla essence but skipped the saffron in her recipe. I also dont think you will need 1/2 cup of butter, a little more than 1/4th of a cup ( 1/3rd of the stick) should be good, I found my biscuits too buttery and a little more flour would have helped.

These biscuits posed wonderful sweet and salty contrast to the other two. The cumin seeds in the biscuits added a very nice flavor, though I added just about a pinch of seeds, the flavor spread through every bite. Absolutely yummy !!


I warmed the chocolate hearts and Cardamom- mango rounds for 5 sec before eating them and along with a glass of warm milk or hot coffee/tea, made up our breakfast for a few days :-), all thanks to Nandita ofcourse for getting me to bake and thanks to Nic and Jyotsna for their wonderful recipes :-)

P.S: Here is Nabeela's recipe for scones. She has pics showing the usual method of shaping scones :-)

Monday, November 13, 2006

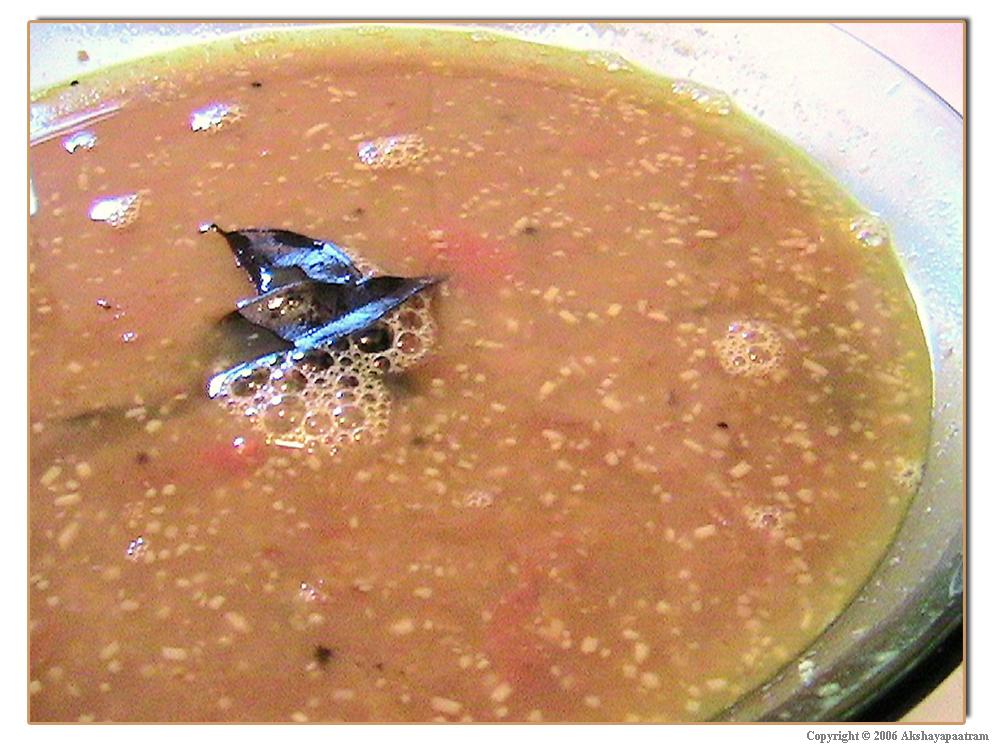
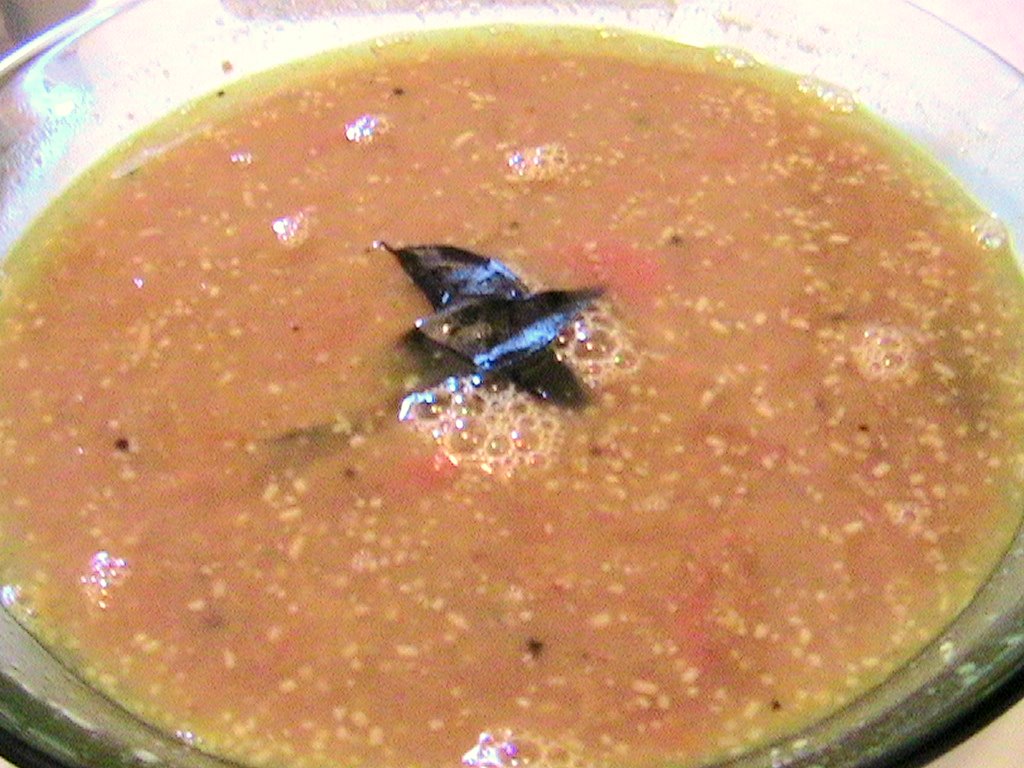
Mysore Chaaru

Lentils cooked in Tamarind & freshly ground spices
~~~~~~~~~~~~~~~~~~~~~~~~~~~~~~~~~~~~~~~~~~~~
Dear Foodies,

Mysore chaaru or Mysore rasam is one of my favourites, and is perfect for a cold winter night. I'll be posting the recipe in the evening, hopefully in time for your dinner :-)
~~~~~~~~~~~~~~~~~~~
Mysore Chaaru
~~~~~~~~~~~~~~~~~~~

This rasam was a regular at our home and more often than not it would feature on the Saturday menu. Why you ask ? Well, we usually had tiffins for dinner on Saturday's, and this rasam can be a standalone meal with just papads or vadiyum to accompany it. A simple aloo fry or any veggie, steam cooked and then stir fried along with some tadka, go very well with this dish. ( I used radish this time) And so it was ideal for an afternoon lunch with no leftovers for dinner and no worries for mummy too :-) .

This rasam has a wonderful medley of spices with pepper being the main source of 'heat' in the recipe, and this gives the warmth in the body when savored on a cold night. You can add a dried red chilli to the spice mix if needed. The rasam is also slightly thicker than the usual rasam but thinner than sambar. The freshly ground spices give a very distinct flavor to the the rasam, making the meal satisfying to the soul and the body. Do try it out and enjoy the winter night :-)
Ingredients:
  • 1 cup - Toor dal, boiled and mashed lightly
  • 1 key lime sized ball - Tamarind, soaked in water and pulp extracted
  • 2 nos - Tomatoes, slit into four portions.
for spice powder:
  • 1 tsp - Cumin seeds
  • 1/2 tsp - Coriander seeds
  • 1 tsp - Pepper
  • 1 Tbsp - Toor dal
  • 1/2 Tbsp - Channa dal
  • 1 1/2 tsp - Coconut flakes or fresh coconut
for popu/tadka:
  • 1 tsp - Ghee
  • 1 tsp - Cumin seeds
  • 4-5 nos - Curry leaves
  • Coriander leaves for garnish
Method:
  1. Heat some oil, roughly about 1 tbsp, in a wide pan and toast the ingredients under the spice powder one after the other. The coconut can be added after the stove is switched off, as it needs very little heat else, it might burn. Allow them to cool.
  2. In a vessel, pour in the tamarind extract, 2 cups of water, salt and the slit tomatoes. Allow it to boil.
  3. In the meantime, powder the spices, add some of the tamarind extract to aid in grinding if required.
  4. Add this spice mixture to the boiling tamarind water and continue to simmer.
  5. Once the raw smell is gone add in the mashed dal and again bring it to a boil. Add another cup or half of water if needed. I generally take out the tomato pieces for a moment and mash them throughly at this stage.
  6. Once the dal gets harmonized with the spices and tamarind turn off the heat.
  7. Add the popu done in ghee and serve hot with rice and vadiyam/veggies.

Blogging tips