Wednesday, May 14, 2008

Primo Veggie Burger

Dear foodies,

Finding a good veggie burger is soo tough, isn't it? Not many places even have them on their menu. During my Masters, I survived on the Wendy's veggie burger, which had a slice of cheese, onions, cucumber and couple of pickles inside a bun, for well more than three months. And it still remains a favorite because of lack of better options around. Except for Burger King I haven't seen a fast food place serve veggie burgers and well, and I haven't seen it at the restaurants I have been too either. The only way you can take a easy route to having a veggie burger is by grabbing a pack of frozen Boca burger patties or veggie patties at the grocery stores and making your own burger at home. I've made my own burger patties at home inspired by the masala burger patty from Trader Joe's and the delectable recipes from Bee & Jai, but I don't make and stock them that often.

So when I went to this local deli near my office and saw that they have a veggie burger with a spicy black bean patty I was shocked! Is that really on their menu?? I just had to try it and was hooked to it. Our team goes there for lunch may be once or twice a month and I have to have it every single time. Its loaded with crunchy grilled vegetables and the bread has the perfect texture. Now the lunches have stopped but my liking for the burger is far from over. A few weeks back my brother suggested I try the frozen black bean burger patties from the grocery store. I haven't liked any frozen patty until now and was skeptical about this one too, but I was wrong this time. Filled with all the fresh vegetables that spring has to over, this is a perfect way to enjoy them. I ate these burgers for breakfast, lunch and dinner a few weekends back :))

The main specialty of this deli is they make their own bread. Theres something purely magical about the aroma and flavor of freshly baked bread and these guys have mastered it. They use a hard kaiser roll for this burger and thats what I used. This is how I assemble the Primo burger, highly inspired by the burger served at the deli which goes by the same name. Their rolls are bigger and the burgers are filled with a lot more veggies.


Ingredients:
  • Snow peas, Zucchini, Yellow Squash, Bell peppers (any color), fresh Spinach/bok choy, Onions (optional), Cucumber - no quantities here, you can use as much as you want
  • hard Kaiser rolls
  • Salt and pepper for seasoning
  • Hummus, ketchup (optional)
Method:
  1. Heat a grill pan or a cast iron pan on medium high heat. Spray some oil and line thin slices (0.5 cm) of zucchini and yellow squash. Cut the bell peppers into thick match sticks and slice the onions. Line them up as well if your pan can accommodate them. Once they brown on one side turn them over and brown the other side too. Cooking on low heat with soften them, which is not what we want here, the veggies need to retain their crunch.
  2. Boil some water in another pan, salt it and add the snow peas. Blanch them for a minute until the green color brightens up and transfer them on to a plate to drain. Once the veggies are out of the pan/griddle toss the snow peas too and saute for a 1-2 minutes along with the greens.
  3. Thaw the burger patty, I usually microwave it for a minute and then pat it with a paper towel to absorb the fat coming out of it. Place it on the pan to crisp the exterior. Cut the kaiser rolls in half and toast them on the pan too. I don't find the need to add any oil or butter for the rolls, the initial oil spray will suffice.
  4. Layer a few slices of zucchini, yellow squash and the greens on the bottom half of the roll, next goes the burger patty a few more slices of zucchini and squash, snow peas and bell peppers. Season the veggie layers with some salt and pepper and top it with the other half of the roll.
There, you are all set to have a scrumptious veggie burger now. You will surely love this one! It has soo many veggies with none of the usual onion/lettuce/tomato combo. The kaiser rolls are sturdy enough to hold all of them, and the spiciness in the black bean burger is enough to balance the rest of the veggies. I was cooking with yellow squash for the first time and I really like it. It has a very different flavor from zucchini (well, I thought it was just a yellow colored zucchini until then!!) with a slight peppery or may be jalapeƱo'ish twist to it (!). The grilled veggies are extremely good for munching on their own too, so definitely make extras. They are surely my most favorite part of the burger!

This burger does not need any ketchup or hummus but you can surely spread a little of it for a change of taste, try it without them first though. I like the spicy black bean burger for this one since it closely resembles the deli burger, but you can surely try it with any burger patty. I had the burger with a few fresh strawberries and some orange juice for my weekend brunch. (Did you notice that the hungry photographer drank a lil of the juice even before the shoot was over ? :D) Oh, and the deli serves it with some melted provolone slices on top of the veggies, I skipped that part, but you can surely add a cheese of your liking.

Happy Wednesday!

Monday, May 12, 2008

Ravioli 101

Dear foodies,

Has it happened to you? A recipe or dish just gets stuck on your mind and the only way you can get it out of your system is to cook it once...and until then it haunts you every time you are in the kithcen or watching TV or out shopping. Yes ?? Thank God! then I am not alone :D It was ravioli for me. My favorite Italian restaurant serves a mean mushroom ravioli, and everyone who has eaten it swears by it. I haven't tried it because a certain kind of mushroom (don't know which) triggers a very bad stomach ache for me and so I avoid anything that has mushrooms when eating out. I guess that was when the ravioli madness started...

I went by the frozen pasta aisle in my grocery store a couple of times, but stopped myself from buying any of the vegetarian ravioli's they had because they were overstuffed with cheese. With me trying to control my diet, that was a very bad option. So I decided I would make them....yess, that crazy! I watched two different shows on TV in a week, which made fresh pasta, I also picked up this wonderful Italian cookbook from the library which started out explaining how good pasta can be made at home. Now that was the last straw...

So off I went shopping for my pasta, I picked up a pack of frozen spinach because RR is always telling how much cheaper it is than fresh spinach, then I picked up some 'light' ricotta cheese and a pound of guilt. Yes, its still cheese, right ? As I was going through the dairy section I saw some lite silken tofu and that flashed a bulb. Why not substitute the cheese like a vegan version of ravioli? I love tofu and since I was pairing it with spinach and pasta and other garnishes, it surely wouldn't taste that bad. So last weekend I set out making my own pasta at home...from scratch...Yay! It was easier than I thought, but was also time consuming. May be because it was my first time and I had not figured out the exact method etc., etc., so I spent roughly about 30-40 mins making 10 ravioli's :)) Well, don't forget to account for the photography breaks though. Every time I wanted to click a pic, I had to wash, wipe and dry my hands; get the camera, click and immediately tuck it safely away from the kitchen and all that flour. So not really bad from plain flour to plated ravioli right?

Here goes the recipe, I made an egg-less version ofcourse.

Ingredients:

pasta dough:
  • 1 cup + 1/4 cup- All purpose flour (whole wheat flour can also be used)
  • 1/4 cup + - Water
  • Salt to taste
filling:
  • 1/2 cup - Silken (lite) tofu, crumbled
  • 1/2 cup - Spinach, thawed and water squeezed out
  • 1 tsp - Red chilli flakes
  • 1/2 tsp - Nutmeg powder
  • Salt to taste
  • 1-2 Tbsp - Soy milk/spinach water
Method:
  1. In a food processor, combine the tofu and spinach. Start out with dry squeezed spinach so that the stuffing is not watery. Add required amount of water/soy milk to then blend all the other ingredients together.
  2. Once blended, add the chilli flakes, nutmeg and salt and adjust the seasonings to taste.
  1. On to the dough, on a flat surface place your flour in a heap, add salt and mix. Make a well in the center and pour 1/2-3/4 of the water and slowly start stirring with a fork to incorporate the flour and water. Gradually add the rest of the water, and using your hands make a smooth dough kneading it well to form a round ball, resembling chapati dough. (Now, this method of making the dough was shown on TV and also described in the book. I am not sure why I cannot make it like normal chapati dough itself instead of the making a well, and using a fork n all. May be next time I will do it that way, and update the post with my results. If any of you know the reason, please do leave a comment)
  2. Once the dough is ready, divide it into two, and flatten one ball into a very thin layer. Use the extra flour to dust your surface, roller and hands. The dough has to be extremely thin and pliable, using all purpose flour instead of wheat flour I think helps here. Try to spread the dough in a rectangular shape instead of circular to avoid wastage.
  3. Now cut through the layers to form 1 1/2" to 2" squares. One round of dough gave me about 10 ravioli.
  4. Place a spoonful of the filling in the center of a square, wet the edges lightly with water and seal with another square. While sealing it try to get the air out of the center and press all four sides. Otherwise the ravioli may open up when boiling.
  5. Arrange the finished ravioli on a parchment paper so they don't stick to each other. You can freeze the ravioli or use them fresh.
  6. To cook them, bring a pot of water to a boil, salt it and then drop the ravioli into it. (If frozen, thaw them out first). They will initially sink to the bottom and slowly rise upwards when done. Drain them on a plate and serve them which ever way you like.
The pasta dough can be turned into any shape you want and used instead of dried pasta. I read in some article that wanton wrappers could be used to make ravioli, may be we could try that too ...

I made a simple topping for my ravioli. Heat a pan with a pat of butter, brown some finely chopped garlic and add some crushed red pepper flakes. Next toss in some grape/cherry tomatoes and saute on medium high heat until the tomatoes start to pop and burst. Add a Tbsp or two of the cooked pasta water, cook for a minute until it thickens a little and pour it over your ravioli and season with salt and pepper. Serve warm!

You can top them with marinara or cream sauce but if you have made the ravioli yourself, I would recommend a very basic topping so you get to taste the pasta by itself and not drown it in other sauces. You will also have extra stuffing from this recipe, hang on for more ways of using them :) If using fresh spinach, chop it finely and saute it in a little butter or oil. you could also add some finely chopped shallots to it if you like.

The stuffing was just right, soft and creamy with a clear spinach flavor. The ravioli were cooked perfectly and luckily for me were not doughy at all. The grape tomatoes were tangy and sweet, being a perfect compliment to the milder stuffing in the ravioli. The red pepper flakes added the right amount of spice that I like. In all it was just a perfect weekend adventure for me. I will surely make more of this soon, but for now, the craziness is gone and I am back to being normal :)

Happy Monday!

Thursday, May 08, 2008

Dondakaya vepudu/Ivy gourd stir fry

Dear Foodies,

How many of you like dondakaya/tindora/ivy gourd ? I know I love it! But this vegetable has such a tarnished reputation and powerful lobbyists who saw to it that it never showed up at any home with school going kids, atleast in Andhra they succeeded. It was told to induce dullness as opposed to the ladysfinger which could turn you into a Math wiz (!!). So every mother would sneak in bhendakaya/ladysfinger as often as she probably could and relegate the dondakaya to an occasional day far far away from any Math exam. The poor guy could not fight all that bad energy :( But now that I am done with all schooling, I am going to enjoy this dish in peace :) (and hey! its actually not bad for you)

The ivy gourd is a very versatile vegetable and it cooks in a jiffy. You can use it in a simple stir-fry like I did, or go for an elaborate stuffed version or an usli preparation. you can either use it in a traditional kootu or in a masala gravy or even in a fried rice, the options are just endless. In Hyderabad, you are most certain to find the dondakaya vepudu with a good amount of cashews thrown in, at every wedding menu.

My mom usually made the stir-fry/vepudu with it and thats my favorite way of eating it too. She would cut them into discs and not length-wise. I think the shape you cut it does change the texture of the dish. The discs cook faster, evenly and are crisp and tender at the same time. When cut length wise I think the chances of thicker pieces are more and I just hate biting into an undercooked piece, okay, I am just biased towards the discs (Mom's always rule) :) and so the frozen tindora is not something that I like. Whenever I get access to fresh dondakaya this is how I cook it,

Ingredients:
  • 3 cups - Dondakaya/Tindora/kovakkai
  • 1/2 Tbsp - Oil
  • 2 tsp - Mustard seeds
  • 2 tsp - Channa dal and urad dal (I like the crunch they give, you can adjust the qty accordingly)
  • Pinch of Asafoetida/Hing/Inguva
  • 1 tsp - Turmeric powder
  • 2 tsp - Chilli powder or to taste
  • Salt to taste
Method:
  1. Wash and dice the ivy gourd as per your preference :D. Place a wide pan with the oil on medium heat.
  2. Splutter the mustard seeds, add the dals and allow them to brown. Add the hing, turmeric and the cut gourd to the pan and saute.
  3. Add the salt and cover and cook for about 6-8mins. Stir in between to avoid burning any of the pieces.
  4. Once they are tender to the touch, uncover the pan and cook for 5 more minutes to crisp up the pieces. Add the chilli powder towards the end and mix well.
Serve hot with rice or chapati. I had it with rice and iruvili kuzhambu, the recipe for which I got from my friend Jaya (while you are there check out her travelogue). Its her mom's recipe, so no doubts there about how it turned out... absolutely fantastic! Kuzhambu is nothing but pulusu, for the telugu speaking. Its a dish that has a tamarind base and has no lentils added to it as is the case in sambar. It mostly has an addition of lightly sauted fresh or dried vegetables. (I used onions)

I love anything that is tangy and my personal favorite is an onion pulusu that my mom makes using sambar powder. This one is very similar to that but the freshly ground spices lend the kuzhambu a nice texture and taste..yummmy. The combo of the kuzhambu and vepudu was great. I was actually planning on taking this for lunch the next day, but once I tasted the tangy kuzhambu I had to serve myself some immediately. Do try it out!


Happy Thursday and have a great weekend !

Monday, May 05, 2008

Risotto...finally!

Dear Foodies,

Having seen many many recipes for risotto on blogs and the high praise that is showered on this dish, I just had to try it out. So off I went to the store one fine day and picked up some Arborio rice...and so the story ended! Yes, that box of rice was sitting on my pantry shelf for more than 2 months without complaints!! Last week I finally decided it was time to bring it out, I was out of fresh vegetables and the Risi e Bisi photo flashed past my mind.

So I checked their recipe, realized I had just about everything needed and set out making the risotto before the moment passed! I used frozen peas and arborio rice .... and sprinkled some (gulp) chole masala (!!) .....I also skipped the cheese & the parsley, apart from that ;) the recipe is intact and so check the recipe here. I am not a huge fan of mint but I absolutely loved its flavor in this recipe, it was wonderful. Thank you Bee & Jai!

Now, you cannot possibly take a photo without garnishing the dish first, right? So I brought out some baby carrots, chopped them up into little flower-like shapes, decorated the risotto with it and took the pictures. Later when I took a bite of the risotto with the carrots, I loved the crunch...so... I hurriedly diced up some more carrots and added it to the risotto. I had it with some yogurt for dinner, Absolutely lovely! Now that the box has been opened, I am surely going to try out other flavors soon.

Since this is my first time ever making or eating risotto, I am not sure if the consistency was perfect. The rice grains were a little sticky but also had a slight bite to them. I hope that is how its supposed to be, cos I liked it that way :D It was wonderful hot off the stove, but the next day since I had refrigerated it by then, I had trouble liking the consistency, because re-heating it in the microwave made it dry and yet sticky....it probably needs a little stock when re-heated. Any suggestions ?

Happy Monday!

Wednesday, April 30, 2008

Cabbage salad - 3 way !

Dear Foodies,

Spring arrived here with a sudden peak in temperatures a couple of weeks back and its funny that as I am writing this post the temperatures have dipped again and the cold weather outside is unbearable. Not because the temperatures are so low, but because the mind has lost its tolerance towards it. It wasn't expecting this bout of cold air for another 6-7 months :-(

Have you guys heard of this fast food place called Gold Star chilli....its a Cincinnati based restaurant chain and well, is located only in the tristate area. They hardly have anything vegetarian in there, but I came up with this combo that I liked very much when in the Univ. It had red kidney beans cooked rajma-style, topped with onions with hot sauce, crackers and a wedge of lime. But this was not a usual combo offered by them. They would have these 1-way, 2-way and 3-way chilli combo's where 1 was for beans, 2 for cheese and 3 for onions and the default being chilli in all of them. I would call mine a '3-way veggie chilli with no cheese' and they would get totally confused :D

The guy who actually plated the food new what I wanted due to sheer repetition, but the ppl at the counter would be different every single time. So the moment I went to their store, this guy would have the food ready but the person at the counter would still be debating about the cost :D I paid a different amount every time I ate there I think! One would ask me to call it a '2 way with onions, no cheese', and the other would christen it a '3 way veggie without cheese' and I would try remembering who said what so I wouldn't have to go thru the whole explanation every single time :D

So back to the salad, my way! Last weekend we had pretty good weather, and I was in no mood of eating anything hot. I was also in a cabbage eating mood all of last week and had a raw salad once during the week. I tried out another version of it and tossed in some quinoa to make a really tasty and quick meal.


Ingredients:
  • 1 1/2 cups: Cabbage, Shredded or thinly sliced
  • 1/2 cup: Carrots, thinly sliced
  • 1/2 nos: Bell pepper, thinly sliced
  • 1 nos: small Onion, thinly sliced (I had tiny white onions, but would have preferred red ones)
  • 1/2 slab: packaged Silken firm Tofu, cut into thick matchsticks
  • 2 nos: Spring onions, chopped (green and white portion)
for the dressing:
  • 1 Tbsp: Tamari/Soy sauce
  • 1 tsp: Tobasco
  • 1 tsp: toasted Sesame oil
  • 1 tsp: Honey
  • 1 tsp: Red wine Vinegar (or any vinegar)
  • 1 tsp: Thai green curry paste
  • 1/2 Tbsp: Olive oil
for the garnish:
  • 1 Tbsp: Sesame seeds
  • 1 Tbsp: slivered Almonds
  • Salt and pepper to taste
Optionals:
  • 1 cup: Quinoa, cooked as per instructions
  • Lettuce leaves
  • Wanton wrappers
Method:
  1. Spray a baking sheet lined with aluminum foil with some oil and line the tofu sticks. Broil them on low for 6-8mins until they start turning a little golden around the edges.
  2. Toast the sesame seeds and almonds, either on the stove top or in the microwave.
  3. Whisk all the dressing ingredients together and adjust the individual amounts to your taste.
  4. Next toss in the veggies and coat well with the dressing and check for seasonings. Add the tofu sticks and load up your salad bowl, topping it off with the sesame seeds and almonds OR add some quinoa, check for seasonings, toss them well for a tasty quinoa salad OR fill some crunchy lettuce leaves with the salad and make lettuce cups OR use the salad as a filling and make potstickers like so.
You could add other veggies you have in hand and play around with the ingredients to suit your palate.

There you go, you have three different dishes from the same salad, and all of them are super easy and flavorful :) ...


...and you also have three pics of the salad with 3 different backgrounds. So which one do you like better ??


Confession # The chopsticks are only for the camera, I tried eating with it and could hardly get any of the salad into my mouth with them :))

Happy Wednesday!

Monday, April 28, 2008

there's always a first ...

Dear foodies,

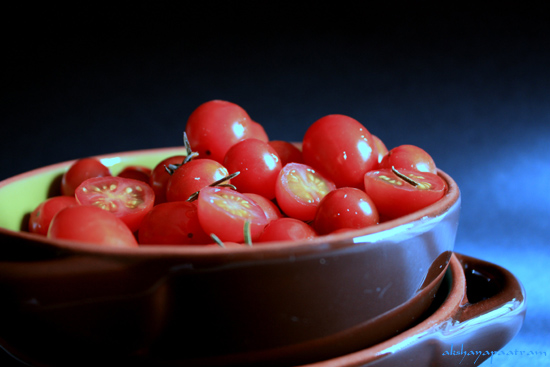
Grape tomatoes for CLICK: Au Naturel

and this is my first entry to CLICK (yayyyy), Bee & Jai here I come :) :) Thank you soo much for hosting the event.

This was another photograph I clicked,


Thursday, April 24, 2008

Comforting Kichadi

Dear Foodies,


I am back again, and this time I am armed with a brand new camera. Yayyy ! I am still learning and trying to find my way through the innumerable settings and buttons on the camera, so pardon the photography that I am going to force upon you guys for the next few weeks. Any tips and comments on composition, lighting, angles and everything else are more than welcome, infact I might make that compulsory ;)

The mention of the red chilli pickle in my previous post reminded me of kichadi and instantly I started craving for some warm kichadi. It was also going to be the best companion for kadhi which has sprung up on quite a few blogs this past two weeks. This time I made my usual kichadi without dressing it up like last time.


Ingredients:
  • 3/4 cup - Rice, I used Basmati
  • 3/4 cup - dal, I used 1/4th toor and 1/2 moong dal
  • 1 tsp - Shah jeera or Jeera/Cumin seeds
  • 2 nos - Garlic cloves, sliced or smashed
  • 1/2 cup - Onion, sliced lengthwise
  • 1/2" round of ginger
  • 4 nos - Laung/Clove
  • 1 nos - Bay leaf
  • 1 nos - Badi elaichi (or normal elaichi/cardamom)
  • 1" - Cinnamon stick
  • 2 nos - Green chillies, split thru the center
  • 1 tsp - turmeric
  • 2 tsp - Oil
  • Salt to taste
  • 2 1/2 cups - Water
Method:
  1. Soak the rice in water for about 20 mins. Heat oil in a pan (or pressure cooker) and add the jeera. Next add all the whole spices and heat them through for about a minute.
  2. The garlic and ginger go in next, after the garlic cooks a little (~1/2 -1 min) toss in the onions, green chillies and turmeric . I add a little salt to the onions so they release their moisture and soften faster.
  3. After the onions are cooked and turn translucent add the moong dal and saute for 2 mins on medium heat until they start turning a little golden and then add the rest of the dal and rice. You could also skip the 2 step process and add all the rice and dal together.
  4. Saute the mixture for 2mins until the moisture evaporates and the rice gets nicely coated with the oil. Transfer it to a rice cooker or microwave safe bowl and cook according to your tried and tested rice:water ratio and salt. I cooked it in the microwave for 14 mins, stirred it once and cooked for another 2 mins.
There seems to be nothing elaborate or rich about this dish but it sure is on the top of my 'comforting recipes' list. Its also because of the memories I've attached to Kichadi. My brother and I would play 'tent' in our home once in a while. We would pull together shelves and some how manage to drape bedsheets over them to form a tent right inside the house :D And then we had this nifty little torch light that had a fan on on side and the light on the opposite. We would fix that to the center of the tent and 'camp out' in our tent. We would also pile up pillows and bedding, books etc and make it a cozy corner. My mom would acknowledge this with kichadi and bring it to our tents :)) It sounds so funny and silly but those were golden days :)

For the Kadhi I followed Manisha's recipe but skipped the cloves in it. Thank you Manisha :)

Have a great weekend!

Friday, April 11, 2008

Ready for Adai ?

Dear Foodies,


The recipes are back again on this blog, Yayyyy !! So before my blog gets branded as another no-recipe food blog ;), lets get cooking, shall we ?

I really love dosa's and idli's, they are so easy to make and you can either go ahead with the whole side dishes charade or make do with some pickles and podi's in your pantry. Either way, they are a great breakfast, lunch or dinner. And our love for this is more than evident with the number of recipe variations that we get to see on the blogs.

Since I started cooking here, I've never tried making my own dosa batter from scratch. One main reason being I am scared to even try fermenting it, and another equally strong reason is I don't have a good blender :D So whenever I want to get the satisfaction of making dosa's from scratch I jump over to Vaishali's instant recipe, otherwise its the pesarattu and rava dosa that are my go-to dishes.

The other favorite of mine is the Adai....

Ingredients:
  • 1 cup - Rice
  • 1 cup - mixed dals -- more of chana dal & toor dal and a little moong/urad dal
  • 3 nos - dried Red chillies or to taste
  • A pinch of hing/asafoetida
  • A sprig of curry leaves
  • Salt to taste
  • Oil for cooking the dosa - approx 2 Tbsp
Optional additions: 1" inch - ginger piece, a cup of drumstick leaves, Cilantro

Method:
  1. Soak the rice, dals and red chillies in water for about 3 - 4 hrs. If I want it quicker I just microwave them for a few minutes to warm the water and reduce the soaking time to 1 -2 hrs.
  2. Grind the soaking ingredients with the curry leaves and any or all of the optional ingredients to a coarse paste. The coarseness is what gives the adai the crisp texture.
  3. Add salt to taste and the asafoetida and mix well. Heat a shallow, wide pan for making the dosa's and spread a little oil on the pan and get started with the adai's. (check here for pics )
  4. The adai should be a little thicker than the normal dosa. To make it cook uniformly and also to make them extra crispy, make 1 or 2 holes at the center of the adai and add a drop of oil, this gives it the signature adai look.
  5. Serve hot with red chilli pickle, kara podi (gunpowder ;) ), jaggery and yogurt to make a perfect meal. For some extra touch, my mom would also add a small dollop of home made butter on the warm adai, the white colored one...yummmm
In our house we were totally spoilt. There were always more than 2 accompaniments to any of these tiffin items. I would have this queue system to optimize the dosa/idli between all the side dishes :)) So if you ask me, all those items mentioned are compulsory not optional :D

You could also add some chopped onions while making the adai and sprinkle some kara podi and grated jaggery...(yup, you cannot have just one thing)


and roll them up for the to-go person :)

I also tried my hand at my mom's Sponge dosa recipe. Since my blender did not give me a very smooth paste, I had trouble getting it to ferment well, and ya its the ~hand~ too :( So I added a tiny pinch of baking soda create the sponge effect :))


And most of you would have figured it out, this one is for Srivalli's dosa mela.

Monday, April 07, 2008

Ugadi Shubhakankshalu

Dear Foodies,


Sri Sarvadhaarinama Ugadi Shubhakankshalu

I wish you all Happy Ugadi and Happy Gudi Padwa. Have a great year ahead :)


Thursday, April 03, 2008

May I come in please ...

Dear Foodies,

I still exist, I really do!! I know I've been away for a very long time. Sorry for everyone who stopped by and were disappointed to see the same old posts. Part of it was because I had work in the University that I still had to complete, and by the way I am a Post-Graduate now yayyyy :) The other reason is, my dear little camcorder that was my partner in crime for this blog broke (because of my stupidity :(( ) So though I cooked a lot in the past few months, I could not transfer the recipes to the blog. I am planning to get a new cam in a few weeks and will also be re-vamping my blog template to bring a fresh new look. So do come back :)

I have been using the old blogger template until now and plan to move to the beta version during the spring cleaning process. I had made a lot of changes to the basic Minima template I was using to create a unique look. So I am sure I'll loose most of it during the move to beta. If you have any sort of advice for me, please do drop in a comment :) and yaa, there is a poll on the left sidebar that'll help me get your views :)

Update: The move was easier than I thought, just a click of a button. I lost all my side bar content as expected because all that was my addition to the original template. But since I was given access to my previous HTML code, I just copy-pasted them into the HTML/Javascript Page elements feature.

I also added a new Horizontal Menubar right below the page Header. The pages connected to those links are just what the label states they are. Hope you find that convenient. I am still looking for other nice widgets and hacks to spruce up the blog and get it in good shape so you guys can enjoy reading it. Let me know if you have used/come across interesting pieces of code :)

Thank you !


Blogging tips