Showing posts with label summer. Show all posts

Wednesday, August 06, 2014

Farmstand Summer Salad

Dear Foodies,


The recipe for this salad was nothing more than putting together ingredients in my market tote. Everything was perfectly fresh, picked right that morning at their peak flavor. There was not much I needed to do to enjoy a good lunch. My neighborhood market is a short 10 min walk from my apartment. It opened the week I moved to the area 3 years ago and though it has changed locations a few times, its still within a 5mi radius. A couple of farms have become market regulars and bring in their fresh produce, likely picked that morning. Even if I don't need groceries for the week I stop by to see whats in season.

Buying veggies and fruit at the market is not necessarily cheaper than at the stores but freshness cannot be beat. More importantly it makes you relearn seasonality charts which are easy to forget when you can buy out of season produce shipped in from around the world at grocery stores. And a bonus if you still need one is finding lesser known varieties of fruits, vegetables and greens that never make it to large scale grocery stores. The lemon basil I used in this salad is a perfect example of that. I'd never heard of it before but the minute I walked up to the table the fragrance from the herb was hard to ignore. It's less peppery than regular basil with a big punch of lemony, floral notes and is perfect in raw preparations.


One other bonus I'm embarrassed to admit is getting my evening snack fix from samples laid out - candy-like tomatoes, crunchy pea pods and sugar snap peas, variety of citrus segments, berries even some fresh pita chips and dip! The difference in taste between produce at the market and grocery store is unbelievable. With a strong CSA subscription and a regular flow of people stopping by to pick up weekly groceries, farmers can confidently harvest produce without any pressures of having to transport them many miles away. Its a perfect win-win for both parties while also establishing a sense of community. I'm usually scrambling to get there by closing time but when I do have a few minutes to chat I get tips on how to cook unfamiliar ingredients, gardening tips to salvage my brown thumb or an extra handful of beans or a sprig of herbs thrown in.

I had some cooked chickpeas on hand and decided to include it to make the salad substantial. I lightly roasted them in a cast iron pan along with a little oil to get them crisp around the edges. I roasted shucked corn as well to add in the salad. If you had an outdoor grill/grill pan you could grill them first instead. I happen to love charred corn flavor but you could skip this entire step and use them raw...choose your favorite method.

I made a simple lemon+olive oil dressing perked up with red pepper flakes and tangy chaat masala for an Indian twist. Any combination of fresh herbs you like should work here. I used cilantro that I always have in my fridge and potent lemon basil from the market. This salad tastes better when made ahead and set aside for at least 30 mins up to a couple of hours. I stored leftovers in the fridge and had it for lunch next day and it tasted really good.

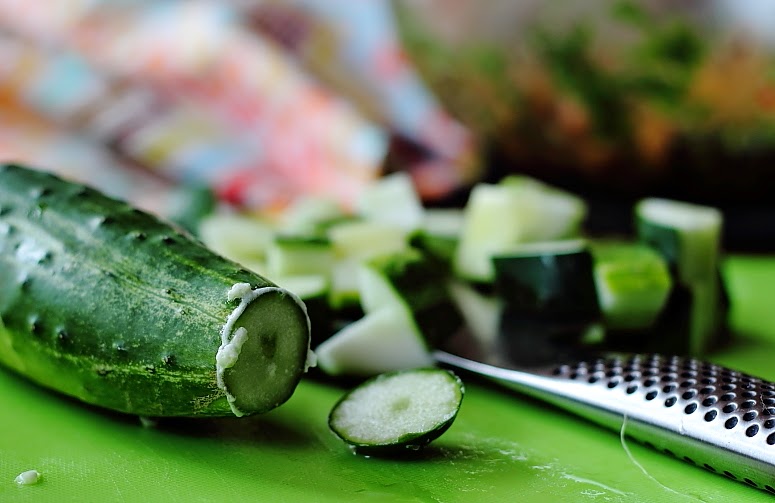
 I used a couple of crunchy Kirby cucumbers in this salad and made a quick pickle out of the rest using this recipe. Some cukes tend to have a bitter edge to them and I use my Dad's trick when prepping to get around it. I begin by slicing off both tips, take one end bit and rub it against the opposite end in a circular motion about 4-5 rounds. Repeat using second end bit on the other end. You'll see a slight foam form around the edges and its supposed to be the bitterness getting drawn out. Wash it under running water and slice as needed. I never cared to research if science backs this up but also don't recollect ending up with a bitter cuke after using this method.
Farmstand Summer Salad
Prep Time - 15 mins
Cook Time - 20 mins
Servings - 2-3 (main) 4-5 (side)
Ingredients:

  • 12-15 - Heirloom cherry/grape tomatoes or 2-3 regular sized
  • 1 ear of Corn, shucked
  • 2 - Kirby cucumber (~approx 1 cup diced)
  • 1 cup - Chickpeas, cooked
  • 6-8 - mini Mozzarella balls, halved
  • 1/3 cup - chopped herbs. I used Cilantro and Lemon Basil
  • 1 Tbsp - Oil
  • 1/4 tsp - Turmeric (optional)
  • Dressing - 2 Tbsp Lemon juice, 2 Tbsp - extra virgin Olive oil, 1/2 tsp Salt, 1/4 tsp Black pepper, 1/4 tsp Red pepper flakes (optional), 1/2 tsp Chaat masala
Method:
  1. Heat a cast iron pan to medium heat with a tablespoon of oil. Add cooked, drained chickpeas, 1/8 tsp turmeric and roast for 8-10 minutes tossing every few minutes till lightly browned on all sides. 
  2. Whisk together all dressing ingredients in a bowl big enough to hold finished salad. Once chickpeas are done add to bowl and toss gently. 
  3. Add shucked corn to the pan with remaining 1/8 tsp turmeric. Saute for 6-8 mins until lightly charred and add to dressing bowl. 
  4. Allow to cool slightly before adding diced tomatoes, cucumber, herbs and cheese. Toss all ingredients together and adjust seasonings to taste. Cover and set aside for at least 30 mins at room temperature or in the fridge if serving cold. 
  5. Serve with freshly shucked corn as a garnish and toasted bread on the side.
Note: I used turmeric for color and it can be left out if you don't have it. Add chunks of lightly toasted cubed bread for a take on panzanella. Diced avocado, jicama and red onion would also work well here. This salad travels well and can be made ahead for a picnic or potluck.

This salad hits different notes on the flavor and texture palate and only gets better as it marinates in the dressing and fresh tomato juices. Though chaat masala may seem out of place in a salad it pairs perfectly with tomatoes and corn and of course its best friend cilantro and lemon. I made this three times in 10 days and will continue to make it as long as I can get my hand on these fresh ingredients. Its become my favorite lunch to pack and I'm going to miss it once summer is out!

Tuesday, July 22, 2014

Summer Breakfast Parfait

Dear Foodies,

I will forever be envious of those who can pause in the morning to make themselves a good breakfast before getting started with their day. I wake up with just enough time to get ready for work and rush out the door. Taking a few extra minutes to sit down and enjoy breakfast even if its just a bowl of cereal or a banana makes me antsy. But skipping it entirely isn't an option either so I've found my way around it. I can't stick to one recipe for more than a few weeks but variety is good, right ? I've circled through many breakfast ideas and tricks over the years and will share some of them so I remember when the lull moves in.

We are in the cusp of berry season and stone fruit season leaving us with an abundance of choice. Strawberries, raspberries, blackberries, blueberries, peaches, nectarines, plums, apricots, plumcots, lychees, jackfruit and the list goes on. Each of them proudly vibrant, plump and bursting with sweet juices making it impossible to not be greedy. But its a good problem to have on hand, pretty much wash-eat-repeat I'd say.

My breakfast during the last few weeks has been yogurt + fruit. I wanted to make it a little more fancy and played with the idea of a parfait. I was out of granola so I made a quick stove top version that was ready in 10 mins. I toasted rolled oats, flax seeds and slivered almonds in some brown butter on really low heat for 8-10 mins until they were evenly browned. I finished it off with some local honey and sea salt to balance out flavors. While this was happening I scooped a few spoonfuls of homemade yogurt into a strainer to get rid of excess moisture. I also pitted plump rainier cherries, roughly chopped strawberries and tossed them with a few blueberries and another drizzle of honey and a squeeze of floral lemon juice.

All three components will be ready in just over 10 mins. All that's left to do is layer them as you please. If you are feeling fancy pick a tall glass or jar like I did, be meticulous in your layering of yogurt followed by fruit and granola. Step out onto your patio and enjoy breakfast under the pleasant warmth of the early morning sun. Or Scene 2 - dump them together with no real rhythm into a container with a tight lid and rush out the door to where ever your day takes you. Either way, you'll enjoy the beauty of summer fruit and look forward to another mornings' breakfast.
Summer Breakfast Parfait
Prep time: 15 mins
Servings: 2
Ingredients

Quick Granola
  • 3/4 cup - Rolled Oats
  • 1/2 cup - slivered Almonds
  • 1-2 Tbsp - roasted Coconut chips
  • a pat of butter
  • 1 Tbsp - Flax seeds
  • 2 tsp - Honey
  • a pinch of sea salt
  • 1/2 cup - Yogurt, strained
  • 1 cup - Cherries, Strawberries and blueberries
  • 1 tsp - Lemon juice
  • 1 tsp - Honey
Method:
  1. Place a wide, shallow plan on low-medium heat and spread slivered almond into an even layer. Toast them gently, tossing every few minutes until evenly browned and set aside. Next add butter and heat until it begins to brown slightly. Add oats and flax seeds and toast on low heat till they are turn a nice golden color. Remove from heat, add almonds and while still warm drizzle honey and salt. If adding dry fruits like raisins or cranberries, do so at this stage.
  2. While nuts and oats are toasting, spoon yogurt into a strainer (placed over a bowl to catch whey) and place in the refrigerator. 
  3. Pit and roughly chop cherries and strawberries into a bowl, add blueberries, lemon juice and honey. You may need more or less honey based on how tart or sweet the berries are.  Place these in the refrigerator as well until ready to assemble.
  4. In a tall glass or jar spoon a layer of berries followed by yogurt and granola. Repeat as many layers as the glass will hold and end with a drizzle of sweet juices from the macerating berries.

The combinations are endless with this one - add vanilla bean seeds or extract to the macerating fruits or lemon/orange zest or cinnamon/cardamom or a tiny bit of grated nutmeg. Use whatever combination of fruit you have on hand, I cannot think of a bad one. Jackfruit + honey + pistachios is divine, papaya + candied pineapple + toasted coconut chips, for tropical bliss. Add other nuts to the instant granola - pecans, walnuts, brazil nuts, pistachios, pine nuts, raisins or dried fruit like cranberries, raisins, pineapple or cherries. You know, no rules. And of course, you can flavor the yogurt too or make a compote from some of the fresh fruit, but when simple, weekday-morning-doable can be this good, I'll stick to minimal work.

Monday, August 19, 2013

Tostadas with Guacamole, Red Cabbage slaw & fresh Corn

Dear Foodies,


Have you been to a horse race ? We were there a few weekends back and surprisingly had a good time. I don't think I would go back there every weekend, but it was a good one time thing to do. I don't gamble much, I could just as well through some cash out the window and it'd be the same. But that said, we wagered a couple of dollars on a few races that day. My dad found a few websites that offered free tips for each race. Some could not have been more off the mark, the one they picked to come 1st came 6th in a 8 horse race...ughh. We ended up with happy coincidences on some picks though - I whopping $3.60 on a $2 wager...hehe. They have 8 races each evening, one every 30 mins, that gives a rookie just enough time to figure out which horse to pick and place your wager. We had a nice time and enjoyed the first 4-5 races of the day. It took us awhile to figure out what was going on but we soon caught on and knew what win, show, place stood for and even the special quinella, trifecta and exacta meant. We tried a few combinations on each race until we were tired of losing and got out. By the 7th race we were done and left before the final race for the day.  Every summer my evening drive home is disrupted by this event - the amount of traffic is crazy, taking me twice as long to get home. Now I know whats its all about but still don't get where the money comes from! Even in the midst of a recession, $458 million was wagered at the race track last year, that is nearly $13 million a day!


Instead of corn tortillas I picked up these tostadas at the store. I had never tasted them before and was intrigued by the idea of having a crunchy chip as the vessel for toppings. Part of the reason I like corn tortillas is probably the smaller size. The fillings tend to be what I like the most about taco's. I'd rather have less tortilla and more filling and these tostadas are even better because of the crunch they bring. They are light and still surprisingly sturdy enough, allowing you to pile on the toppings.

A tostada is a fried tortilla that can be loaded with goodies. Its like an open faced taco with a crunchy shell giving you more room for filings which are essentially the best part. When you need a light lunch or snack to get you through a busy summer day a tostada is your answer. With the bounty of avocado in the markets here I make guacamole very often and with a few other ingredients I can have a fun meal ready in 15 - 20 mins. If you don't find pre-made tostada's in your local stores you can lightly fry store bought corn tortilla's as shown here. But finding ready made ones would be ideal in making this a quick meal to put together.


This dish has a few of my current favorites - guacamole and red cabbage slaw. Its perfect for picnics or do ahead scenarios as you can make and store all the components ahead of time. And more importantly, it looks stunning on the plate ;-) It could also be a great addition to a 'taco party' menu. I keep the guacamole simple with lots of cilantro and lime juice. A hint of cumin and diced jalapeno round up the spices for me.

Summer Veggie Tostadas
Prep time: 20 mins
Ingredients
  • Tostadas
  • 1 cup - Guacamole (recipe below)
  • 1 cup - Mexican cabbage and Jicama slaw
  • 2 - Corn on the cob, roasted (oven/grill) or microwaved whole in the husk
  • 3 - Spring onions - greens only
  • Feta cheese
  • Hot sauce (optional)
Guacamole
  • 2 - Avocados
  • 1-2 - Limes
  • 1/4 cup - Cilantro, roughly chopped
  • 1/2 tsp - Jalapeno/Serrano, minced (adjust to taste)
  • 2 Tbsp - Onions, finely diced (optional)
  • 1/4 tsp - roasted, Cumin powder
  • Salt to taste
Method:
  1. Roast or char grill corn or microwave in the husk for 3-4 mins as I did for this recipe. Once cool to handle, slice off the kernels with a sharp knife. 
  2. For the guacamole, combine onions (if using), minced chilies, cumin powder, salt and half the lime juice in a bowl. Using the back of your spoon apply gentle pressure to crush them together. This helps to draw out the juices. Add peeled and roughly diced or scooped out avocado to the mix and toss together. I sometimes go for a smooth texture and use a fork to mash everything together or when I want a more chunky guac, I add diced avocado and fold it into the other ingredients. Add more lime juice to taste, I prefer more of it.
  3. To assemble, apply a generous smear of guacamole on the tostada, top it with a few spoons of the cabbage slaw. Add as much of the corn and cheese and complete it with a sprinkle of spring onion greens and a few drops of hot sauce(optional)

This was a super nice spin on ingredients used in these tacos. The tostada's are surprisingly sturdy and did not fall apart in my hand and neither did they turn into a soggy mess. The sharp hint of lime in the guacamole and the slaw brighten up the dish and the fresh summer corn is a burst of sweetness. I had some mild feta on hand and it turned out to be a nice addition to the tostada. This is more of a technique or idea and could be used as a perfect vehicle for all the fresh produce in summer and fall.

What's your current summer favorite go-to meal ?

Wednesday, August 14, 2013

Homemade | Rhinestone / Kundan Rangoli

Dear Foodies,

Padmam - Lotus muggu
I'm going to take a detour from cooking on today as I can no longer keep this new craft that my mom and I (...mainly her :) ) have been churning out from all you guys. Last month for a puja at my brother's place we were trying to come up with ideas for setting up the altar and other decorations. Since it was their new home we did not want to risk using traditional muggu (rangoli) colors and staining the floors. When looking for designs online I came across some that were made using kundan stones and that's when this got started.
Peeta muggu (to be placed under a 3" high stool - peeta)
Michael's is our go-to store for craft items and it was no different this time. We found a huge pack of assorted color acrylic rhinestones and with the 40% coupon it was a good buy for a impromptu project. Only drawback was having to sort the beads by color before we got started. But with some glue and plastic printer sheets we got started on our very first one soon.


Since then we've made many more...it's hard to stop and we knew we were spent our afternoons ordering stones on Amazon and our evenings scouring bead stores in the area for the right shape, right shade or the perfectly sized stone :)
another Padmam with a different petal tip design
For the first few muggu's we used Graffix Ink Jet film, but later realized it's a little too thin and flimsy for such a project. We currently have these sheets from Graffix that we ordered online. They are much more sturdier but the only downside is the color. I noticed that the sheet itself had a blue tinge only after opening the package. So if you can find clear sheets of the same thickness, that would be ideal.
Flower pattern - Not the best photo but my favorite so far
Since the sheets are transparent its easy to trace the pattern on a sheet of paper and attach it to the plastic sheet using staples or paper clips. Its best to move a few inches at a time, trace the pattern with glue (we used this) and immediately place the rhinestones. Do use a good amount of glue or the stones will fall out over time when handled...found that the hard way.

We also used pearl and silver bead strings for some of the outlines. My mother figured that the best way to make them fit the pattern is to leave them stringed until they are glued in place. While the glue is still fresh, gently tug at the string and pull it out. You can then make slight adjustments but its a lot easier than gluing beads individually. Once the glue has had time to dry, trim off excess plastic sheet around the pattern. We skipped this step for now and left a lot more space so they are easy to handle and move around.


This our most recent project and the one we are most proud of, I think. We spent many evenings visiting stores and looking online for the right stones for this one but it was definitely worth it. Its still not complete. My mom's done making all the petals (below pic) and we'll have to create the final shape by using some gold string to form an outline.
Materials & Sources
  • Acrylic Rhinestones - Various colors, sizes and shapes
  • Pearl and Silver beads
  • Sources: Michaels Craft store - don't forget to look for coupons; local bead stores/outlet; The Crafts Outlet - Amazon store, eligible for prime shipping;
  • Craft Plastic Sheets - we used these Graffix sheets, but in a clear color if you can find them (and let me know where!)
  • Glue - Aleene's Clear Tacky Glue
  • a pair of tweezers really come handy when you have to move little beads around
petals to go around the above circular center pattern - 8 total
Google stone rangoli and get prepared to be awed. There is soo much great work to be inspired by. I thought I had a brilliant idea when we were trying to find an alternative to traditional color powder rangoli, but looks like its been around forever. This was the first collection that inspired me, here's another that lead to our current project; and another one. The very first muggu is the one that will be at the base of our Varalakshmi vratham kalasam this year.

Did you worked on any craft projects recently ? Please share them here!
 

Friday, June 14, 2013

Corn Tacos with Mexican Slaw & Poblano Dressing

Dear Foodies,


I've been waiting all year long to share this recipe here. I discovered fresh corn tortilla's and tacos last summer and they were my staple food for a good month or two. But it was way past fresh corn season by the time I got around to putting the recipe together. This year I hope its right not time so you guys can enjoy it as much as I do. Summer in SD is not until July or August, we are going through what is called June 'gloom' right now. Overcast days with 60-65F temperature hardly feels like summer. One look at the farmers market stalls though and you'll know otherwise. Just like summer and mangoes will go hand in hand for me, its fresh summer corn that I look forward to here. The kernels are so tender and juicy that they hardly need any cooking. When separating the kernels form the corn, a good portion of it ends up being a snack. I nuke them in the microwave for 2-3 minutes while still in their husks sometimes. Once cool to handle, remove the husks, slide half a lime through the kernels, sprinkle salt, chili powder and call it dinner.


This taco recipe is filled with some of my favorite components. A stunning slaw has just three main ingredients - purple/red cabbage, carrots and jicama. I started using jicama only last year after watching a Mexican food show on TV. I had always seen them next to cauliflowers at the local store here but never really paid them notice. Eaten raw, jicama is super crunchy and has a mild sweet flavor. It's rich in fiber and adds a wonderful texture to salads. I dress the salad with a sharp lime dressing with lots of cilantro and a hint of cumin and chile powder to add zing. This simple slaw is clearly greater than the sum of its parts. Its perfect for picnics or do ahead scenarios as the veggies are sturdy enough to hold up against the acidic dressing for a few hours. And more importantly, it looks stunning on the plate!


If you make nothing else from this recipe, you should at least try the poblano dressing immediately. I use poblano's instead of green bell peppers in quesadilla's or stuff them with the sauteed corn and red peppers, a little cheese and bake them for a quick dinner. Once the poblano's are grilled/broiled it takes 5 mins to make the sauce. I use thick homemade yogurt, scallions, a lot of cilantro, some lime juice and roasted cumin powder. A few recipes call for garlic but I don't like its pungent flavor in raw form and avoid it here. Throw everything in a blender jar, give it a few pulses until the sauce to smooth and creamy. And its ready to be used as a salad dressing or a condiment for burgers and sandwiches.

For these taco's, I separated the kernels from the cob and charred them in a dry pan. Seasoned them lightly with salt and pepper. The star of the dish though are the vibrant slaw and poblano chile dressing that packs a punch. I make both every few weeks and store in the fridge for a few days. I made the slaw for a event at work a few weeks back it was enjoyed by all.

Corn Tacos with Mexican Cabbage slaw and Poblano dressing
Prep time: 45mins
Cook time: 15mins
Servings: 3-4
  • Corn Tortillas
  • Roasted/Charred corn (on an open flame or kernels sauteed in a dry pan)
  • Radish sprouts or any other kind of your choice
Mexican Cabbage-Carrot-Jicama Slaw
  • 1/2  - small head of Red cabbage, thinly sliced, approx. 3 cups
  • 1/2 - Jicama, julienned, approx. 1.5 cup
  • 3 - Carrots, julienned or shredded, approx 1.5 cup
  • 1/2 cup - Cilantro, roughly chopped
  • 1/2 tsp - Jalapeno/Serrano. minced or mexican red chile powder (adjust to taste)
  • 1 tsp - roasted, Cumin powder
  • 2-3 - Limes, juiced
  • 2 Tbsp - Olive oil
  • Salt to taste
  1. For the salad dressing, combine lime juice, olive oil, salt, chile and roasted cumin powder. Adjust seasonings to taste. I tend to use more lime juice in mine. Toss together all the veggies, cilantro and half the dressing adding more as needed. Set aside for 30 mins at room temperature or refrigerated to develop flavors.
Poblano Chile Dressing
  • 3 - Poblano chiles
  • 1 - Scallion
  • 1/2 cup - Cilantro leaves and tender stalks
  • 1.5 cups - thick plain Yogurt or (3/4 cup buttermilk + 2 Tbsp sour cream)
  • 1/2 tsp - freshly roasted Cumin powder
  • 1-2 Tbsp - Lime juice
  • 1/4 tsp - Garlic, grated (optional)
  • Salt to taste 
  1. Roast poblano chiles over a gas flame or under the broiler until charred all around. Transfer while hot to a bowl and cover with plastic wrap for 10mins. Once cool to handle the peel should come off easily, discard the seeds and membrane as well.
  2. Transfer coarsely chopped poblano, scallions, cilantro and yogurt to the blender jar and process until smooth. Add salt, lime juice and cumin powder to taste. Use immediately or store refrigerated in an air tight container for up to a 1 day.
Warm the corn tortillas lightly to make them pliable again. This can be done on a skillet or cover a stack of them in aluminum foil and place in a warm over for 10 mins. Spread out all your fixings on a table for a taco bar or assemble them as you go. Place a spoonful of slaw on the taco, top with charred corn, radish sprouts and finally drizzle a spoonful of poblano chile dressing over all of it, right before serving.

Notes: Swap charred corn with roasted onions & peppers or marinated and cooked tofu/mushrooms or crisp sauteed potatoes or well, the choices are endless. You can also add a zippy guacamole tomato salsa or tomatillo salsa as topping additions.

This is a perfect summer dish loaded with crunchy veggies and vibrant flavors that keep these tacos light and refreshing. Since its all about the fillings I like to use smaller tortilla's and prefer the flavor of corn tortilla's over flour. There are no strict rules with this though so make it your own and use flavors and ingredients you enjoy. Each component is good on its own too and can be used in many other forms. If I have left over salsa's and roasted corn or peppers I make a burrito bowl with the addition of black beans and rice. Add some steamed edamame, cranberries and toasted slivered almonds to the slaw for a light mid-week lunch.

Friday, July 06, 2012

Friday Frames | Summer Colors


Dear Foodies,

Don't you love that yellow ? It's a piece of sunshine you can hold in your palm

Jewel colored radishes, almost too pretty to eat, almost...

With nature doing all the work for us, I only did the assembling. No cooking needed. I got a huge bunch of basil and made pesto with a punch of lemon zest. This platter is my very poor interpretation of a veggie sampler plate I had at Burlap.

ending the meal with some sweet cherries.

Thursday, June 28, 2012

Summer Spinach, Strawberry & Quinoa Salad

Hello Foodies,


If not from the heat (!), the produce in the market has surely announced the arrival of Summer. When the temperatures soar there is nothing more refreshing than a bite of juicy strawberry or watermelon. Lucky for me there's a huge strawberry farm close to where I work and the berries there are the best. The center of the berries are filled with sweet juices that fill your mouth as you bite into it. I've bought countless punnets of berries this season and have hardly cooked anything with them. The path of least resistance leads right to my mouth from the basket and there's no stopping. But its not just the strawberries that are at their best right now, there's a lot of green gems to focus on as well. Candy like sweet peas and fava beans are a delight, salad greens like arugula, spinach, chard, kale are all vying for your attention. Mother Nature knows what we need and when we need it so why tinker with her.


I had a refreshing strawberry spinach salad at the local deli a few weeks back and was pleasantly surprised by how good it was. The fresh bite of the strawberries against the earthy & light spinach made for a really satisfying lunch. A google search revealed that the combo wasn't uncommon, but it was to me. I would never have used strawberries in a salad and now, not anymore. A simple lemon vinaigrette works just as well but I've been in a fennel phase lately. So I lightly toasted fennel seeds and used them to flavor a vinaigrette bursting with lemon zest. Making vinaigrette's at home is a revelation if you haven't tried it yet. You don't need fancy ingredients make one - a lemon, good olive oil, salt & pepper is all you need to get started. And then based on how often you have salads you can begin exploring by using different vinegars, oils, mustards, spices etc. Using the very same ingredients you can completely change the flavor profile of a salad by using a different dressing.

Spinach, Strawberry & Quinoa Salad
Prep time - 10mins
Cook time - 30mins
Servings - 2
Ingredients
  • 1/4 cup - Quinoa
  • 2 cups - Baby Spinach, washed & drained (or mixed greens)
  • 2 Tbsp - Walnuts, toasted & coarsely chopped
  • 1/2 cup - Fava beans
  • 3/4 -1 cup - Strawberries, sliced
  • 1 Tbsp - Parmesan cheese, grated (optional)
Fennel - Citrus Vinaigrette
  • 1/2 tsp - Fennel seeds
  • 1/2 tsp - Lemon zest
  • 2 Tbsp - Lemon Juice
  • 2 Tbsp - Extra virgin Olive Oil
  • 1/8 tsp - Sea salt & Pepper, freshly ground (adjust both to taste)
Method:
  • Toast quinoa until it just begins to pop (optional) and rinse under multiple changes of water. Combine with a little less than 1/2 cup of water and bring to a boil. Reduce heat to the lowest setting, cover and cook for 15mins until all the water is absorbed by the quinoa. Keep covered for another 10mins and fluff with a fork.
  • To prepare fava beans, bring water to a boil and dunk them in for just a minute before draining. When cool the handle the outer skin should pop right off. Wash, drain the strawberries and slice lengthwise. Wash and thoroughly dry spinach or greens of choice.
  • Vinaigrette - Toast fennel seeds on a low heat until they begin to turn color and are fragrant. Transfer to a pestle & mortar and grind to a fine powder. Add lemon zest, juice, salt, pepper and combine. Drizzle in the olive oil and combine using the pestle to emulsify. Dip a leaf of spinach to test for seasonings and adjust accordingly.
  • When ready to serve, season the quinoa first with a bit of the dressing. Combine spinach, strawberries, fava beans and toss together with a little more dressing. (This recipe makes extra dressing, you'll need about a teaspoon to dress a cup of greens) Top the salad with some freshly grated parmesan, if needed.

Notes: This is more of an idea than a recipe and the options for variation are many. Swap blueberries for strawberries, pecans or almonds for walnuts, or try candied/spiced nuts instead. Arugula or mixed greens could be substituted for spinach. Add a spoon of pesto to season quinoa instead of vinaigrette. Perhaps, skip quinoa entirely and use cooked brown/green/black lentils instead.

This was a satisfying salad chockful of fresh flavors and textures. Every bite has something interesting with each ingredient being at the peak of its flavor. I try cooking quinoa and lentils in bigger batches that last a few meals which makes putting together salads like this very convenient. And after a nutrient rich meal like this one you are sure to feel good about yourself..and probably make room for a cool dessert which is, afterall, the ultimate goal :)


Sunday, August 14, 2011

Zucchini & Yellow Squash Ribbon Salad

Dear Foodies,

Things never seem to go as planned around here with me and the blog! Late last year I took a break from work when I moved to San Diego thinking that would give me all the time in the world to spend on blogging, reading other blogs and making new friends. When I was working and trying to blog regularly I would always wish for more free time, and envy those who were able to take a break and spend time doing what they love. So when I finally did reach that point I had so many more things on my list and I just got drawn into a completely different routine. I cooked a lot and interestingly managed to take some good photographs and added to my collection of food props too. But the actual time I spent on the blog or following my favorite blogs shot down to a real low. I got busy crocheting, sewing, taking craft classes, catching up on books, exploring the new city, photographing and lots of cooking.
Now I'm back to work and with it my itch to blog is back with a bang too! When I was working I had my blogging routine all worked out and it had become a matter of habit, so now I hope to nourish that routine and make it a really work. The last few weeks I worked hard to finally make the move to the new blogger beta templates from the older one that I had. Its easier now to change colors and fonts and backgrounds, but the move itself wasn't easy at all. There were some hacks and widgets that I had learned to tweak to my needs and create a personalized blog space in the older version and now I had to re-tweak them, painfully refreshing my memory and making them work with this new blogger html code. Not an easy task! After an extremely slow and frustrating process I am satisfied with the way it looks now and decided to move on before I go crazy :) And the idea behind the color scheme, if you are wondering, is inspired from a coffee mug that I fell in love with at the store!
This salad that I bring to you today is assuredly one of the prettiest plates I have made! And there was almost zero effort on my part, the gorgeous veggies handled it all by themselves. Its.summer.on.a.plate. The grocery stores are piled high with summer squash and if you are gardener then you surely are running out of ways to consume them before the next batch is ready for picking. I slice them up, char them lightly on the cast iron pan and pile them on my burger like so. Or I use the chunks in some tomato-onion based gravy spiced up with ajwain(carom) and fennel seeds. But those ideas are for later, today I share with you a very simple salad preparation.
Summer Squash & Radish Ribbon Salad
Servings: 2 ( side)
Prep time: 20mins
Cooking time: N/A
Ingredients
  • 1 - Zucchini, Yellow Squash and couple of radishes washed and wiped dry
  • 2 tsp - Spring onion greens, minced
  • Pinch of red pepper flakes
For the lemon vinaigrette -
  • 2 tbsp - Lemon juice
  • 5 Tbsp - Extra virgin olive oil
  • Salt & Pepper to taste
Method:
  1. Cut the squash in half or thirds for longer ones to get approx 4" pieces. Using a vegetable peeler or a mandoline, carefully shave off ribbons of the squash allowing them to fall into a bowl. The radishes can be sliced as is, taking care of your fingers all along.
  2. For the basic lemon vinaigrette, I add all the ingredients into a small bottle with a tight lid and shake it well to get the emulsification going. Taste test for seasonings. 
  3. Starting with half the vinaigrette, pour it over the veggies and lightly toss them together. Add more vinaigrette as needed. 
  4. Arrange the pretty vegetable ribbons on a plate, sprinkle the minced spring onions and red pepper flakes and serve the crisp fresh salad immediately.
Notes: Carrots can also be made into ribbons in a similar fashion and added to the salad.
- Dry fruits (cranberries/ raisins) & toasted nuts (walnuts, pine nuts or sliced almonds) can be added to enhance the salad.
- Little chunks of ricotta, feta or goat cheese would also go really well with the sharp acidic vinaigrette.
This is a fantastic salad, you get to enjoy the unique tastes of each vegetable but they also blend together to form a cohesive dish. The acid in the vinaigrette adds a sharpness to the salad that makes it extremely light and refreshing to the palate. The spring onion greens and red pepper flakes add varying kicks of spice forcing you to go back for more. I had a bowlful of it and made it again the next day, and the day after until I ran of squash at home. Another great way to enjoy the salad is to pile it on top of crisp toasty bread, smear one slice with a little bit of fiery home-made harissa and dig-in. Brilliant. You will even forget you are eating raw veggies. Make this and enjoy the rest of summer.
Blogging tips