Thursday, November 30, 2006

Radish Stir Fry

Dear Foodies,


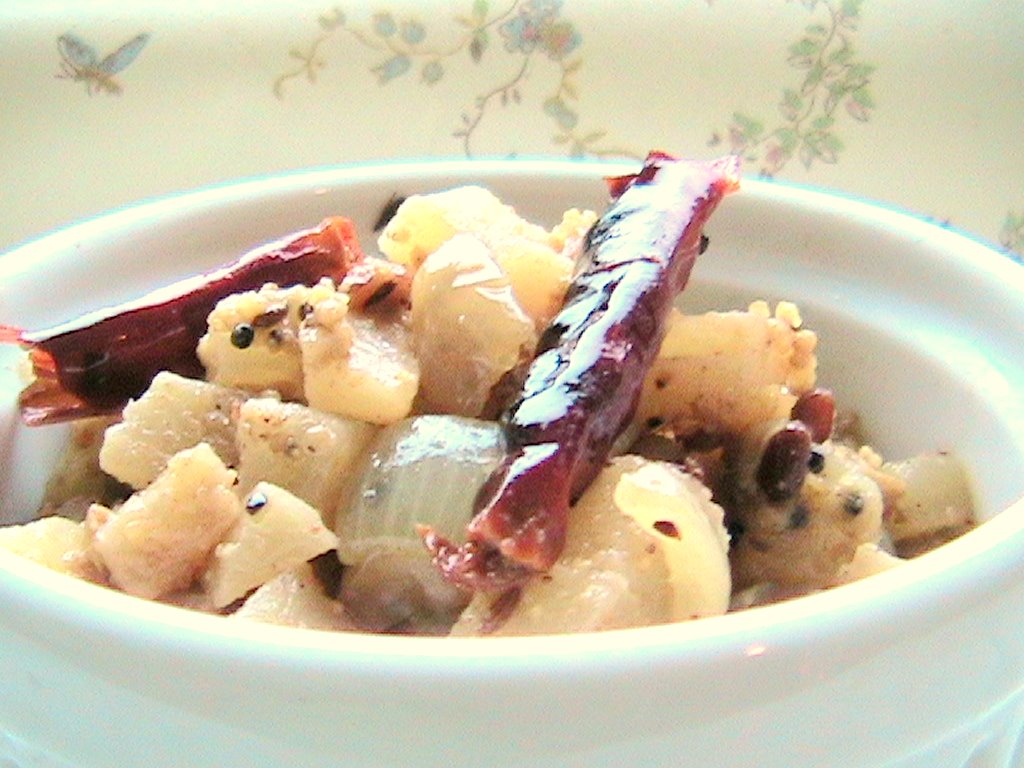
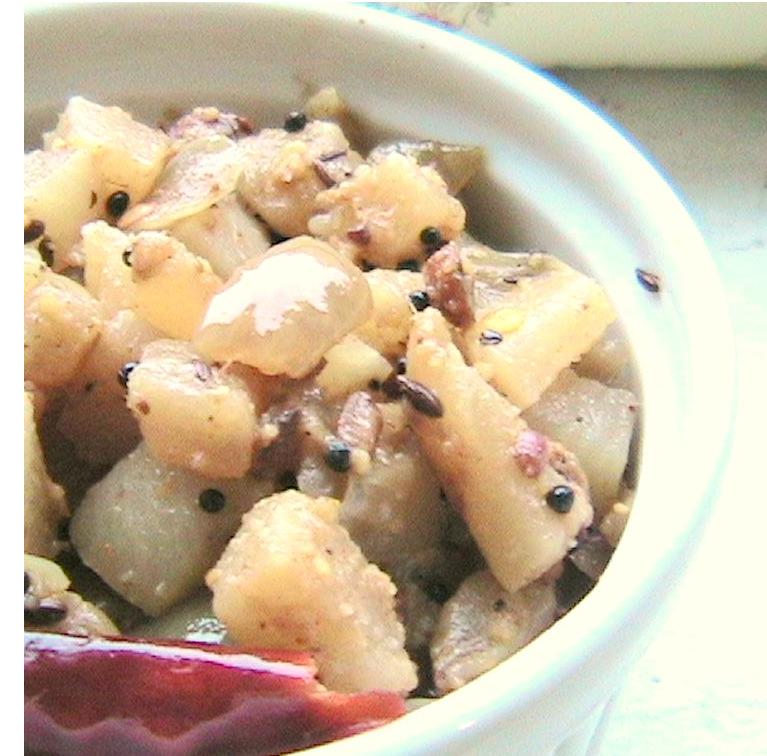
I made Mysore rasam a few days back and paired it with this simple radish stir fry. The rasam has a comforting feel attributed to the freshly ground spices that it is made from. My mother very thoughtfully made some kind of a simple veggie stir fry along with it, something that would gel with the rasam and not take snatch away its glory.

I used Red Radishes to make this dish. I dont remember eating the red colored ones in India, radish is called mullangi in Telugu and the one I am used to seeing is white and my mother made Sambar with it (similar to Indira's recipe). When I saw these tiny lil beauties at the grocery store for the first time I was tempted to buy them though I dint know what to do with them. The first few times I made use of them in sambar, but then I was using up just 3-4 at a time and the pack never got over !! So I tried making a stir fry with these and it tasted really good. If you have tasted them, you will see that they are not as strong in taste as the white ones, those were really sharp in taste and even brought tears in your eyes !! But these cute reddies do no such thing. They take well to the spice powders and have a comforting feel to them.

This dish can me made in a jiffy and does not need much of your attention either. Cooking them this way also retains most of their nutrients as they are mainly steam cooked with very little oil used. Here goes my recipe.

Ingredients:
  • 10-15 nos - Radishes, the small ones neatly washed.
  • 1 nos - Onion, chopped
  • 2 nos - Red chilli, dried
  • 1 tsp - Mustard seeds
  • 1 tsp - Cumin seeds
  • 1 tsp - Urad dal
  • 1 tsp - Channa dal
  • 1 Tbsp - Oil, for sauteing
  • Salt to taste
  • 1 - 2 Tbsp - *Curry Powder(kura podi)/Dalia Powder or 1 tsp - Coriander powder
  • 2 tsp - Coconut flakes (optional)
Procedure:
  1. Neatly wash & clean the radishes and chop them. Peeling them is left to your choice. Cutting them is the only tedious part for this dish !! Peel and chop the onion, size same as that of the radishes.
  2. In a wide pan heat the oil, once hot add the mustard seeds. When they begin to splutter add the cumin seeds and the dals. Toast them till the dals turn a slight red and add the red chilles and then the onions.
  3. Saute till the onions become transparent. Now toss in the chopped radishes. Sprinkle salt and cooked covered. The salt will bring out the water in the radish that will be enough to cook them. Sprinkle some water if needed. Stir in between to avoid charring.
  4. Once the radish pieces turn soft add the choice of spice powder you use and stir fry for a few minutes, uncovered. Add the coconut flakes now if using.
  5. Serve with hot rice and sambar/rasam. They also pair well with chapatis.

Notes:
  • Other veggies like beans, potatoes, beetroot, carrot, bottle gourd, chow-chow can be cooked in a similar method.
  • The Kura Podi I used is the pack my roomies mom made in India and sent it along for us :-) I will try and get the recipe from her and post it soon :-)

Monday, November 27, 2006

Baking Adventures - Shortscones ??

Dear Foodies,


This is what I conjured up for Nandita's WBB # 7 - Baking for Breakfast event. Will be back with the recipe in sometime :-)

Off-late I have been trying to bake a lil whenever I can manage some free time. I dont like using eggs and so keep browsing for recipes that dont need it. Substituting eggs in a recipe is tricky, as you more often then not have to compromise on the texture or the taste. I am still on the look out for egg-less cake recipes, so any of you who have some do share them with me :-).

But in the meantime I was also looking at recipes for cookies and scones too. That was when I chanced upon this amazing blog, Baking Sheetby Nic. She has a huge collection of recipes which are soo well written and neatly explained. The first scone I had was a cinnamon scone at Panera bread and it was love at first bite :-) , so the moment I saw the scone recipes on Nic's site I was really excited to make some at home. I was going through the list of cookies and scone recipe she has and found a lot of them that did not need eggs. Browsing through her recipes frequently gave me a picture of the basic method and I experimented with the flavors depending on what I had in hand. I have made chocolate chip scones, coffee scones and berry scones, all of which were absolutely delicious. I only made about 4-5 medium sized scones each time and so they vanished before I and my friends were done tasting them. I have been planning ever since to make a bigger batch that would last a few breakfasts alteast, but never found the time or the motivation to do so.


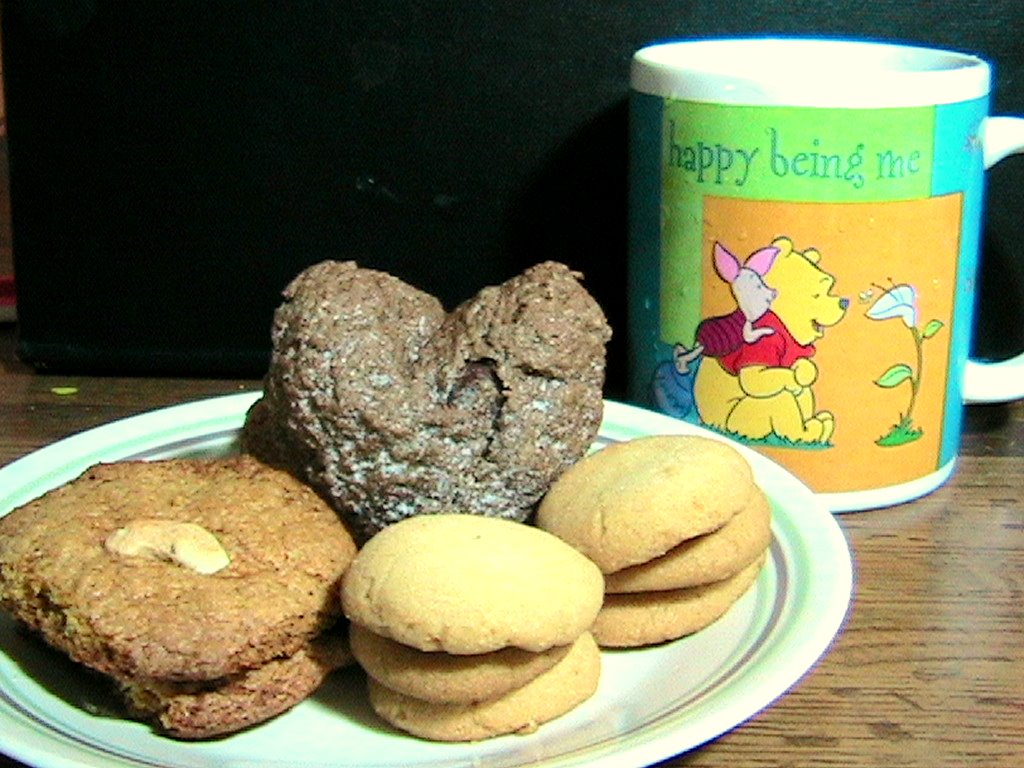
When Nandita unveiled the theme for WBB event to be Baking, I rushed to my apt that very evening to bake some scones. Well it was actually night by then, I went home at 11:00pm and started out :-) I planned on making scones, but once the dough was ready I was in no mood of shaping them like those triangles and so shaped them randomly like cookies or bit sized scones. I then realised that shortbreads are, vaguely put, the cookie shaped version of scones. So now I dint know what I had made.....and so I named them ShortScones ..hehe..

I am going to give you a rough estimate of the ingredients I used. As I am still learning how to bake the perfect scones, I would suggest that you go over the Nic's blog for her detailed recipes.

Ingredients:

Dry Ingredients:
  • 1 1/2 cup - All purpose flour
  • 1/3 cup - Sugar, I used the fine powdered sugar
  • 1 tsp - baking powder
  • 1/2 cup - Butter, chilled and cubed ( I used half a stick of butter)
  • a pinch of salt
Any of these: 1/3rd to 1/4th cup
  • your choice of chopped berries (strawberries,raspberries,blueberries,cranberries)
  • dry fruits and nuts (apricots, raisins, walnuts,peacans)
My choice:
  1. 1/3 cup- Chocolate chips + 2 Tbsp - Cocoa powder
  2. 2 Tbsp mango pulp + 1 tsp - Elaichi powder
Wet Ingredients: 1-2 Tbsp of
  • Water or Orange juice/Lemon juice + a few drops of the zest or Buttermilk or Soymilk
Procedure: ( Preheat oven to 300deg F)
  1. In a bowl sieve in the flour, salt and baking powder. Add the sugar and mix well, toss in the cubed butter. And rub it into the flour mix with your hands by applying slight pressure on the cubes forming a coarse flour mix.
  2. Now add in your choice of berries/dry fruits/choco chips and mix well
  3. Next add the wet ingredients a tsp at a time and get the flour mix together, so you can shape it. When using berries you will need very little of the liquid to do the job.
  4. The mixture does not have to be kneaded, and should be loosely packed, shape the into a lil thick disc and make cuts with a blunt knife like you would to a pizza and place it on a parchment paper lined baking dish.
  5. Bake for about 15-20 mins, until a tap on the surface gives a hollow sound and it has a wonderful golden brown color. You can also test it withthe knife coming out clean when done trick.
  6. Break the individual scones along the cuts you made and enjoy one right out of the oven and try to store the rest if you can stop yourself from eating more ;-)
While baking these treats the way I have done them, keep in mind that they continue to cook for a little while after being taken out of the oven. The Cardamom- Mango rounds and nankatai were a lil soft when I removed them from the oven but turned crisp on cooling. So time them accordingly.


Chocolate Hearts :-)
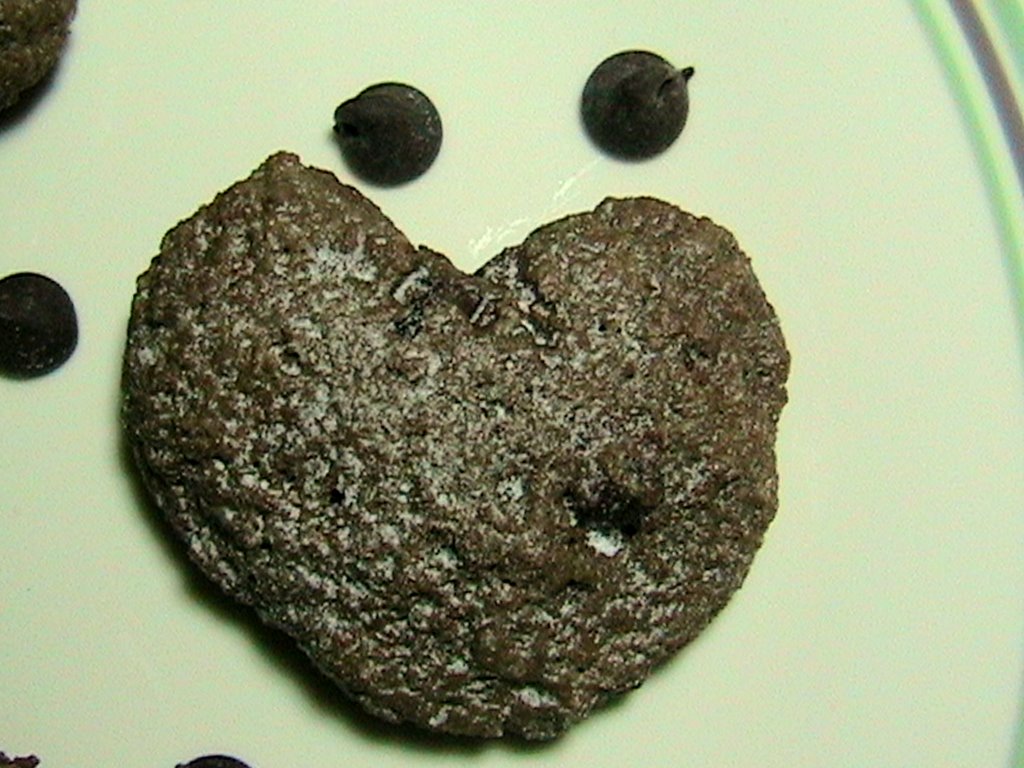
I made a heart-shaped batch of chocolate chip + cocoa powder combo. These were my favorites, well ofcourse I shud add I am a huge chocolate fan !! Anything that has to do with chocolate or coffee or soft toys will grab me 100% :-) The chocolate chips that were at the center did not totally melt, but were warm when rite out of the oven and gave a nice gooey, chocolatey taste that was very very delicious. I dusted these with some icing sugar just for the heck of it :D I am going to try refining this recipe to get a near brownie taste soon.

Cardamom-Mango rounds
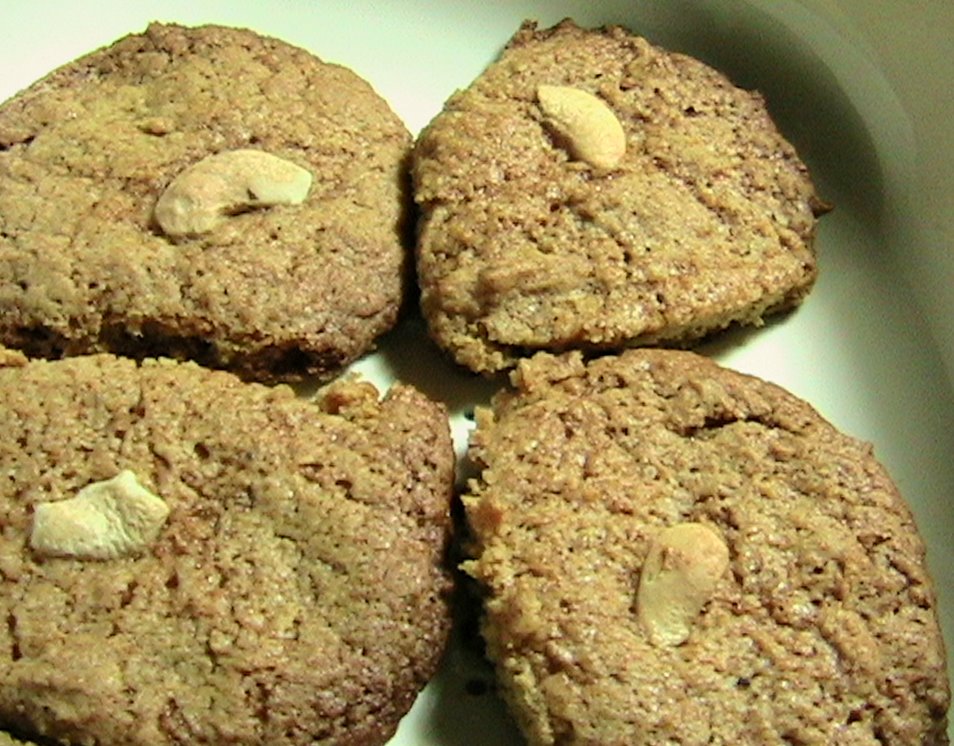
The second batch was with the cardamom powder and mango pulp, shaped as round cookies with a cashew topped on each. I arranged these cookes too close to each other in the tray and so they came out as one big cookie that I had to break. The mango pulp did not contribute much to the taste as the quantity was far too less to dominate. The cardamom powder was the ruler. This cookie very dearly resembled an Indian sweet, but niether me nor my friends could pin-point at the name though. Let me know if you try these out :-)

Savoury Nankatai's
I also tried out savoury Nankhatias taking hints from Jyotsna's recipe. Instead of 1/2 cup of sugar and cashews I added just 1/4th cup sugar and 2 tsp of salt. I also added some hand-crushed cumin seeds. I did add some vanilla essence but skipped the saffron in her recipe. I also dont think you will need 1/2 cup of butter, a little more than 1/4th of a cup ( 1/3rd of the stick) should be good, I found my biscuits too buttery and a little more flour would have helped.

These biscuits posed wonderful sweet and salty contrast to the other two. The cumin seeds in the biscuits added a very nice flavor, though I added just about a pinch of seeds, the flavor spread through every bite. Absolutely yummy !!


I warmed the chocolate hearts and Cardamom- mango rounds for 5 sec before eating them and along with a glass of warm milk or hot coffee/tea, made up our breakfast for a few days :-), all thanks to Nandita ofcourse for getting me to bake and thanks to Nic and Jyotsna for their wonderful recipes :-)

P.S: Here is Nabeela's recipe for scones. She has pics showing the usual method of shaping scones :-)

Monday, November 13, 2006

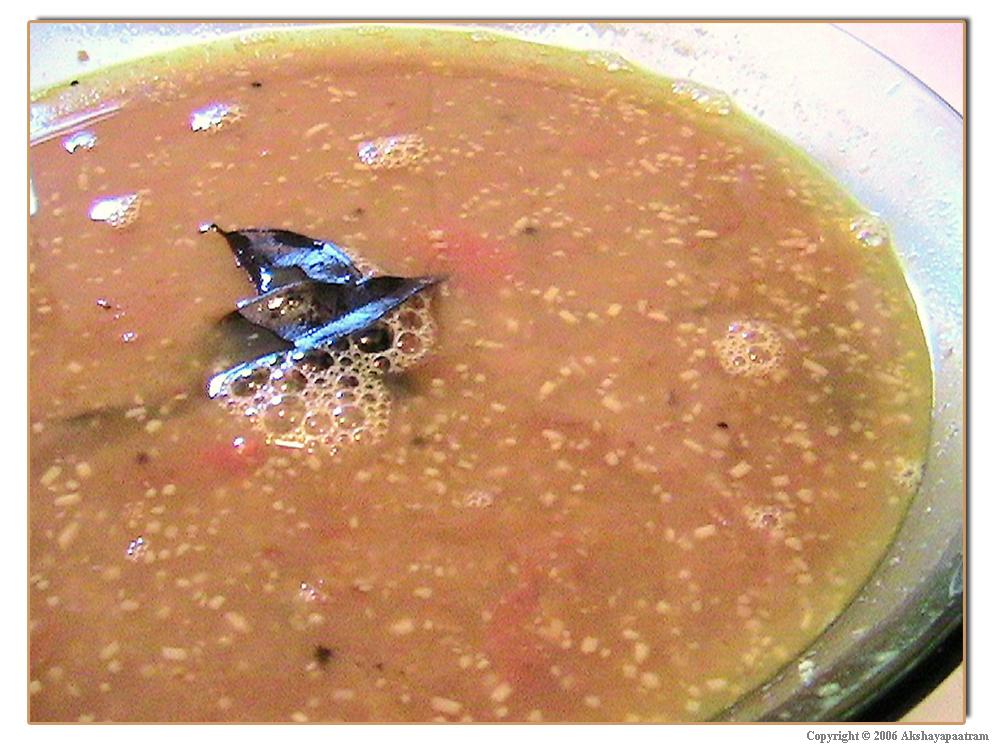
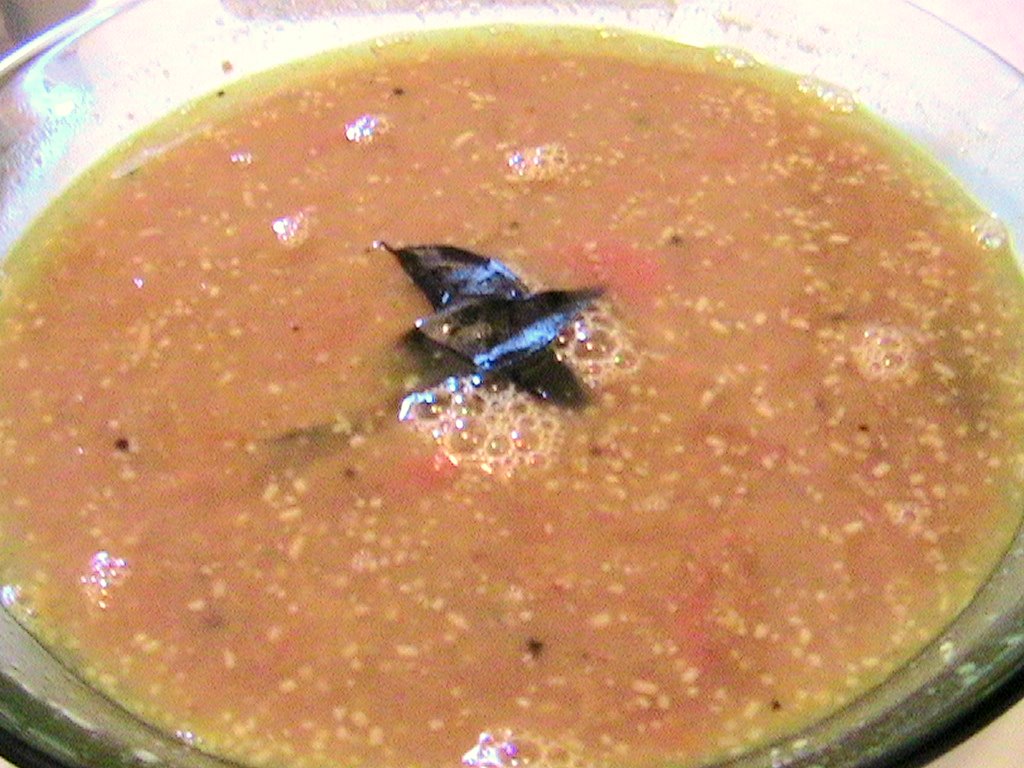
Mysore Chaaru

Lentils cooked in Tamarind & freshly ground spices
~~~~~~~~~~~~~~~~~~~~~~~~~~~~~~~~~~~~~~~~~~~~
Dear Foodies,

Mysore chaaru or Mysore rasam is one of my favourites, and is perfect for a cold winter night. I'll be posting the recipe in the evening, hopefully in time for your dinner :-)
~~~~~~~~~~~~~~~~~~~
Mysore Chaaru
~~~~~~~~~~~~~~~~~~~

This rasam was a regular at our home and more often than not it would feature on the Saturday menu. Why you ask ? Well, we usually had tiffins for dinner on Saturday's, and this rasam can be a standalone meal with just papads or vadiyum to accompany it. A simple aloo fry or any veggie, steam cooked and then stir fried along with some tadka, go very well with this dish. ( I used radish this time) And so it was ideal for an afternoon lunch with no leftovers for dinner and no worries for mummy too :-) .

This rasam has a wonderful medley of spices with pepper being the main source of 'heat' in the recipe, and this gives the warmth in the body when savored on a cold night. You can add a dried red chilli to the spice mix if needed. The rasam is also slightly thicker than the usual rasam but thinner than sambar. The freshly ground spices give a very distinct flavor to the the rasam, making the meal satisfying to the soul and the body. Do try it out and enjoy the winter night :-)
Ingredients:
  • 1 cup - Toor dal, boiled and mashed lightly
  • 1 key lime sized ball - Tamarind, soaked in water and pulp extracted
  • 2 nos - Tomatoes, slit into four portions.
for spice powder:
  • 1 tsp - Cumin seeds
  • 1/2 tsp - Coriander seeds
  • 1 tsp - Pepper
  • 1 Tbsp - Toor dal
  • 1/2 Tbsp - Channa dal
  • 1 1/2 tsp - Coconut flakes or fresh coconut
for popu/tadka:
  • 1 tsp - Ghee
  • 1 tsp - Cumin seeds
  • 4-5 nos - Curry leaves
  • Coriander leaves for garnish
Method:
  1. Heat some oil, roughly about 1 tbsp, in a wide pan and toast the ingredients under the spice powder one after the other. The coconut can be added after the stove is switched off, as it needs very little heat else, it might burn. Allow them to cool.
  2. In a vessel, pour in the tamarind extract, 2 cups of water, salt and the slit tomatoes. Allow it to boil.
  3. In the meantime, powder the spices, add some of the tamarind extract to aid in grinding if required.
  4. Add this spice mixture to the boiling tamarind water and continue to simmer.
  5. Once the raw smell is gone add in the mashed dal and again bring it to a boil. Add another cup or half of water if needed. I generally take out the tomato pieces for a moment and mash them throughly at this stage.
  6. Once the dal gets harmonized with the spices and tamarind turn off the heat.
  7. Add the popu done in ghee and serve hot with rice and vadiyam/veggies.

Saturday, November 11, 2006

Rasgulla & Rasmalai !!

Paneer/Cheese balls cooked in sugar syrup
~~~~~~~~~~~~~~~~~~~~~~~~~~~~~~~~~~~~~~~~~
Dear Foodies,

Rasgulla's

I was sooo excited after digging my teeth into one of these lovely, juicy lil fellas that I had to put it up on the blog immediately. Will get back with photos detailing the recipe later this weekend.

But if you cant hold on until then, then jump over to Priya's blog for her recipe.
-------------------------------------
Rasgulla
-------------------------------------
After seeing Priya's post on rasgulla's I was really tempted to try it out. So this weekend a friend and I tried making this absolutely delicious sweet and I have to say it is a cakewalk making them. Thank you soo much for the recipe Priya.

I am not going to detail the recipe as it is very similar to how Priya made it. I just made a few changes that. I used a gallon of whole milk (Vitamin D milk). I learnt that the best way to split the milk is to add the lemon juice right when the milk is boiling and begins to rise ( a timely tip from a friend). After filtering out the water and looking at the amount of paneer left my friend and I sadly estimated the no. of rasgullas to be 20 lil ones. I did not have a cheese cloth and used one of the many free t-shirts we get around the campus, it took the paneer just about an hour to dry out completely. I totally forgot about using the blender which Priya mentioned and kneaded it by hand as given in one of the links she provided. We kneaded it for about 15 mins and I would have added about 4 teaspoons of all purpose flour. We then started to make tiny balls out of it and thats when we realised it was becoming a never ending process...the estimate of 20 slowly became 40, then 50 and finally stopped at 60 rasgulla's !! While making the balls don't apply too much pressure, knead it well and lightly press to get the shape you desire. I pressure cooked 20 rasgulla's in one batch. I made the syrup with 1 cup of sugar in 3 cups of water, but I had to add more as the sugar vanished once the rasgulla's were cooked. So taste the syrup to make it a little sweeter than you really want the as the sugar got absorbed into the rasgulla's leaving the syrup bland. I added a few drops of rose essence in one batch and 4-5 elaichis in the other, both of them were excellent. The rasgulla's were extremely fluffy and soft, when flattened with a spoon they immediately bounced back to shape taking in more syrup. yummmmm :-)

I pressure cooked the rasgulla's for a little more than one whistle in a Hawkins pressure cooker got from India. I turned off the heat 2 mins after the first whistle, basically I saw to it that I dont hear the second one.
-------------------------------------
Rasmalai
-------------------------------------

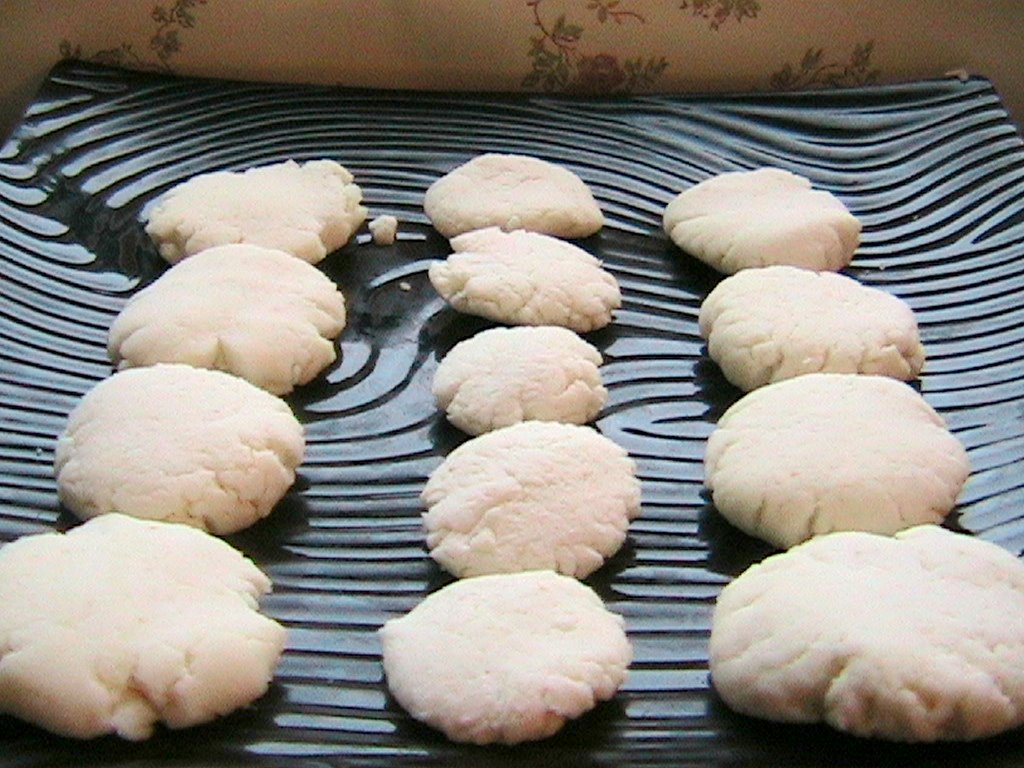
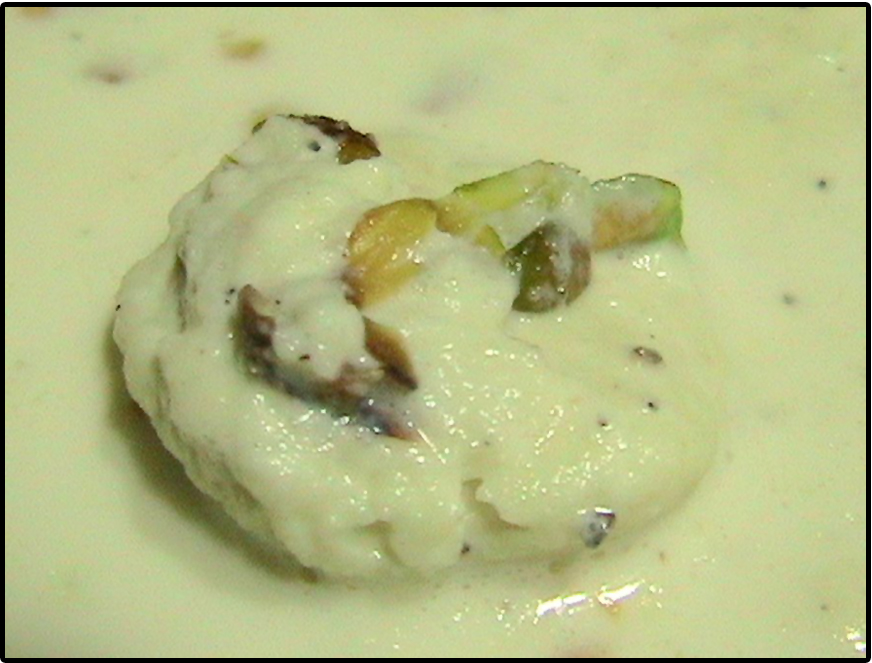
I had a little more paneer left after two batches of rasgulla's and so made rasmalai with the rest. I reduced 2 cups of milk to half the quantity, in the microwave, added 2 tablespoons of condensed milk and 1/2 cup sugar, then dunked the flattened balls into it and microwaved it covered for 15 mins. I was a little lazy to use the cooker again and so microwaved the rasmalai. You can follow the same timings as for the rasgulla to make these. After you have reduced the milk, drop-in the paneer balls with room for them to grow and pressure cook for a little more than one whistle.
I added 4-5 powdered elaichis and sliced pistachios to the milk for additional flavor. Even this one was a winner, tasting super yummy.

~~~~~~~~~~~~~~~~~~~~~~
Thank You Time !!
~~~~~~~~~~~~~~~~~~~~~~
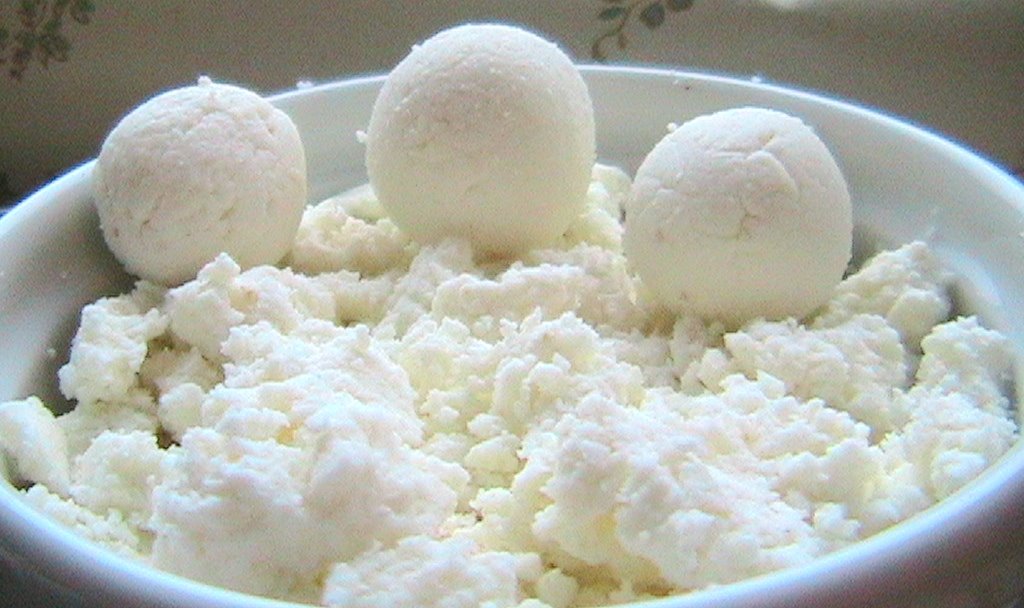
(Paneer balls ready to get transformed into fluffy Rasgullas)
This post is going to be my platform to finally say my Thank you's to all those who made me the foodie I have become !! The first Thank You is surely to my Mom and Dad. If not for their enthusiasm for good food I wouldn't have been such a foodie. My mother, I think is THE best cook. My lunch box at school always found friends other than me to empty it. She constantly experimented with different cuisines and churns out wonderful dishes. Any dish I make is perfect only if it tastes just like how my mom makes it and that I have learnt is extremely difficult :-P !! Even now when I am so far away from her kitchen I still continue to pester her to make my favorite dishes so that I can post them up on the blog here, and she has been doing it soo wonderfully with my Dad capturing them through photos. (Well the secret is, I want the recipes..and blogging is an excuse to get the secret ingredients from her ;-) shhhh) My Dad is a great foodie too, we used to compete in setting the salad plate for dinner and it used to be soo much fun. He would also neatly chop the fruits of that season and leave them in the fridge for all of us to gobble them up with out any trouble :-) Well....I could go on and on about the two of them. So I will end now with a huge Thank you and loads of hugs to you :-) Love you ! Today (14th, Nov) is my Dad's b'day, Happy Birthday Nana :-)

My roomies and friends and my brother who got trapped once, are the poor souls on whom I have been testing my experimentations all throughout. If not for their words of encouragement even for the worst turnouts in the kitchen...I wouldn't have dared to start this blog !! They are always pouring out praises that boost my confidence and I end up torturing them even more with my new experiments ...hehehe I know you guys repent it now...but its tooo late, the damage has been done. :D Thank you guys :-) ( Applause )

There are also the wonderful bloggers who share their tried and treasured recipes, so that newbies like me can flaunt the recipes at parties and with friends and take all the praise too. Thats a perfect example for 'having the cake and eating it too'...it couldn't have been any easier. Each one of the bloggers has re-defined cooking as not just a chore, but as a way of showing your love and affection towards your family and friends. Cooking should be done with a consciousness to make delicious and healthy food is what many of them have showed through their blogs. I also started the Treasure Trove section to thank all the bloggers for sharing their recipes and now I am going to say it here too. Thank You !

I was tempted to put a stat counter after reading Indira's post about her reaching a blog milestone ( Congrats to her again) a few days back and I was shocked on seeing the results !! I thought there were just a bunch of fellow bloggers who came to my blog and I always took the no. of comments to be the sole yardstick for readership !! I realized that apart from bloggers there are soo many others who come here, some who either leave their footprints through comments and many who are silent visitors. Thank you all soo much for dropping by, it really means a lot to have you guys visit me :-)

And most importantly, I'd like to thank Meeta, the person who gave us a chance to Give Thanks. Her blog is a delight not just for foodies but also to those who enjoy beauty. Each one of her photos is a masterpiece in itself and she has constantly been raising the bar for good pics !!

Sunday, November 05, 2006

Vote for VCC Q3 2006

Dear Foodies,

VKN who writes at My Dhaba has been hosting a wonderful event called Virtual Cooking Competion that draws a lot of lip-smacking recipes to his blog. He is currently hosting the third in the series - VCC Q3 2006. The theme for the event was Festive Foods (any cuisine).

The winner of the event is decided based on the votes the recipe receives. So go over to his blog and have a look at the huge collection of recipes and cast your vote for the best of the lot :-)

Vote Here

Friday, November 03, 2006

Bisi Bele Huli Anna

Bisi Bele Huli Anna - Rice and Lentils cooked with veggies
~~~~~~~~~~~~~~~~~~~~~~~~~~~~~~~~~~~~~~~~~~~~~~~~
Dear Foodies,


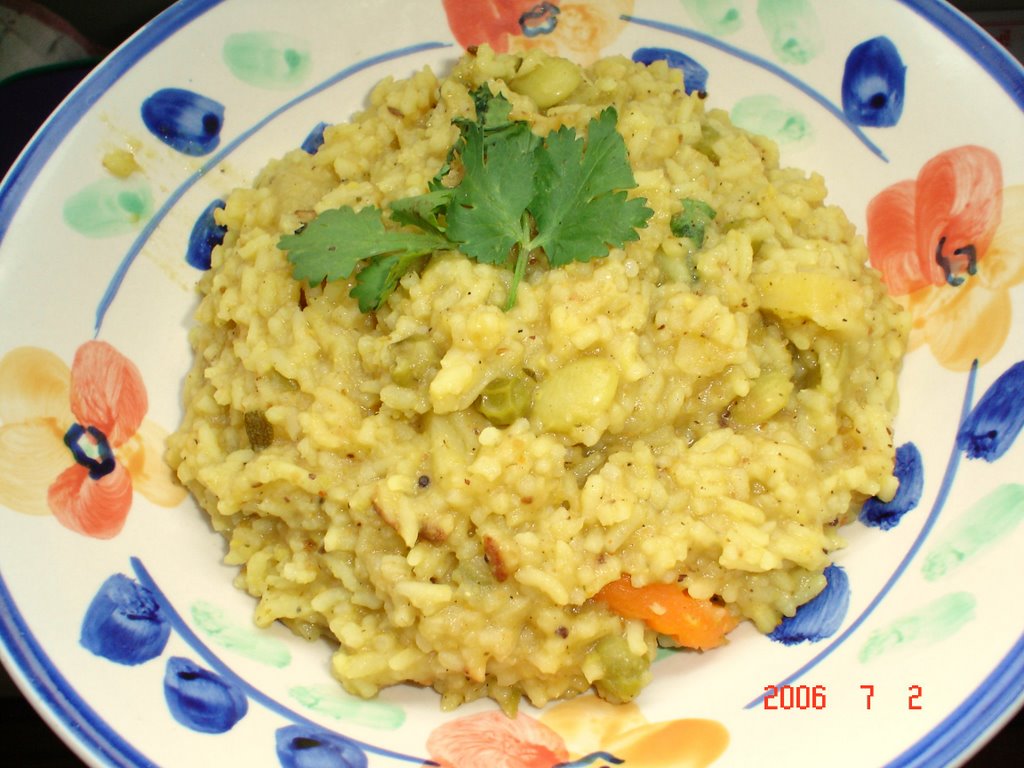
A couple of months back there was a sudden surge of Bisi bele baath recipes in the Indian blogs. Thats when I decided to make it too. It is a one pot meal, not as simple as kichdi or tomato baath, but definitely very very yummy and comforting. I made a cooker full of it on a saturday and it was all over by the evening with me needing to scrape a little from the bottom of the vessel for dinner :-)

Bisi Bele Huli Anna, is a Karnataka speciality. Bisi - hot; Bele -dal; Huli - tamarind; Anna - rice. Its similar to sambar rice, the rice here is cooked along with the sambar made from freshly ground spices.

Here goes the recipe for this splendid medley of rice and dal. The recipe list is long but all you have to do is roast all of them in a skillet and grind. So don't shun this wonderful dish looking at the long list of ingredients. This is a perfect one-pot meal for a cold, rainy weekend lunch.

Ingredients:

Vegetables:
  • 1 nos - Potatoes, cubed
  • 1 nos - Carrot, cubed
  • 1 nos - Onions, cut into 1 inch pieces
  • 1/2 cup - Green peas
  • 1/2 cup - Lima beans
  • Coriander leaves for garnish
  • (You could choose any combination of veggies)
To pre-cook:
  • 2 1/2 cups - Rice, I used sona masoori
  • 1 cup - Toor dal
  • 1 key lime sized ball of tamarind soaked for 10-15 mins in warm water.
To grind:
  • 2 tsp - Mustard seeds
  • 2 tsp - Cumin seeds/jeera
  • 1 tsp - Fennel seeds/saunf
  • 2 tsp - Coriander seeds/dhania
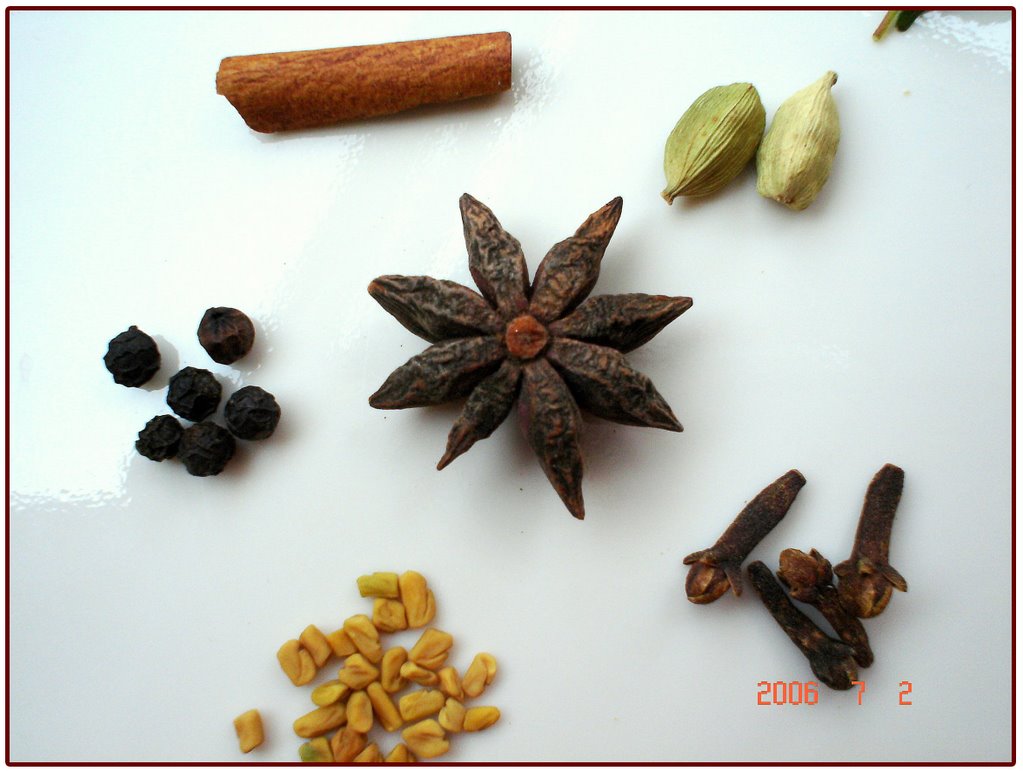
  • 1 tsp - Fenugreek seeds/Menthulu
  • 4-5 nos - Cloves/lavang
  • 5-6 nos - Whole pepper
  • 1 no - Cinnamon stick, 1 inch long
  • 2 nos - Cardamom/elaichi
  • 1 nos - Star anise
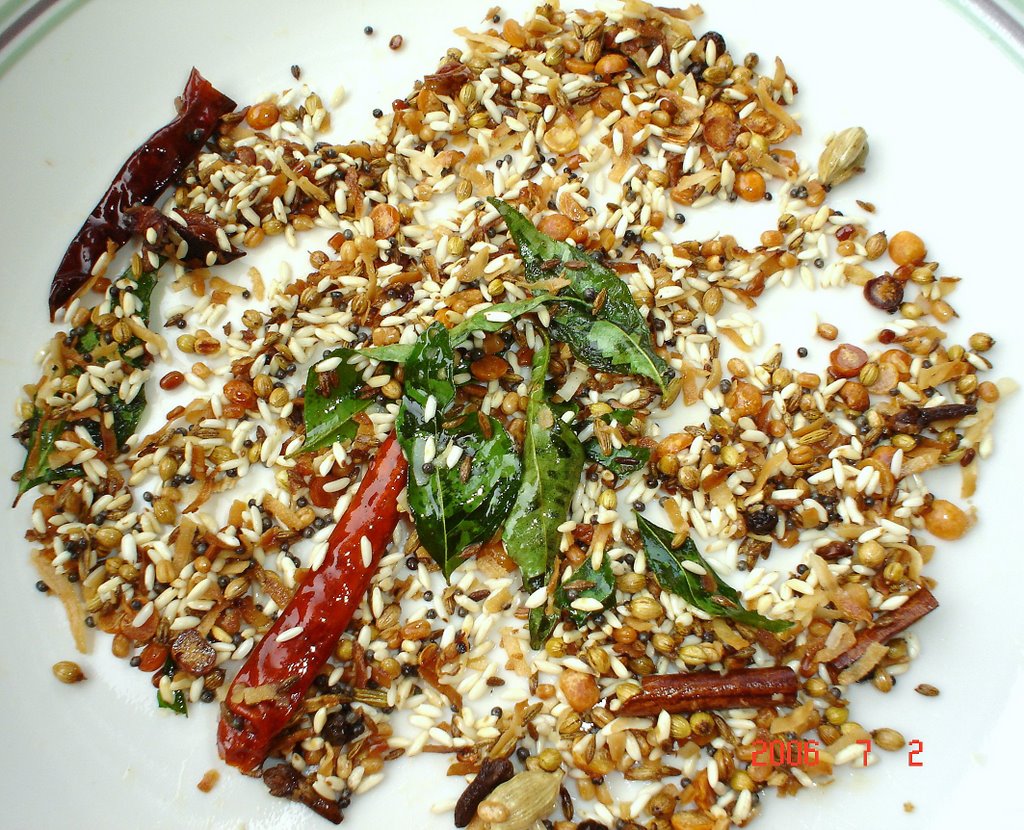
  • 1 Tbsp - Urad dal
  • 1 Tbsp - Channa dal
  • 2 Tbsp - raw rice
  • 1 sprig - Curry leaves
  • 2 nos - Red chillies, dried
  • Oil for sauteing the above, roughly 2 Tbsp.

Procedure:
  1. Pressure cook the dal and rice separately. You can toss in the vegetables that take time to cook along with the dal. Soak the tamarind in some warm water.
  2. Heat some oil in a skillet and slightly toast the ingredients under the 'to grind' list. Take care to avoid burning any of them. I roasted the ingredients in 3 steps, first those from mustard seeds to cardamom in one go(add the fenugreek seeds last, they burn really fastttt), reserved them, then roasted the dals and rice and finally the curry leaves and red chilies. Allow all of them to cool.
  3. Transfer all these to the grinder and blend to get the spice powder. This masala does not have to be extra fine.
  4. Extract the pulp from the tamarind and bring the water to a boil. Also add the vegetables not cooked with the dal. Once they get cooked, add the spice mix and boil for a few minutes.
  5. Next add the cooked dal and fold in the rice taking care not to mash the vegetables. Add salt to taste and more water if required to get a slightly watery dish.
  6. Pressure cook for 1-2 whistles or leave covered on the stove top stirring occasionally till the masala blends with the rice and comes together as complete dish.
  7. Mix in some fresh coriander leaves and let the rice stay covered for a few more minutes
  8. Serve hot with a small dollop of home made ghee, some more coriander leaves and some vadiyum/papad. Now sink into the couch with your plate & your favorite movie playing on TV :-) You can also serve it with some tomato-onion raita too.

My notes:
  • You can use veggies of your choice. Beans, zucchini, chole etc. I personally don't like adding cauliflower to sambar dishes as they become mushy.
  • I prefer my bisi bele baath a little liquidy with the rice grains soft, unlike the separated rice grains for pulao dishes.
  • You can adjust the amount of red chillies and cloves according to your taste. I added a teaspoon of mom's sambar powder too apart from the spice mix.
There are loads of recipes for this from other bloggers:

Well I am going to stop here...looks like nearly every Indian blogger has written about it !!!


Tuesday, October 24, 2006

Pastaaa - Indian Ishtyle !!

Dear Foodies,


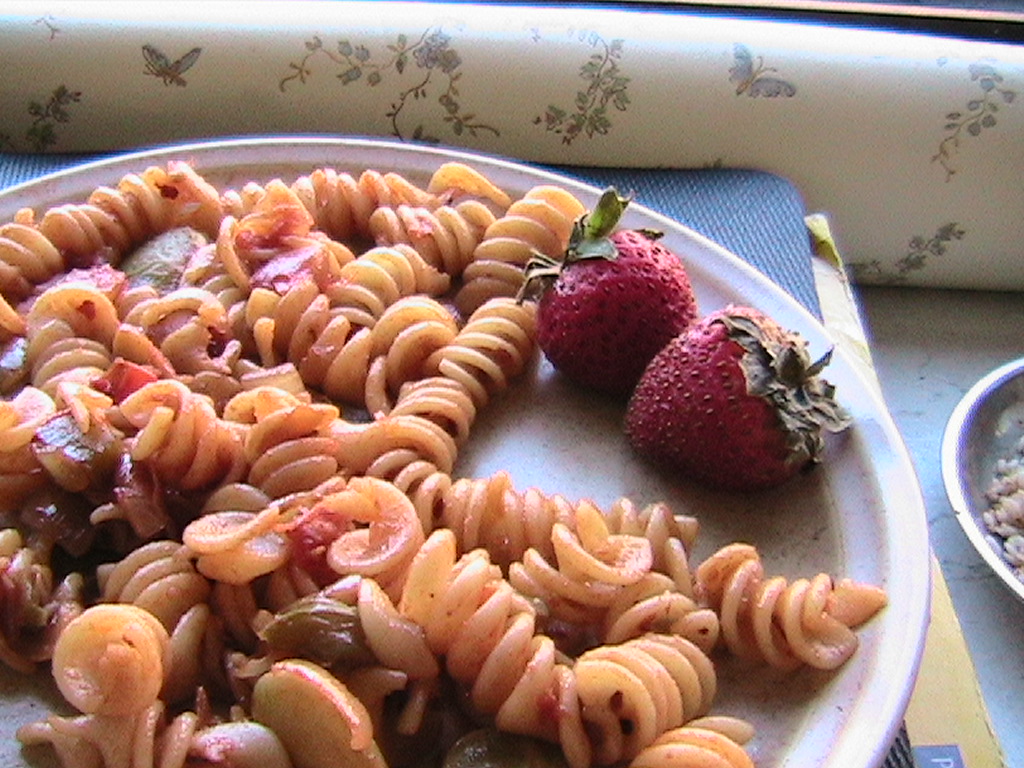
The pasta aisle in the grocery store always wins the game. I start out on my monthly shopping with a firm resolution that I wouldn't buy any pasta on this trip, but you will always see a new bag of it in my kitchen closets !! During my last visit, Orzo, the rice grain shaped pasta was the winner :-) My most favorite of them all is the tri-color Rotini, though they might be similar in taste to any other kind of pasta, the colored spirals are a treat to the eyes. Toss in some colored peppers and tomatoes and you have a masterpiece !!

This pasta recipe is the result of some gathered inspiration from a friends' recipe and my cravings for a spicy n quick breakfast on the weekends. Its very simple and a regular in my apartment. Since its a dish with no particular recipe that I stick too, I add anything that comes within my arms reach in the kitchen !!


Ingredients:
  • 1/2 pack - Rotini, cooked as per instructions
  • 2 nos - Tomatoes, chopped
  • 1 nos - Onion, chopped
  • 1/2 nos - Capsicum, chopped
  • 1/2 cup - Lima beans (I used canned ones)
  • 1 1/2 tsp - red pepper seeds/Chilli powder
  • 2 Tbsp - Maggi Hot n Sweet sauce /Tomato ketchup
  • 3 tsp - Lime juice
  • Salt to taste
  • Oil for sautéing (I used olive oil, the newbie in my kitchen :-) )
Procedure:
  1. Cook the pasta as per the instructions, add a few drops of oil to the boiling water to avoid sticky pasta.
  2. In a skillet heat some oil. Once hot, sprinkle some red pepper seeds and then the chopped onions and saute till translucent.
  3. Next comes the capsicum, once they are tender add the tomatoes and cook covered till the tomatoes cook. If using chilli powder, add it now.
  4. Mash the tomatoes a bit and add in the lima beans, salt and ketchup and cook covered for a few more minutes till it all comes together. Add a little water if required.
  5. Now toss in the pasta and stir to coat it well with the vegetables. Add more salt if required. cover and cook for a couple of minutes till the flavors blend into with the pasta.
  6. Turn off the heat and add the lime juice for a tangy twist and to complete the desi touch.


Notes:
  • I guess you could add any veggie of your choice to this dish. eg: carrots, peas, potatoes, french cut beans and also tofu or crumbled paneer if you have some.
  • You can also add some roasted peanuts for an extra crunch :-)
  • I add the Maggi hot n sweet ketchup for it to be extra hot, you can skip that if you are not huge spicy food fan. You could use plain ketchup while cooking instead and reserve the Maggi sauce for the bowl just before serving.
  • If you don't have the Maggi ketchup you could use a dash of green chilli sauce or tobasco sauce.

Now its over the Nandita's WBB event.


Sunday, October 22, 2006

Kalakhand - My Deepavali Special :-)

Dear Foodies,

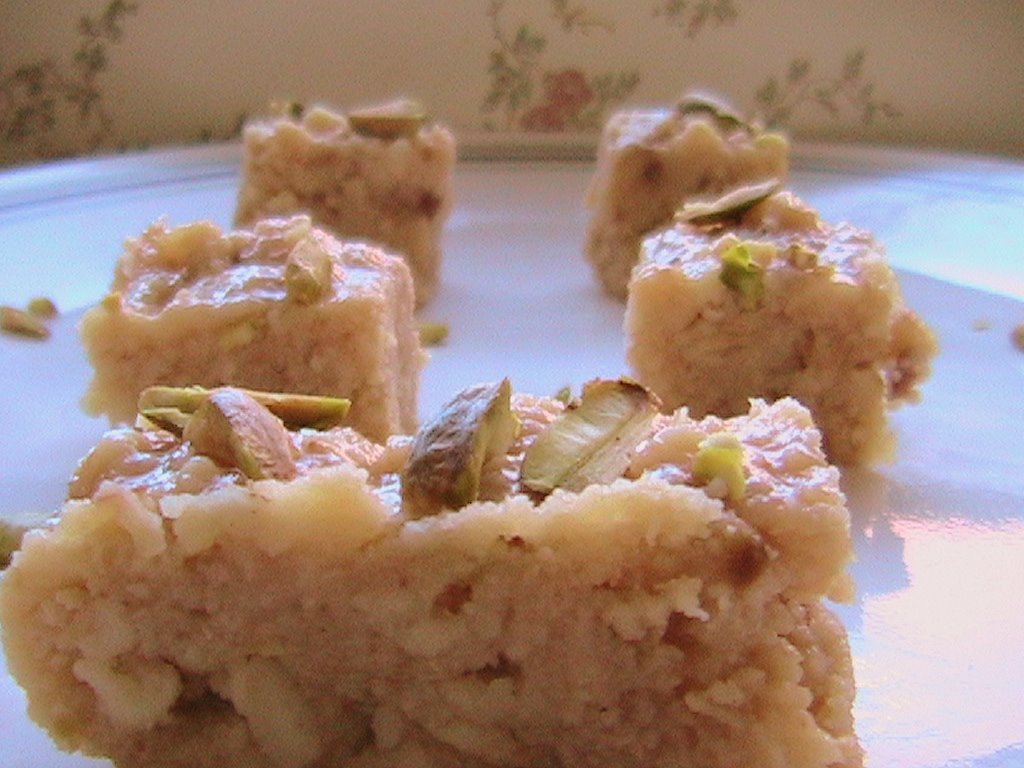
Kalakhand

Hope all of you had a wonderful Deepavali. I enjoyed the music concert I mentioned in the previous post. I managed to get Sudha Ragunathan's autograph and also a few photographs with her. It was just great listening to her mellifluous voice for more than 3 1/2 hours !! I am amazed how she could keep singing for such a long time without feeling any strain. Plain talking for more than an hour makes my throat go sore !! Well, I dont think I should be comparing myself with her in the first place..!! haha

I also got to fire crackers for Deepavali at the Hindu temple in Cincinnati, with my friends here . Our first time after coming to the US, so we were all happy happy happy :D

Recipe for the Kalakhand will follow soon, for now all I can say is it was really really delicious. The taste was authentic, just like the ones we get at the Mithai shops in India. It being my first time, I dint have high expectations and so I was pleasantly surprised when it was done :-)

-------------------------------------
Kalakhand
-------------------------------------

For Deepavali, I wanted to make some kind of milk sweet but was bored of the usual payasam. I had seen a few Kalakhand recipes for the JFI - Milk event and for some odd reason when I was deciding about the Deepavali special dish the first one to come to my mind was Kalakhand, when I asked a friend for suggestions, he came up with the same thing too, and so it was decided that I would make Kalakhand. Thats when the search for a good recipe started. I saw 3 different methods: one using ricotta cheese, the other using milk powder and condensed milk and the traditional ones using whole milk.

I have never used ricotta cheese before and so was hesitant to use it now, the main thing stopping me was...We dont get ricotta cheese in India so there should be a method which skips it. So I was looking for recipes that started with milk and ended with kalakhand :-) I read a few recipes which did this, the method was simple. Separate half the quantity of milk you are using and reduce the other to half. Then add them to together and reduce further, add sugar and additional flavorings, decorate with nuts. Now that looked simple and authentic too. The only differences in the whole milk recipes were in the method of separating. A few used citric acid and few used tartar (heard of it only in toothpaste ads !!).

Well, I dint have either of these, but had lots of lime juice. Lime juice, I knew for sure would help separate/split the milk, but there was soon a anti-climax. I poured half a gallon of whole milk into a huge vessel and set it to boil. Once it started to raise, I added a spoon of lime juice and waited for it to split. 1sec...2sec...3sec...nothing happened...2nd spoon of lime juice...1..2..3..4..countdown again...nothing happens...this process continued and I had added 5 spoons of lime juice with no hint of splitting from the milk !! I was totally confused...sometimes I badly crave for a hot cup of tea and end up with a cup of split milk and today I was trying HARD to split it but it wouldnt budge !!! I was also scared to add more lime juice as I dint want a lime n lemony Kalakhand !! :-( As a desperate attempt I also added 2 teaspoons of vinegar but to no avail !!

That was when I decided to trick the milk, a drop of lime juice in a cup of milk was successful in separating it and so I divided the milk into 2 smaller portions and added 1 spoon of lime juice in each and Yayyyyyyy it split...I guess it was the first time I was happy that the milk split !! So I would advice you guys to use citric acid if available for this recipe, it might be a more efficient milk-separator :-)

Going by the glossy pieces in the pictures you might think that this sweet uses a lot of ghee, but believe me, I did not add even a drop of ghee. Its just magic with plain MILK :-) The pistachios can be added raw unlike cashews or raisins which need to be toasted in ghee.

The whole process of making this sweet took about 1 1/2 hrs, so do make sure you have a good company of friends to share the stirring of the milk !! :D But it was fun making it and all of us just loved the Kalakhand, it was simply superb, perfect store bought taste. I would surely recommend all of you to try it out.


Ingredients:

  • 1 gallon : Whole milk
  • 2 1/2 cups : Sugar
  • 1/2 cup : Condensed milk
  • 4-5 nos : Cardamom/Elaichi, powdered
  • 10-15 nos : Pistachios, sliced
  • 3-4 drops: Vanilla essence
  • Citric acid/lime juice to split the milk

Procedure:
  1. Boil half a gallon of milk in a vessel, once it come to a boil add the acid to split the milk. Use of a sieve to drain the water and reserve the solids/paneer. The paneer does not have to be kneaded. A little water left in it is okay too. ( I read a recipe that did not filter the water, but that could make the process even longer and the water needs to vaporize)
  2. In another vessel heat the other half gallon on milk and reduce it to a little more than 1/2 its volume. Keep stirring every 3-5 mins to avoid any burnt layers. Be sure to use a clean vessel and spoon as we don't want this half to split :D. This could take about 45 mins.
  3. Once the milk gets thick add the paneer, sugar, condensed milk, half the sliced pista and the vanilla essence. This is the crucial stage, stir more frequently or you could end up with burnt layers and also to get the sugar incorporated into the mixture. (This semi-solid mixture tastes great too :-p, and keep in mind that even if it looks like it needs lil more sugar at this stage don't add any, as it thickens it will get a bit sweeter)
  4. Keep stirring till you can judge that the kalakhand will become firm on cooling. I scooped a small spoon of the mixture onto a plate and put it into the freezer for a minute. If it feels a little hard the Kalakhand is ready !
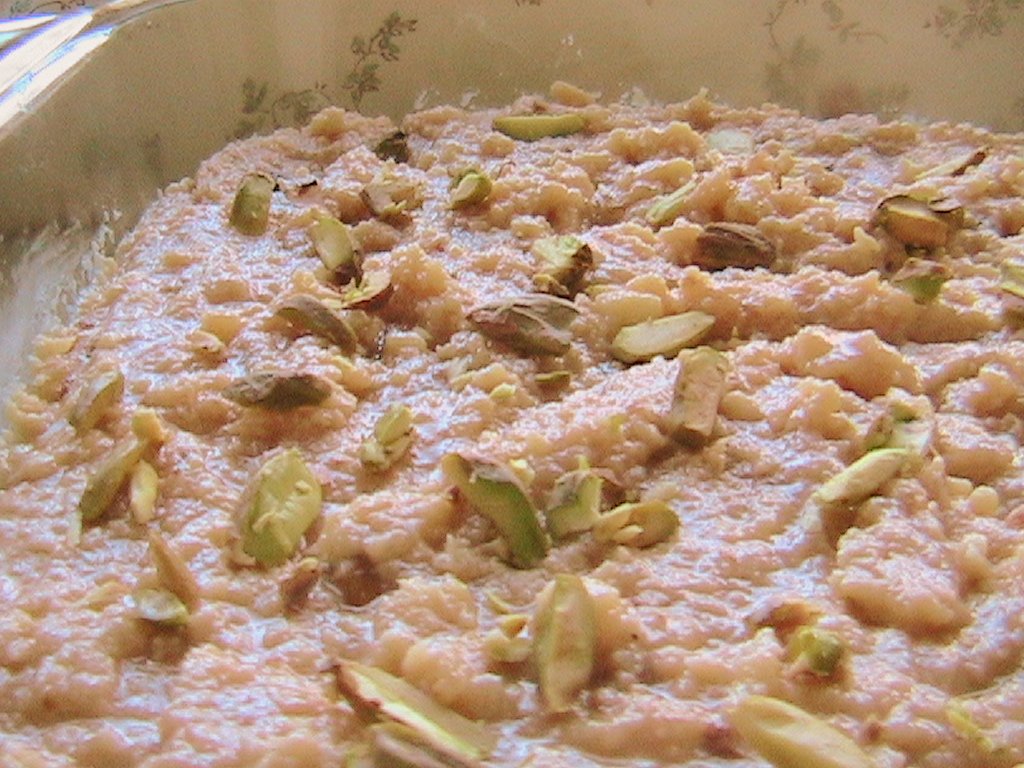
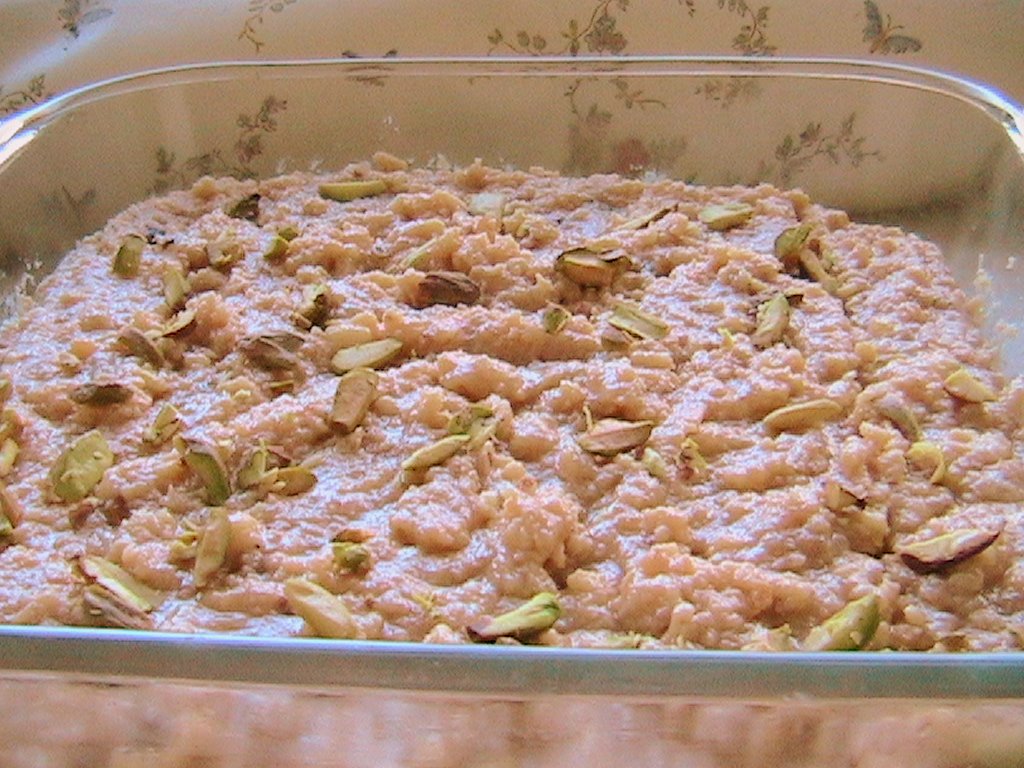
  5. Transfer all the Kalakhand into a flat dish and even out. Sprinkle the rest of the pistachios and place in the freezer for 30mins.
  6. Once it sets and is firm you can cut the Kalakhand into the desired shape and sizes.
A few chunks of the Kalakhand are now off to VKN's My Dhaba for the :


My Notes:
  • To get a thicker texture you can increase the quantity of milk that you reserve for splitting. That will give more solid pieces when you bite into the kalakhand.
  • Condensed milk was something I added just because I had a can of it lying in the fridge. I guess you could skip that and increase the amount of sugar a bit.
  • If you want to reduce the amount of milk stirring time, I think you could microwave it for around 10 mins or so and then move it to the stove top.
  • Fortunately there was no trace of all that lime juice and vinegar I used. I wouldn't want to advice you guys about the method of splitting the milk. Follow your very own tried and tested method there :-)

Thursday, October 19, 2006

Deepavali Treats # 1

Dear Foodies,

A VERY HAPPY DEEPAVALI TO ALL !!


I really really miss being at home for Deepavali, some how this festival shares a very special place in my heart. Its probably because of the goodies mom makes or the Lakshmi Puja at home or the new dresses that Daddy buys for all of us or the fire crackers or the festive look in the house and the neighbourhood or the non-stop Deepavali special shows on TV or its just ALL of them.

Every year we kids in our street would have a competition of who light's the first cracker for Deepavali. And so, my brother and I would be up at 4:00 am in the morning, not to get ready for an oil bath, not to help mom with the preps... but to get the first 100 wala lit on the road !!! And the excitement in the air would be really infectious, and one after the other for abt 30 mins everyone in the street would hear 100 wala's and 500 wala's going off instead of their boring alarms. And that would begin the wonderful day for us :) No matter how splendid the fireworks display in the US is, I would still prefer our small bijili pattasu, flower pots, sparklers, rocket bomb and Vishnu chakra any day !! When I was a kid, I would roam around the whole day with a gun filled with roll caps with a cowboy look and pride on my face :D And when all is over, in the night when we collect all the trash papers we would toss in a few roll caps and serpent tablets for that finishing touch :D The whole day was just AWESOME !!

Read the list of fireworks industries based in Sivakasi, one could call it the fireworks capital of India, here and its history here ( .pdf file).

Being in school, I havent found time to make anything for the Big Day. But well, there has to be a silver lining somewhere rite, its Deepavali !! And here it is, tomorrow, that is on the eve of Deepavali we have a concert by none other than the outstanding carnatic vocalist, Sudha Ragunathan rite here in the university, just 10 mins from where I am now :-) Its being organised by SABHA. Hats off to SABHA !! Well I bet all of you have heard Sudha Ragunathan, if you havent please do listen to her render a carnatic song and you will be enthralled for life :-)

Well back to the food part of this blog, every Deepavali my mother makes boondi laddu and kara mixture at home apart from other sweets & savouries. She makes them in huge quantities too and a major portion is for sharing with relatives and friends and neighbours. Deepavali is a traditional Indian 'Thanksgiving' thing.

This year though, my mother did not carry her usual enthusiasm as both my brother and I are here in the US. But well, God has His own way of getting things done :-). So my pedamma (Aunt) volunteered to make a bigger batch of treats to share with us for our naivedyam and my mom did a beautiful job at photographing every stage of the laddu making process. After looking at the pictures I felt me writing out the recipe would be redundant !! Have a look at them yourself.

All thanks to Vee for hosting the JFI-Diwali, its a wonderful idea and has lit up all our blogs. Its bringing in the festive look I was missing staying away from home :-) THANK YOU VEE

So here goes the recipe for the laddu our the family, my aunt making them, my mom photographing it, and me happily blogging about it :-) (The recipe for home-made mixture is in the previous post)

~ Boondi Laddu ~

This plate is on its way to Vee's JFI-Diwali


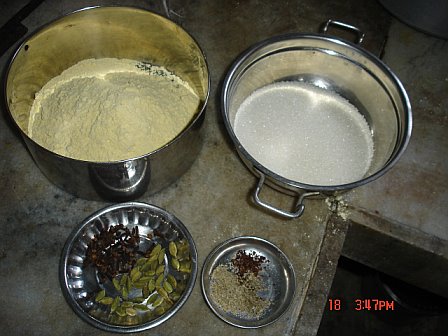
Ingredients:
  • 1 cup - Besan
  • 1 1/2 cup - Sugar
  • 1 tbsp - Rice flour
  • 5 nos - Cardamom/Elaichi, powdered
  • 10 nos - Cloves/Lavang
  • A pinch of saffron color
  • Few kalakand pieces
  • Water for sugar syrup

Procedure:
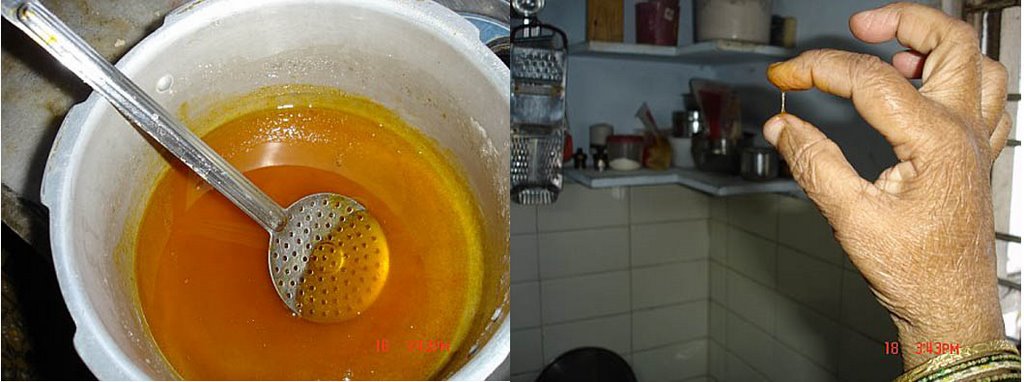
  1. Prepare the sugar syrup, by adding required amount of water and boiling it till u get the one-string consistency(see second pic below for the 1-string test). Add some saffron color and reserve.
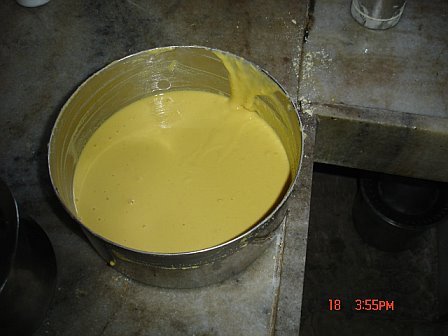
  2. Make a batter with the besan by adding required amount of water to get a bajji batter like consistency i.e., the batter needs to be slightly runny.
  3. Heat oil in a kadai and on a medium flame. Now pour a spoonful of the batter into the slotted spoon and rub the batter in to make it fall like tiny droplets into the oil. You can use either a rounded spoon/cup/your hand to do this. Be very careful though.
  4. Fry the boondi on a medium flame. Dont wait till they get crisp, remove when 3/4th done and dunk them into the reserved sugar syrup.
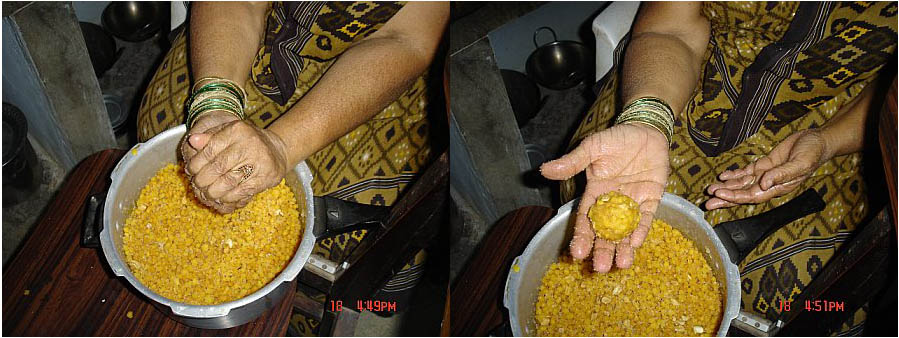
  5. When all the boondi is done toss in the lavang and kalkand pieces in too and make small laddu's of the mixture. This is easiest when the mixture is hot. If it has already cooled down you can re-heat till the sugar melts a little bit or you can use a little milk to moisten your hands while making the laddus. The use of milk will reduce the shelf life of the laddus though !
  6. The next is to wait until the naivedyam is done to pounce on the laddus :-)


Blogging tips